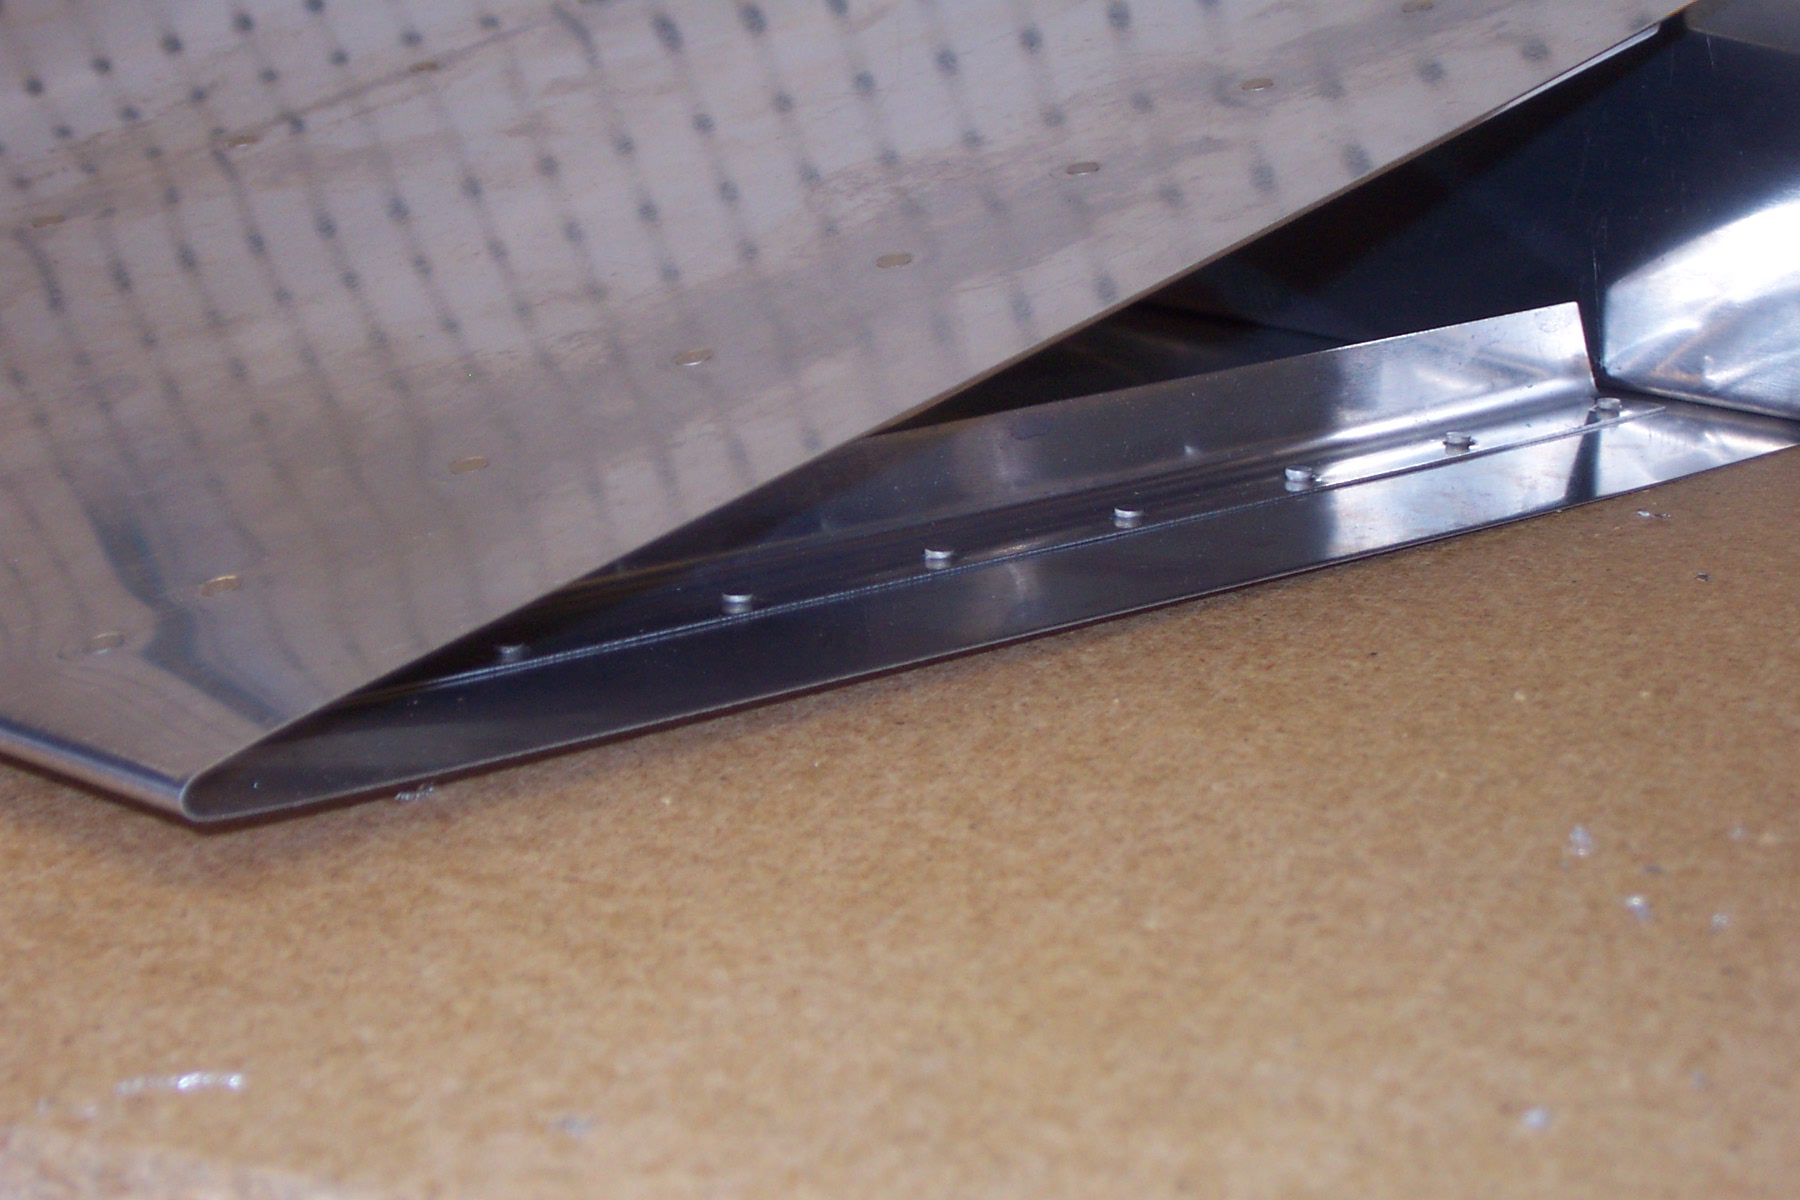
First, thanks a bunch Scott for volunteering your afternoon to help me get started on my main wheel pants. I have put this off long enough. We got the wheel pants lined up and clecoed. That was the hard part. Long afternoon!
I finally got my RivetSizer iPhone app up and running. I was approved and went live on the App Store a couple of days ago. It calculates the rivet length as the user inputs metal thicknesses. You can choose which rivet diameter you need too. It is meant for metal airplane builders so RV builders may enjoy it. It is meant to be quick, and I think I have accomplished this. It was a bucket list item to actually learn how to program an iPhone app. Visit the app store and search rivet sizer. Or click this link: RivetSizer on the app store. or visit the blog I set up for it at RivetSizer.com.
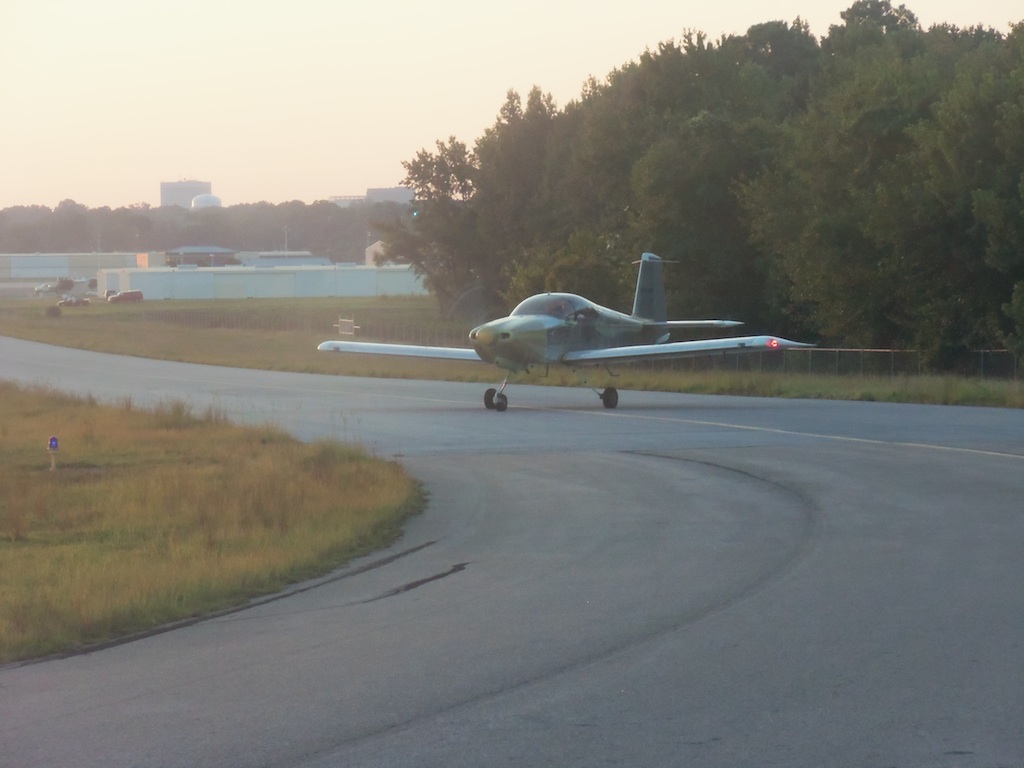
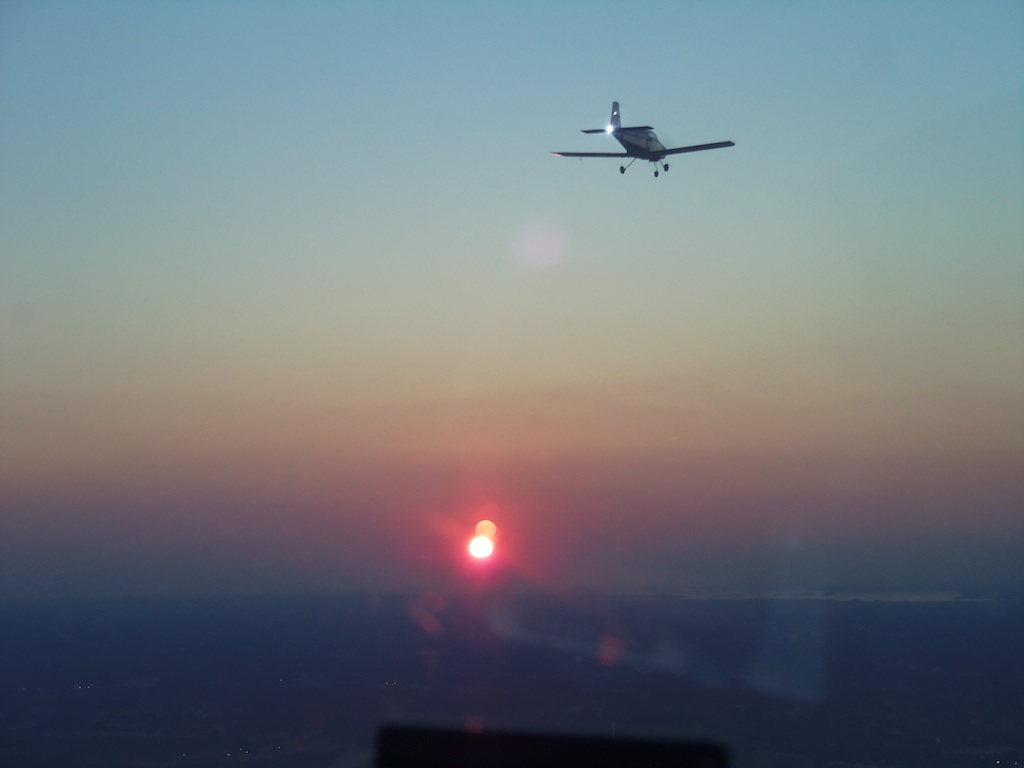
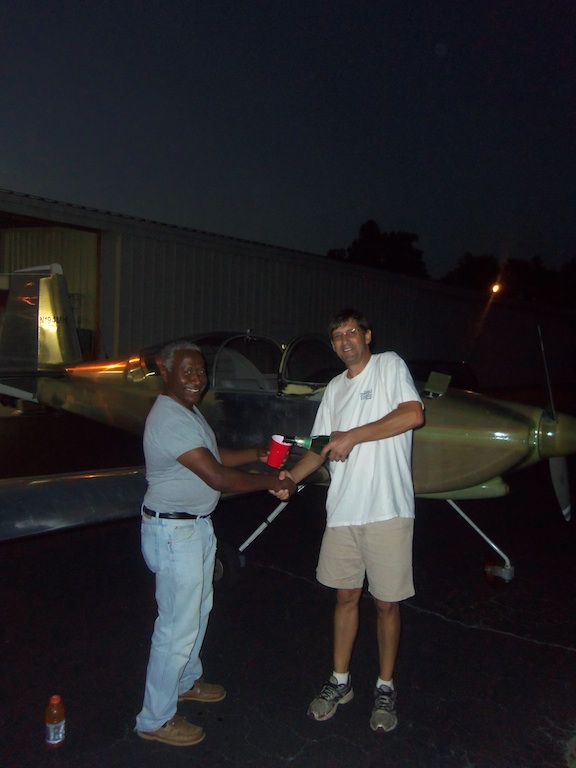
Had my first flight today! How exciting. The most surreal feeling I have ever had. It was a perfect evening flight with no surprises. Thanks James Clark for handling my transition training. Thanks Ken Jefferson for allowing us to use your RV-9A for the training. Thanks to Tom Roberts and Ken Harrill for all the help these many years during my build. Thanks to all the RV builders and everyone else at KCUB for all your help and encouragement! It was a great day! James agreed to manage the first flight and we made a plan and stuck to it. After several sessions of transition training, the last being a 1.4 hour session today, and afterward we debriefed, James said, "Go get your plane ready." I had no idea that today would be the day. James flew chase with my wife, Pam, aboard his RV-6. Tom handle ground radio; Ken Harrill was there as Technical Advisor; Steve Richardson was kind enough to leave dinner early from across town to hurry to KCUB to be videographer. I look forward to seeing the video. I taxied out to the runway, did my run-up and all the checks, and departed for three laps around the pattern at 1600 ft. No surprise on the take off roll, nor during the flight. The landing was smooth, perhaps one of my best, and I felt no shimmy. The landing roll was smooth. Taxied back to the hangar and shut 4MH down. Pam brought out the champagne and we passed the bottle around to celebrate one of the greatest days of my life. Thanks to everyone who was there!
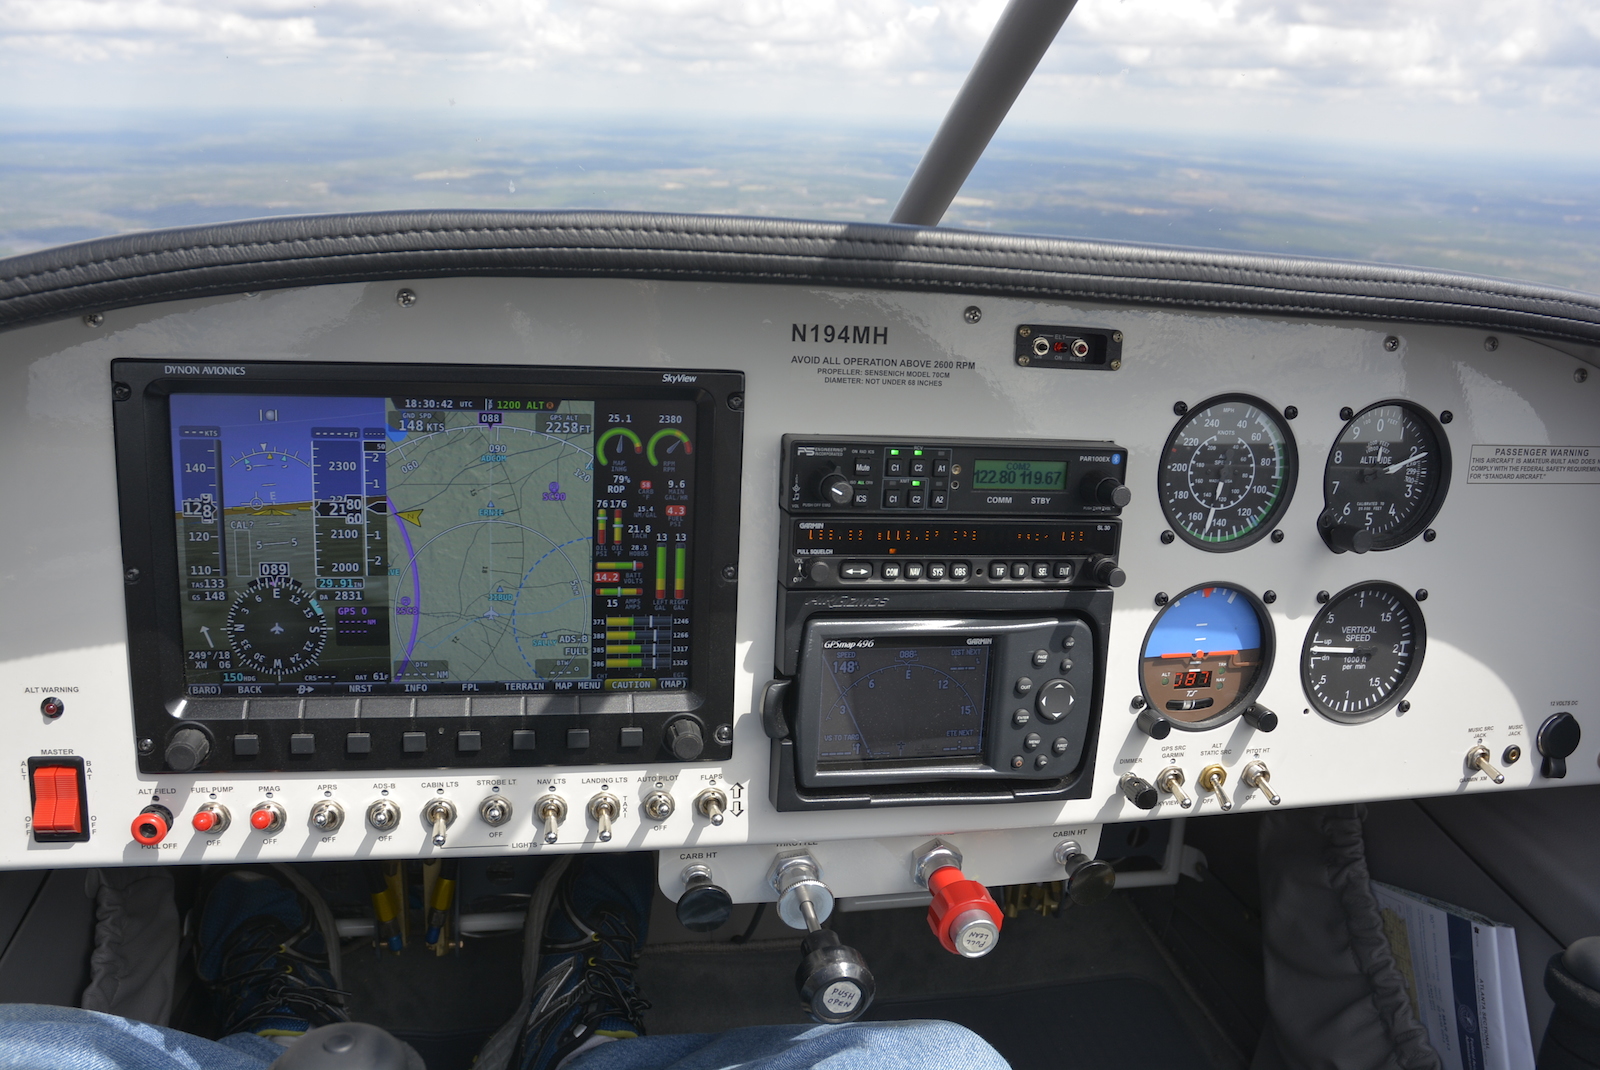
Today James and I launched for more transition training. We flew to Columbia Metro (KCAE), Aiken (KAIK), Fairfield (KFDW, Camden (KCDN) and then back home to Jim Hamilton-LB Owens Airport (KCUB). We logged 2.5 hours, five landings and some great flying albeit in rather bumpy hot conditions. I couldn't help but laugh when I looked at the GPS showing us 160 knots ground speed at times. We had some tailwinds, but we were at 2300 rpm. We covered a lot of ground, but I still need to practice getting my approach speed under control. The RV-9A glides like crazy.
Got 1.2 hours more transition training in an RV-9A today for a total of 1.8. Five hours total transition training required by my insurance folks. Thanks James! It was a great flight even though I am still a bit behind the airplane. It was so hot my I was covered in sweat when we landed. It ain't a Cessna 172! This thing floats on forever. Energy management is what James has been demonstrating to me on each approach and landing. Pattern operations are so much different that the Cessna, the sight picture is hard to get used to. This thing is nice! Thanks to Ken J. for being so kind and James for taking the time to get me ready for flying my RV-9A. It is much appreciated!
I made an appointment with the local FSDO to get my Experimental Repairman certificate. They require a 24-hour minimum advance and an appointment is required. I showed up with my 8610-2 filled out and the nice fellow, Bob Giguere, a Maintenance Inspector, met with me and we went over the paperwork required to get my certificate. It took about an hour and some fields on the form needed correcting, but otherwise, it was a pleasant visit and I really enjoyed talking with Bob. He said handling my job was easy since he had just finished a 18" stack of paperwork required to get a Part 135 operator aircraft pushed through the system.
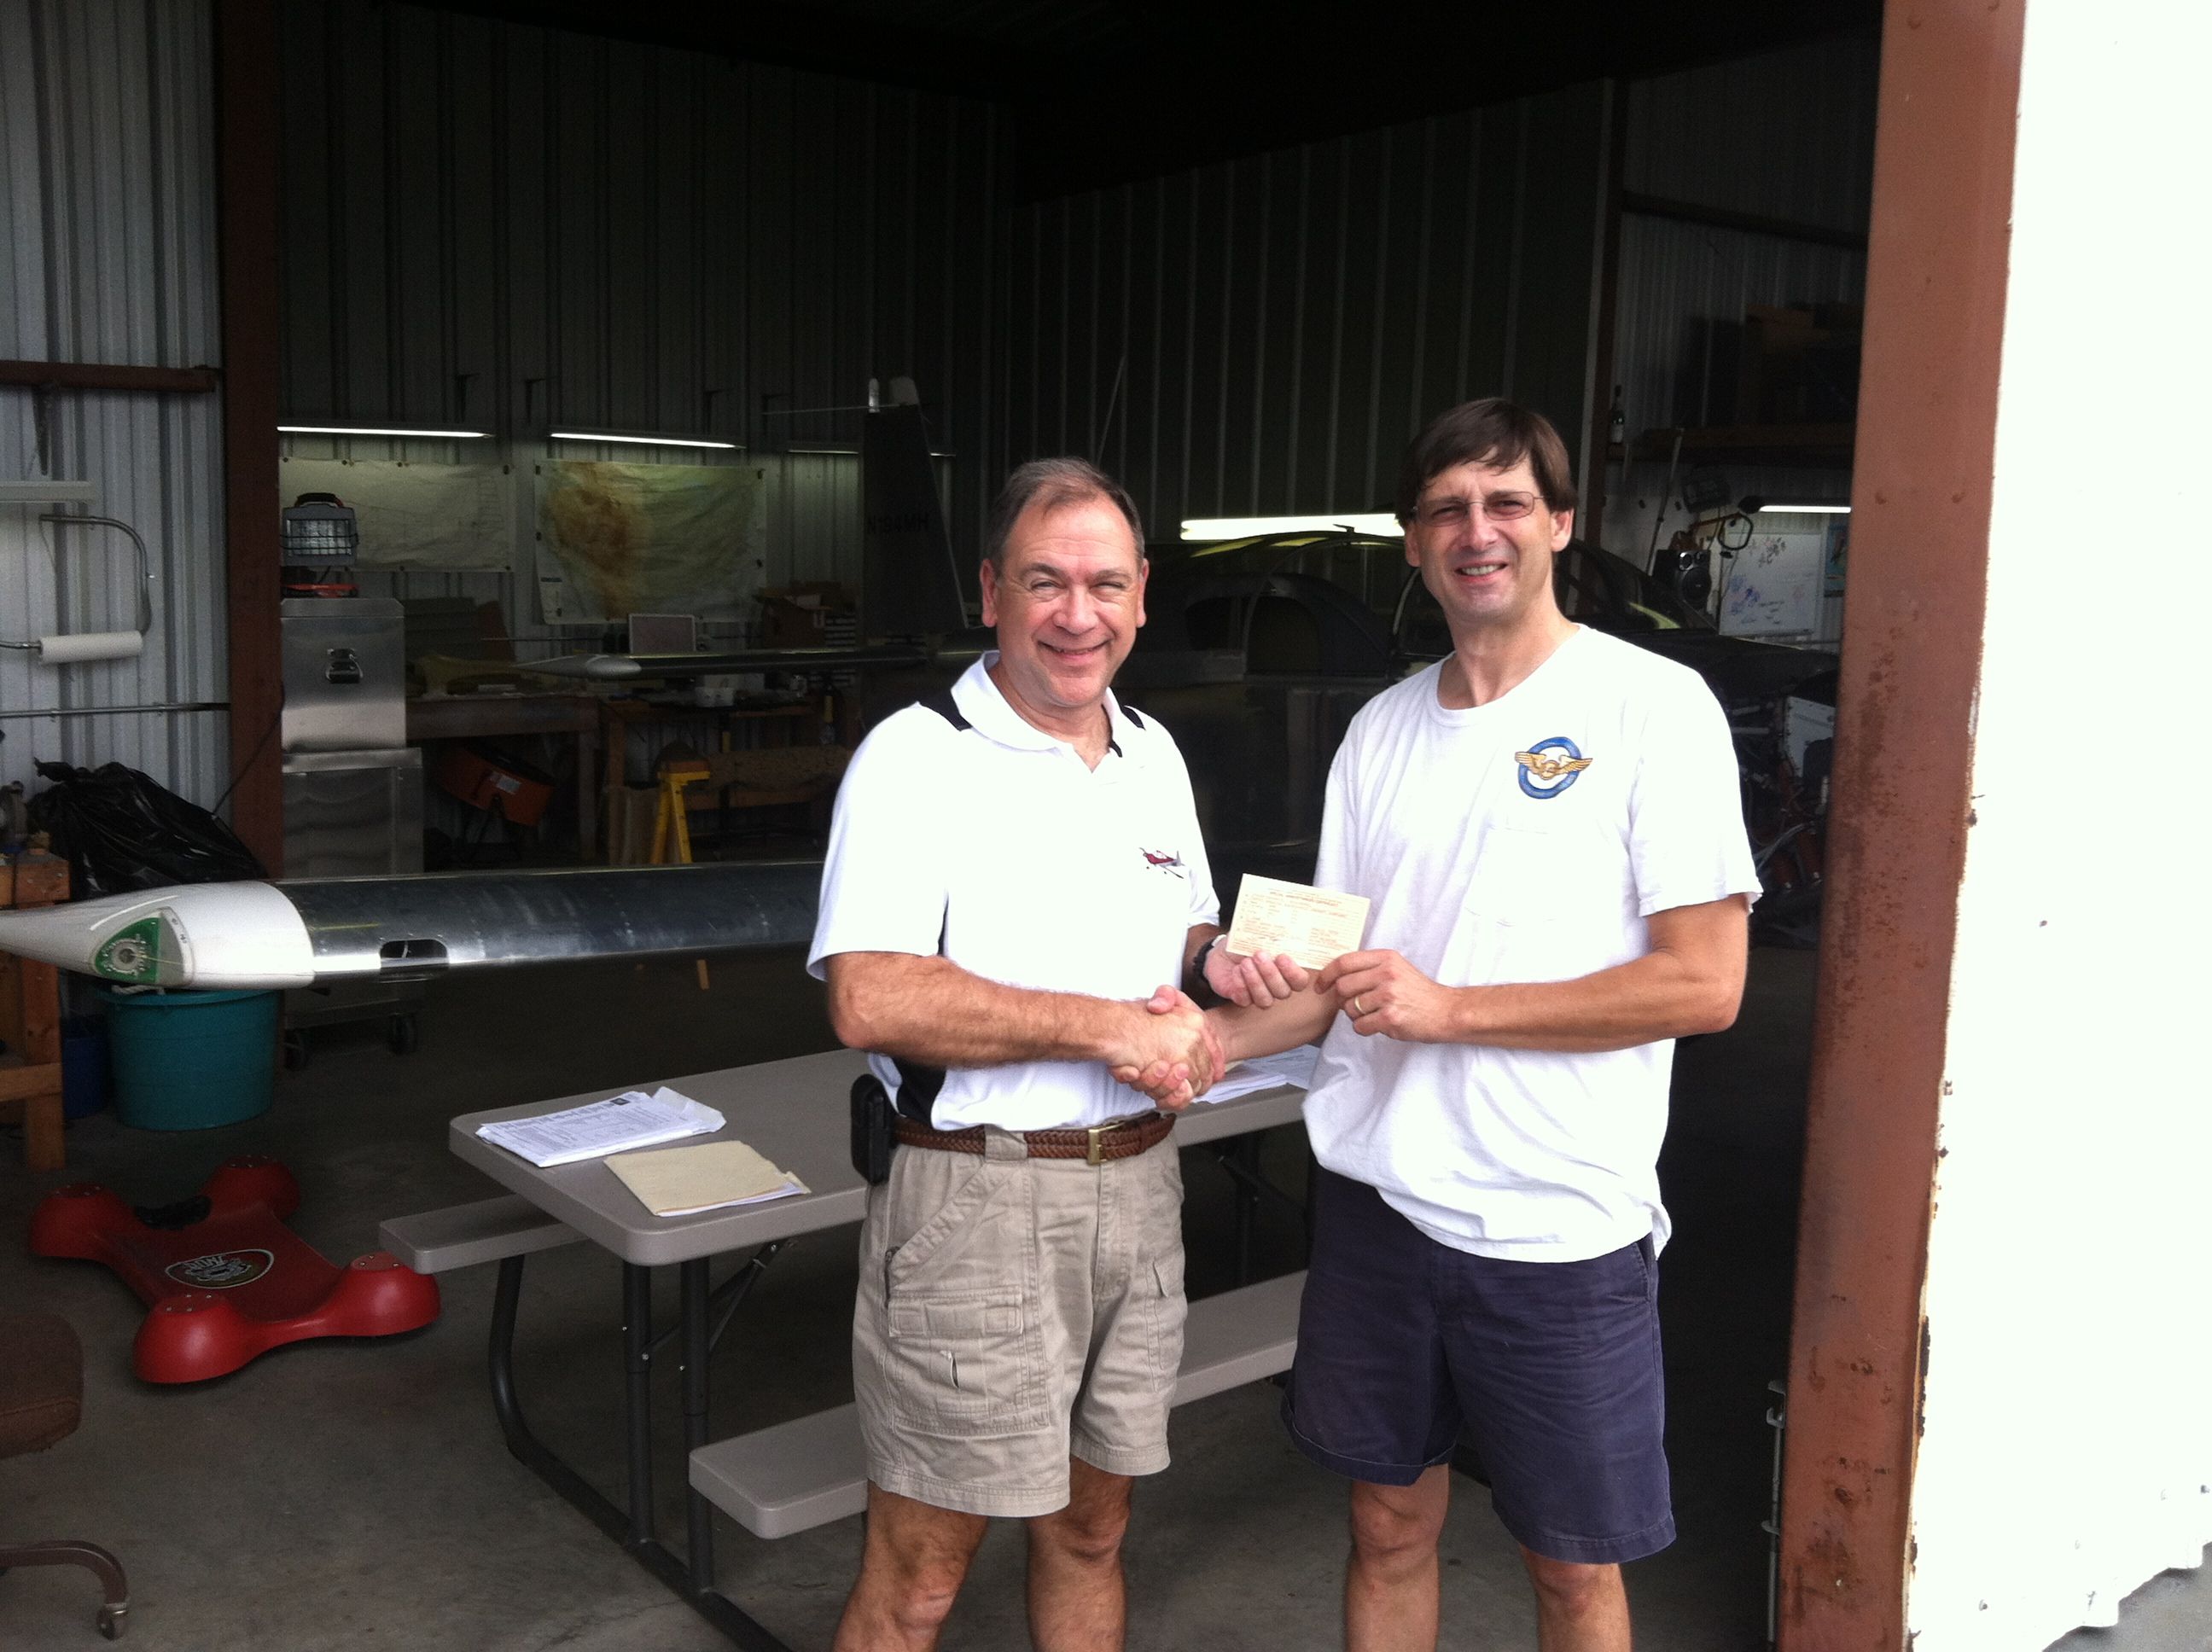
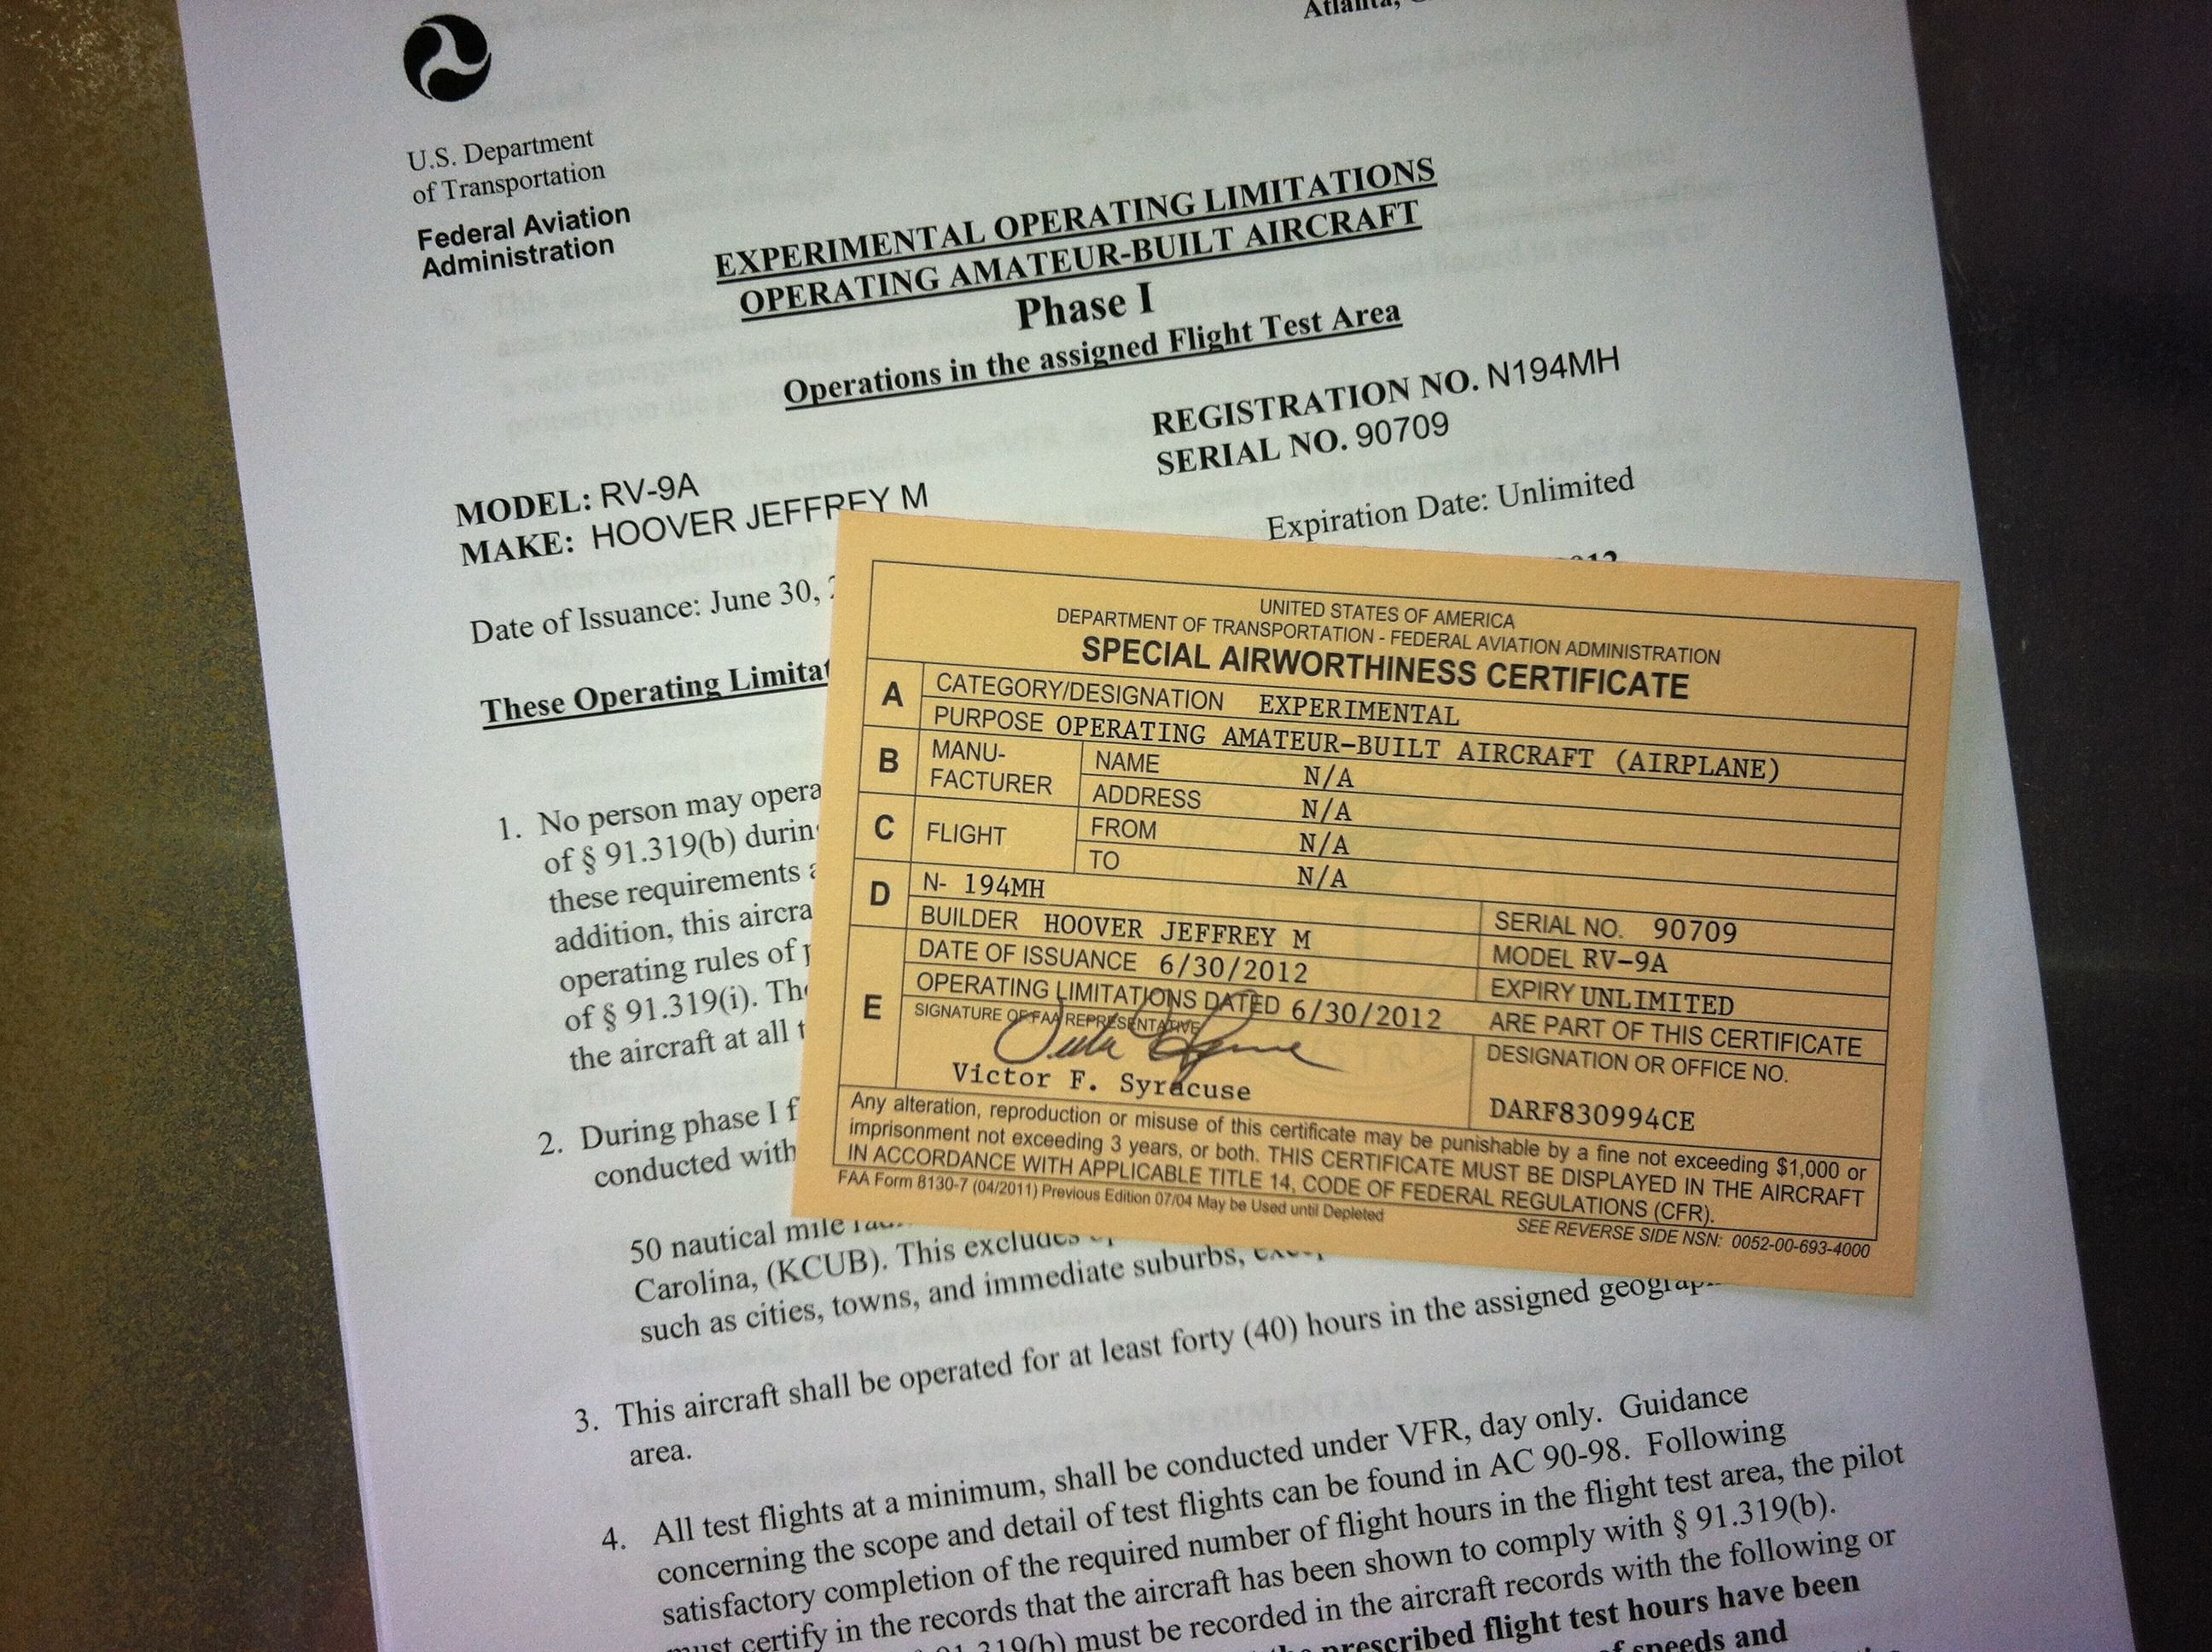
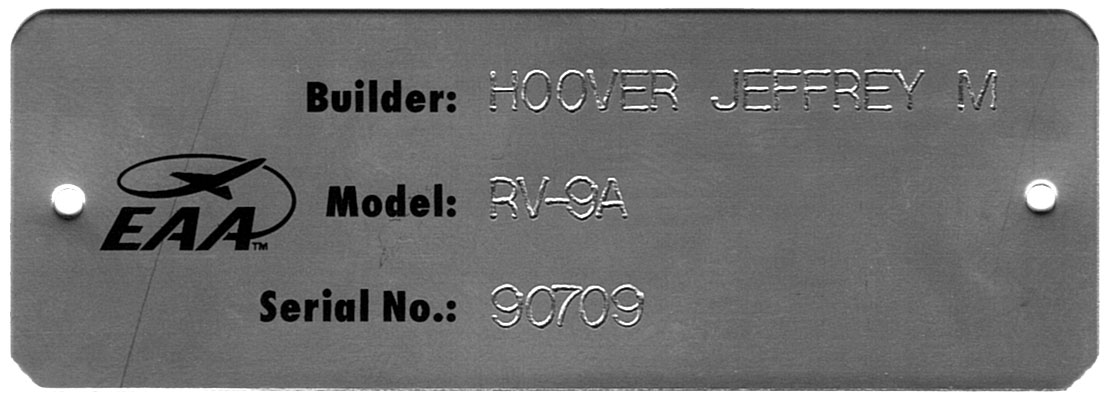
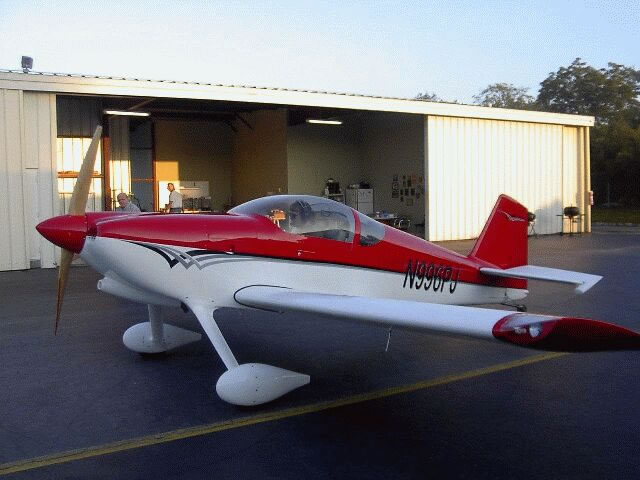
Today, DAR Vic Syracuse, flew in from south of Atlanta in his beautiful RV-10 and performed the inspection on N194MH. After about 15 minutes of paper handling and about 20 minutes looking over the RV-9A, Vic pronounced it Airworthy when he presented me with the Special Airworthiness Certificate. Vic found a few things that needed correcting that were done there on the spot, but nothing critical. A big thanks to all my friends at KCUB that were a tremendous help getting my RV-9A completed, from moral support, technical support, hands on sheading of some blood, sweat and tears, all your help has been greatly appreciated! Thanks too to all the folks on the VansAirforce.net community who offered support of all kinds. A great day indeed!
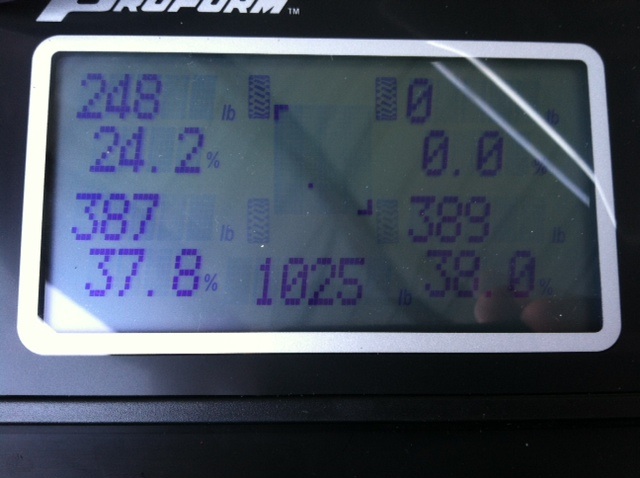
Received shipment of our new scales from JEGS today. Tom and I unpackaged them and decided to weigh N194MH even though the cowling is off, there are no gear leg fairings or wheel pants. The right seat and belt is not installed, nor are the inspection plates, baggage bulkhead panels, empenage fairing, etc. The weights were: nose=248 lbs.; left main=387; right main=389. Total was 1025. We slid the canopy open and it took 8 or 9 pounds off the nose. I sat in the left seat and the mains were right at 400 and some weight off the nose. I expect to do an official weight and balance in the next several days.
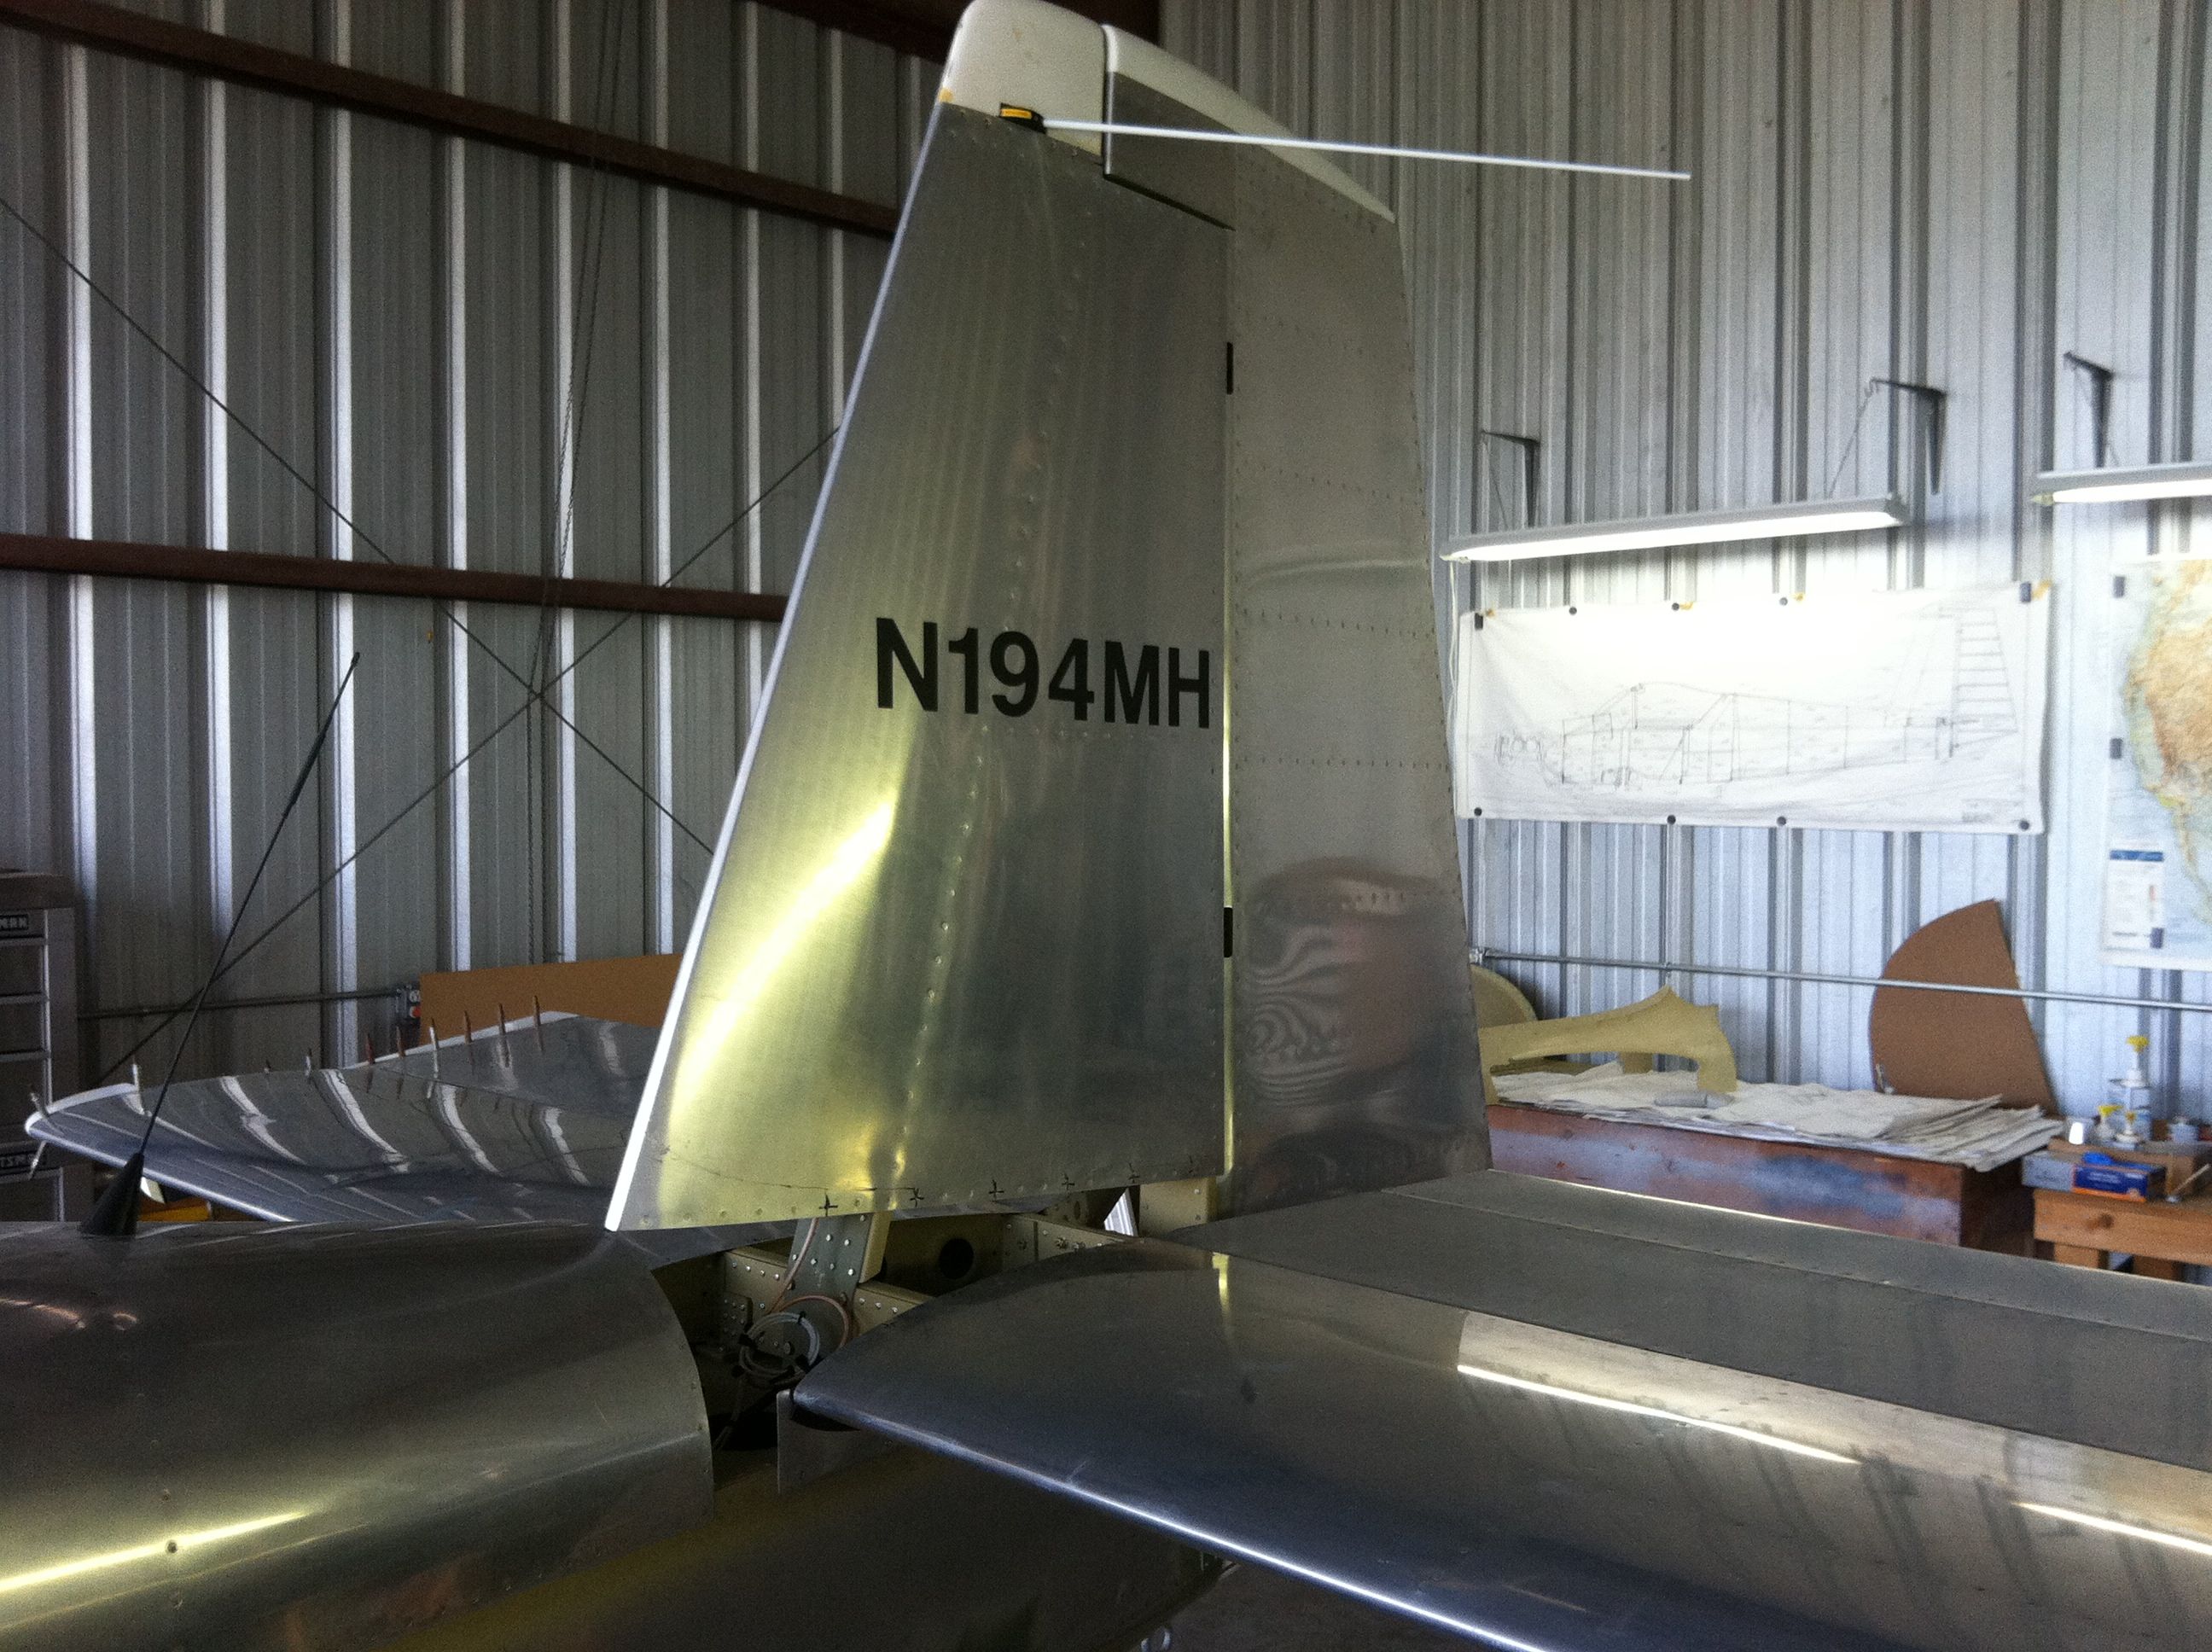
I sent my registration paperwork to the FAA last Friday, June 1, 2012. I looked on the database online and found that N194MH is no longer reserved -it is assigned to my RV-9A! I am expecting to have the DAR inspection on Saturday, June 30, 2012 and have a laundry list of things to to before then. Hope it all goes well. I went ahead an put the N numbers on the vertical stabilizer.
First engine start today. Everything went well except for the Dynon Skyview reporting 13 PSI fuel pressure the whole time, with or without the booster pump. Thanks to Tom, James and Ken for mulling over the FWF these past few weeks. Thanks Steve for the video. Thanks Ron and Scott for the moral support. Was a great day!
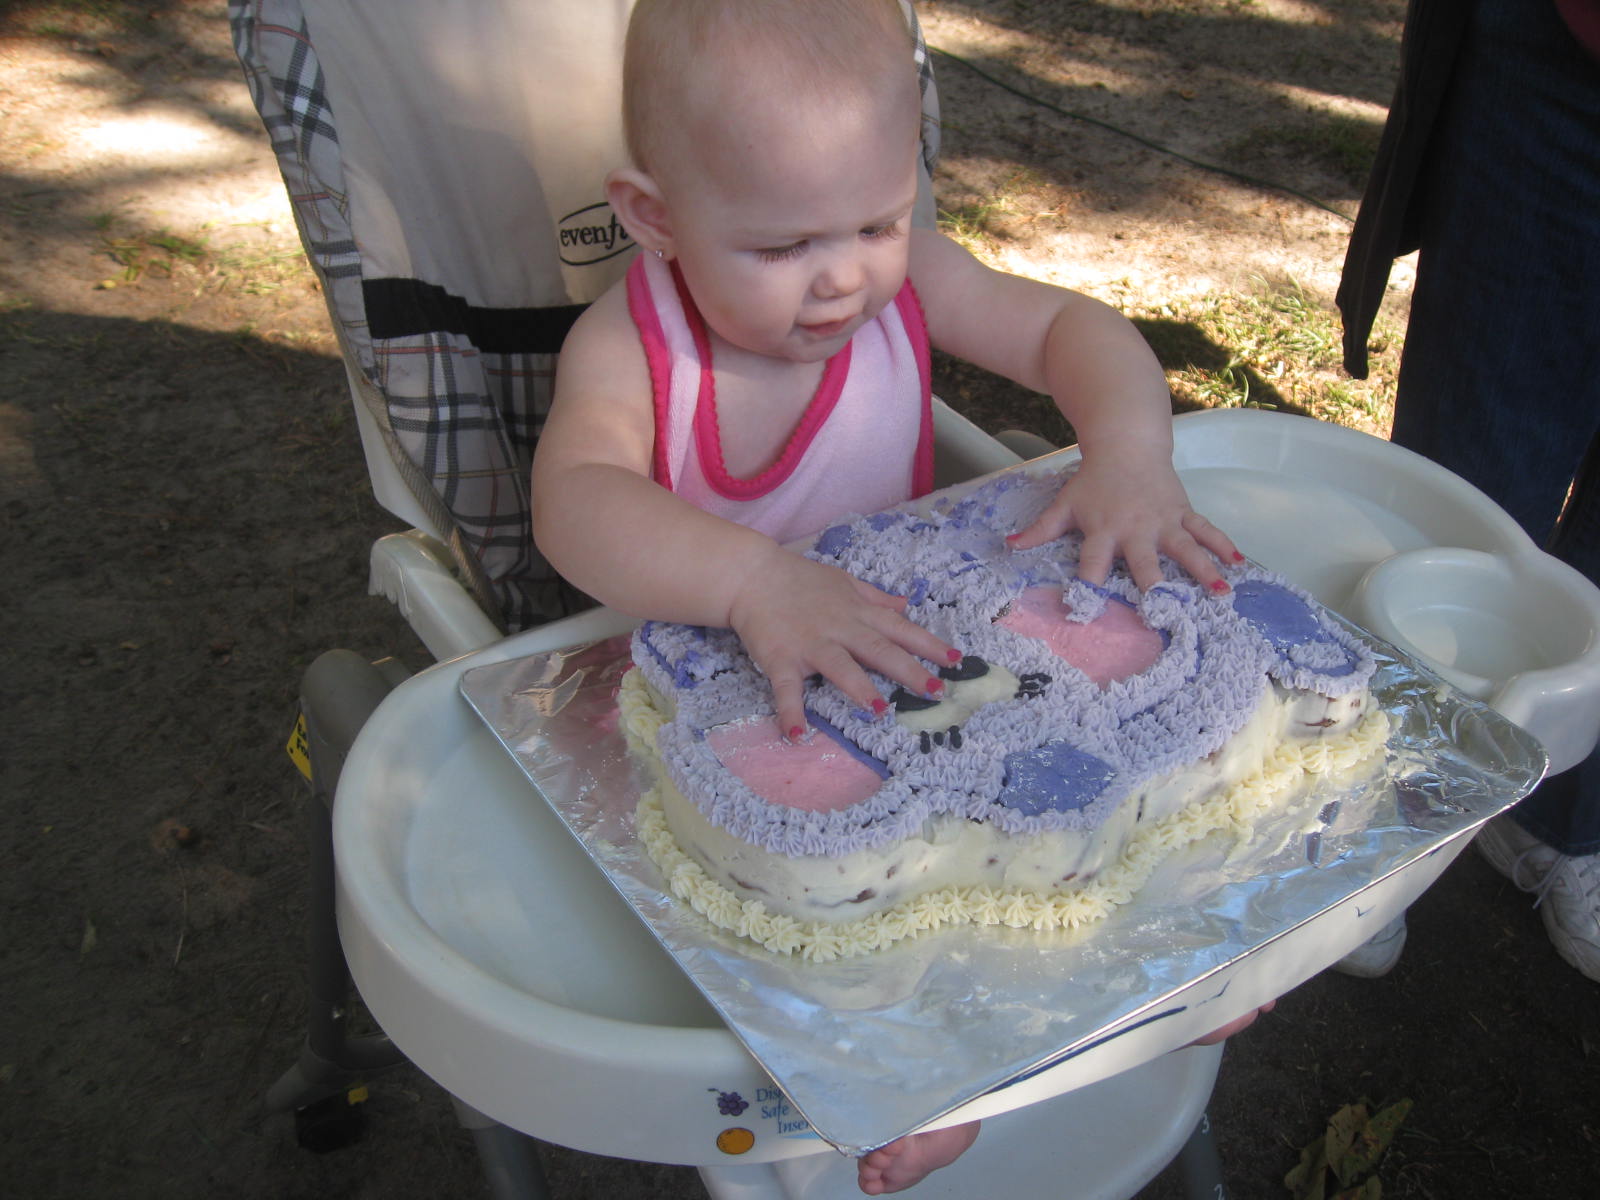
It has been a full year since my new baby, Jacie, was born. I cannot believe a year has gone by already. It has been an exciting one. I have gotten a lot done on my airplane too. I have not posted lately but I have been working on the baffles. I have them trimmed and ready to install the baffle material. I need to mount the oil cooler, disassemble, paint and reinstall before riveting the baffle material on.
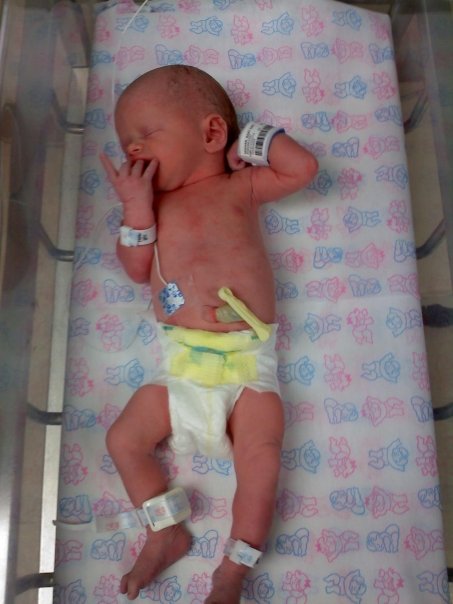
So I am delighted to be a father! On October 26, 2009, at 9:51 p.m. Jacie Michelle arrived (four weeks early and unexpected) 5 lbs, 4.4 oz and 18 inches long. Mom and baby are doing fine. Can't wait for the day I take her flying in my RV-9A!
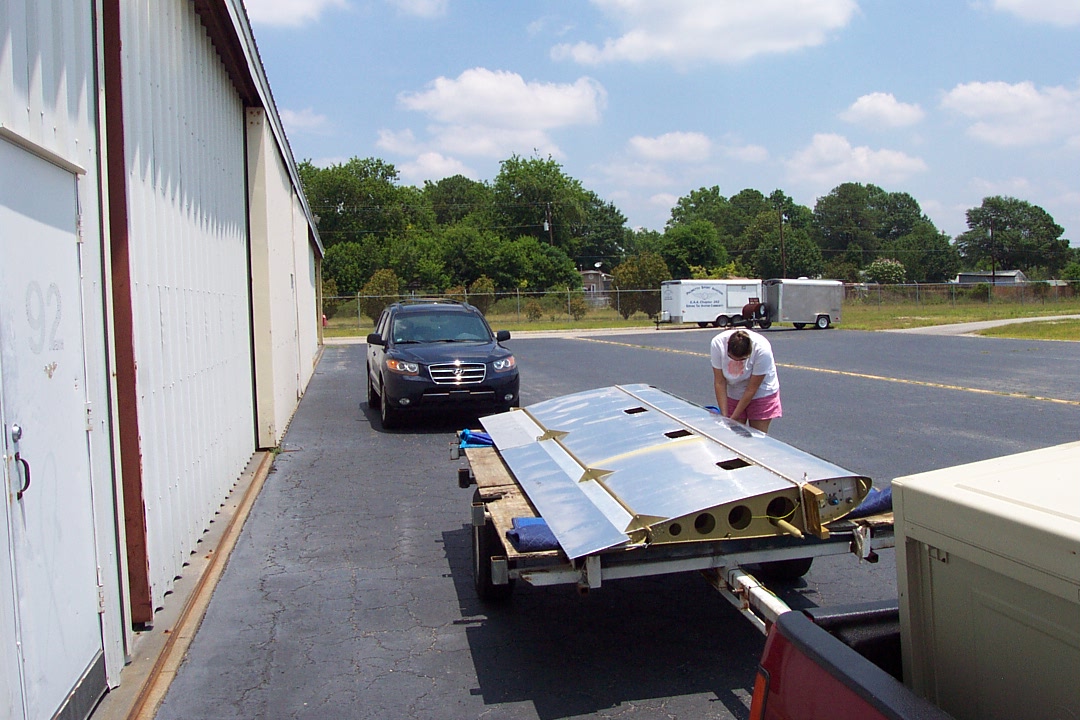
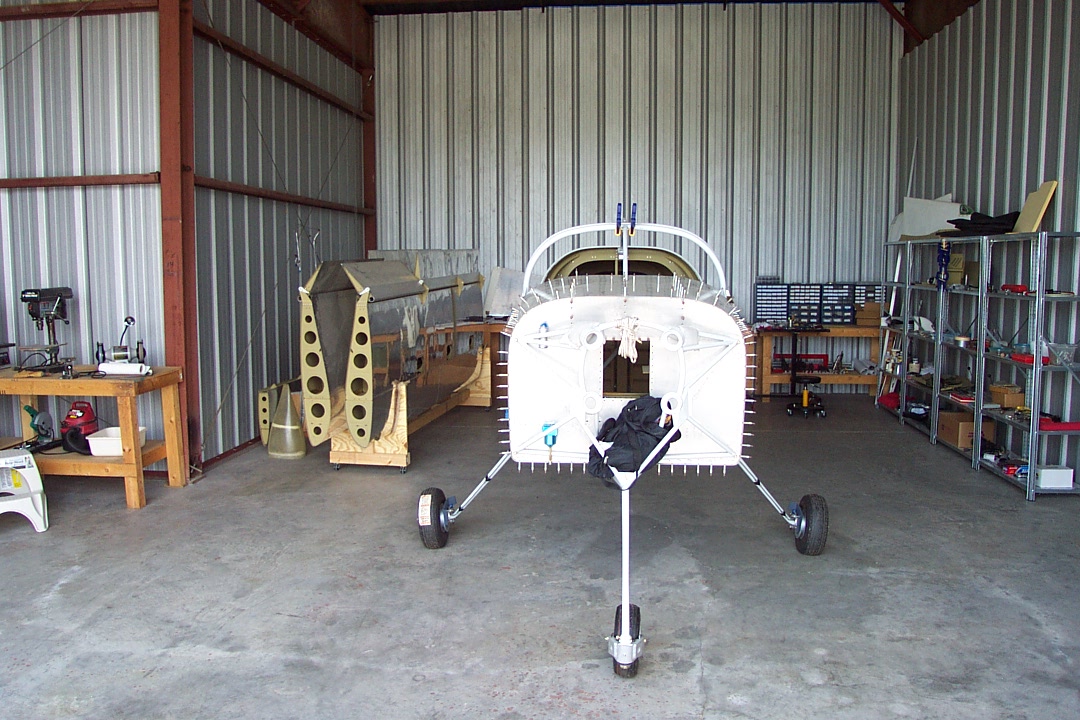
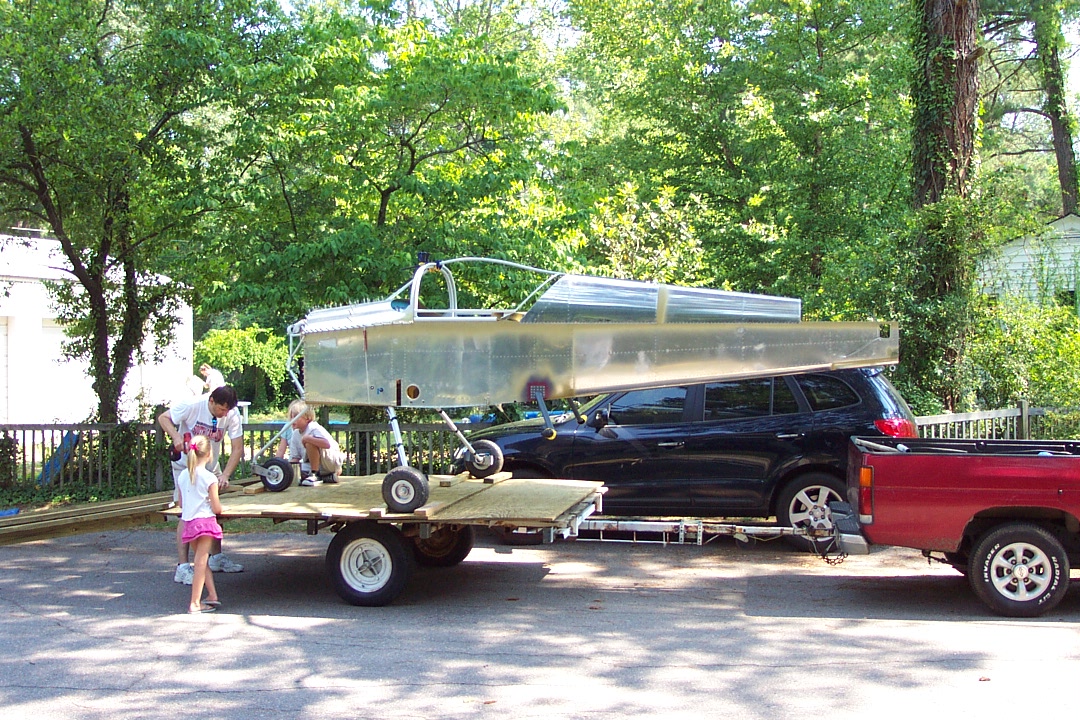
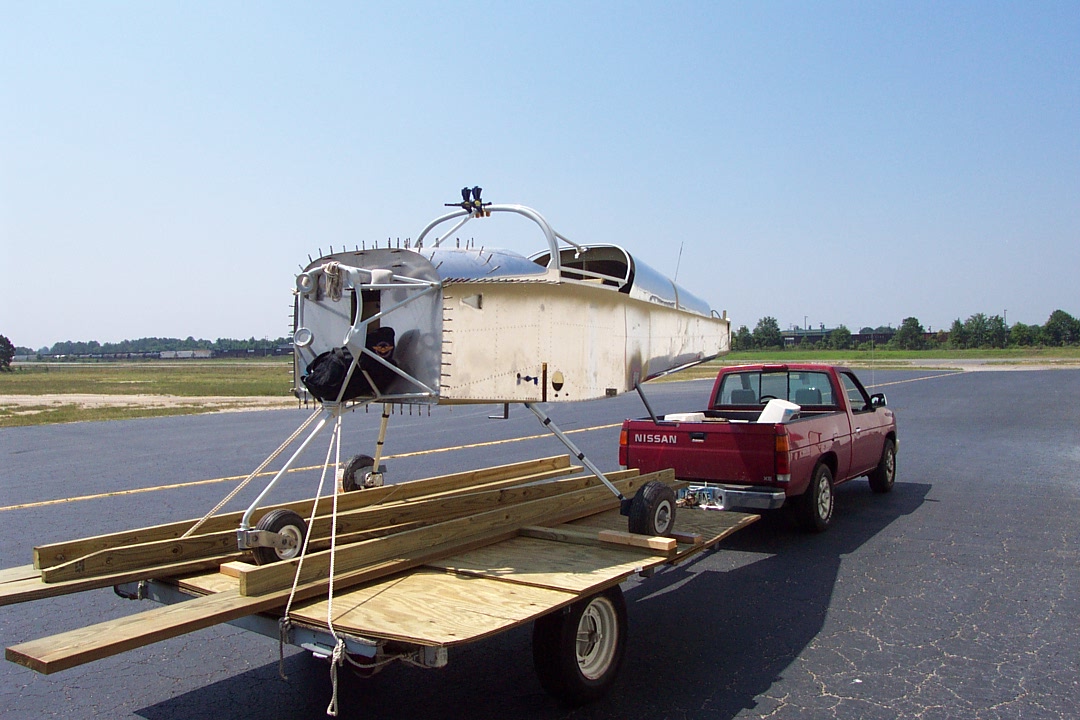
Finished moving the project to the airport with getting the wings over there. Took us two trips with one wing each trip. Kind of risky with them laying out in the open. I am surprised we did not encounter falling objects along the route. Nerve-racking, but it is done! Thanks to everybody that helped!
Moved my project to the airport today. Pam and kids, and my brother, William, helped me move the fuselage. The trip from my workshop to the airport was about 3.5 miles and took us over 25 minutes. We were driving about 5 miles and hour. It was nerve wracking, but everything worked out just fine. Pam drove in her car behind me to provide a traffic buffer. We got a bunch of stares along the way.
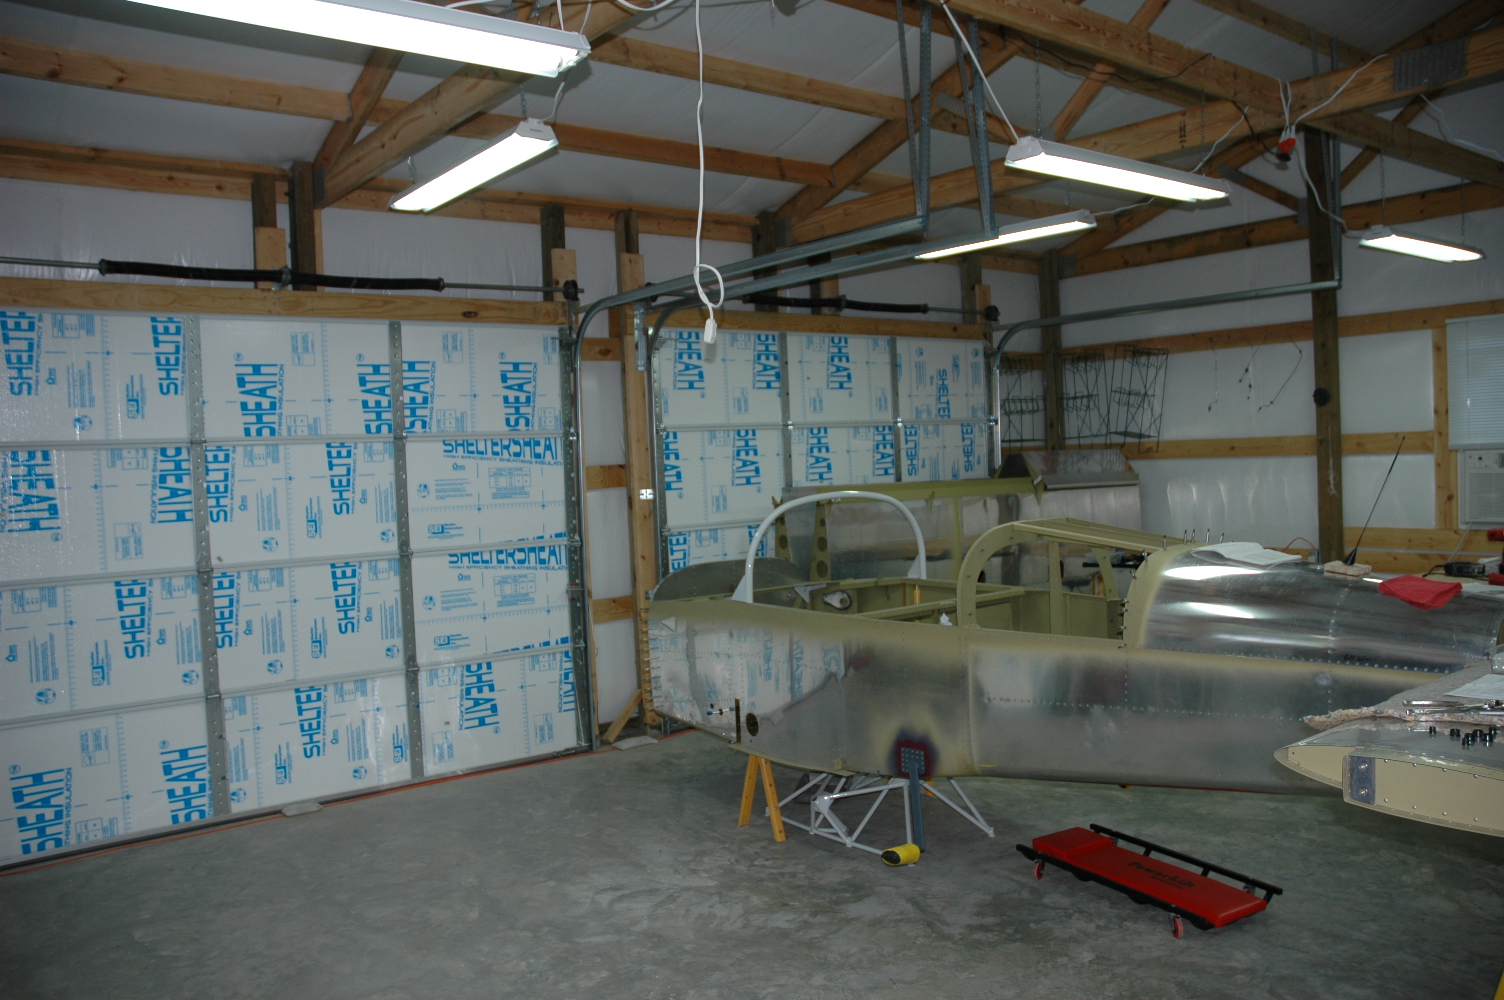
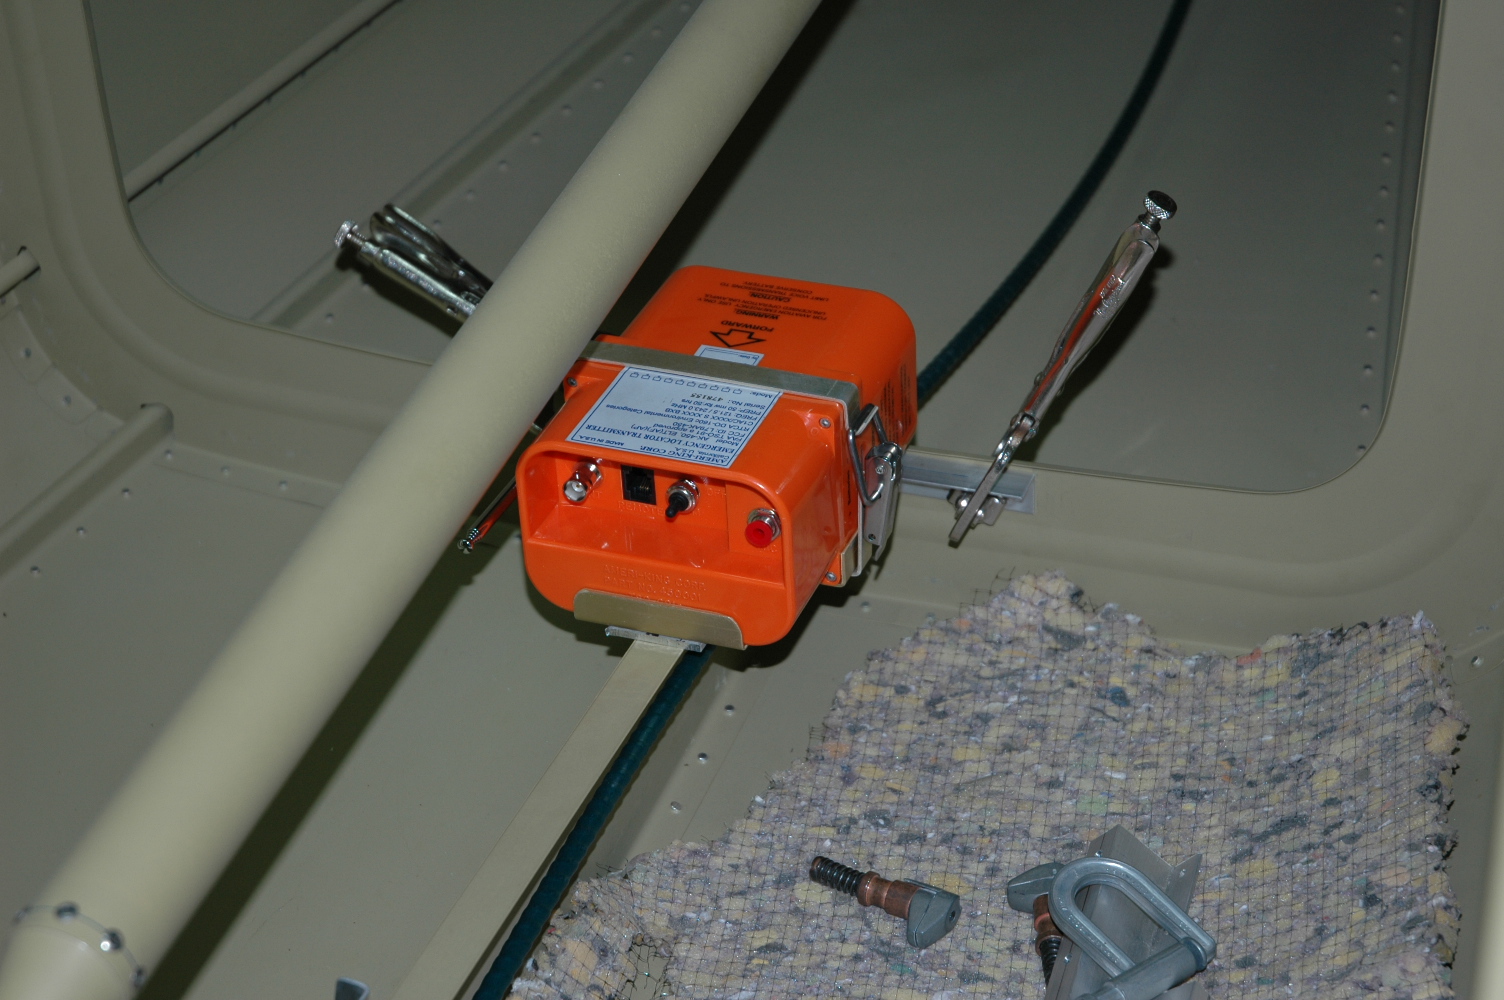
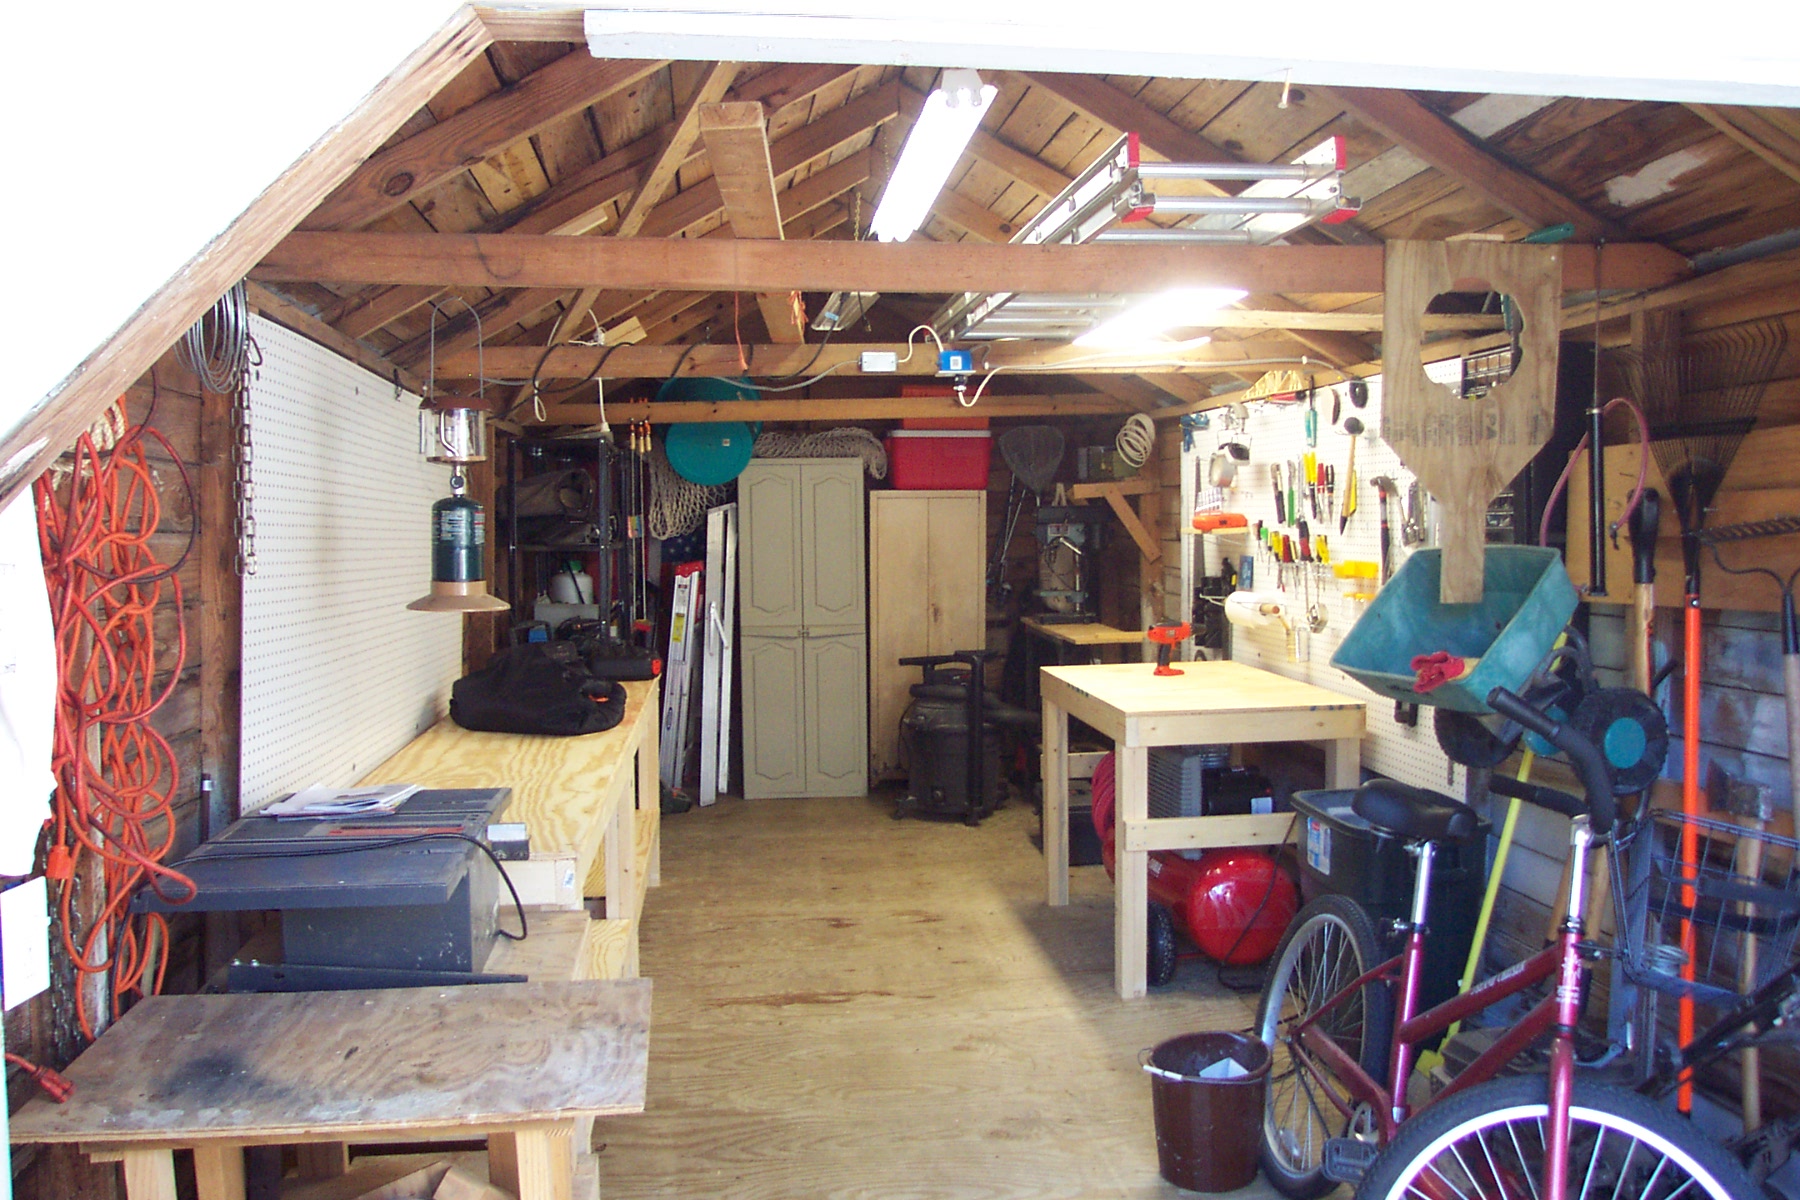
Haven't made a journal entry lately so I figured I'd add one to update my website. Over the past several days I have been contemplating ELT and strobe power pack placement, antennas required and their placements, and other stuff. Just a lot of head scratching and studying. Also have been upgrading the workshop with an air conditioner and foam board insulation panels in the garage doors. Can't work in a 95? workshop. Tried it last summer and I do not want to do that again!
Looks like my website is back up and running properly after my webhost decided to "merge servers" and dorked up my stuff. They could have at least given me some kind of warning. The website was down for a couple of days and some records were lost. Anyway, I haven't done too much on the project lately, so a minimun number of journal entries were lost. I think I have them all replaced now. Hate doing things twice, but it's related to plane building so I guess I should be used to it. Strike one for my web hosts.
This has been bugging me for quite awhile so I went ahead and called my home owners' insurance agency Bill Weathersbee State Farm and increased my detached structure insurance from $9k to $14k to cover the new and old hangers and also increased the contents coverage to $29k. Also made my deductible $1k instead of $500 to keep the cost down. Bill said "you're covered". So one less thing to worry about if a meteor strikes.
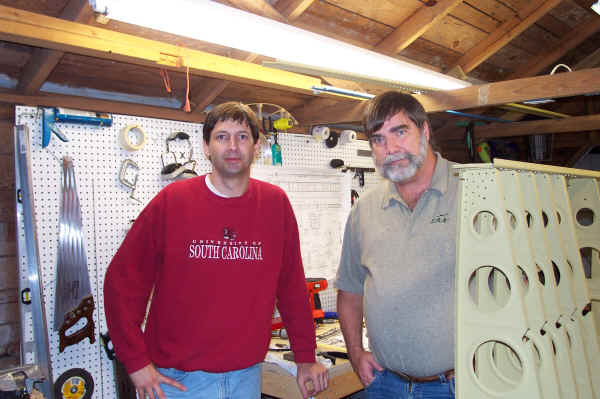
Our local EAA-242 Technical Advisor, Ken Harrill, visited the new and improved Dog House this evening. He checked my progress on the fuselage. He said he thought I was doing a fine job. Feels good to have someone besides myself saying that! We talked about my next task of initially fitting the wings and many more things. Ken gave me a bunch of good tips and advice as usual. Thanks Ken! I forgot to take a dang picture, so I'll have to get one later.
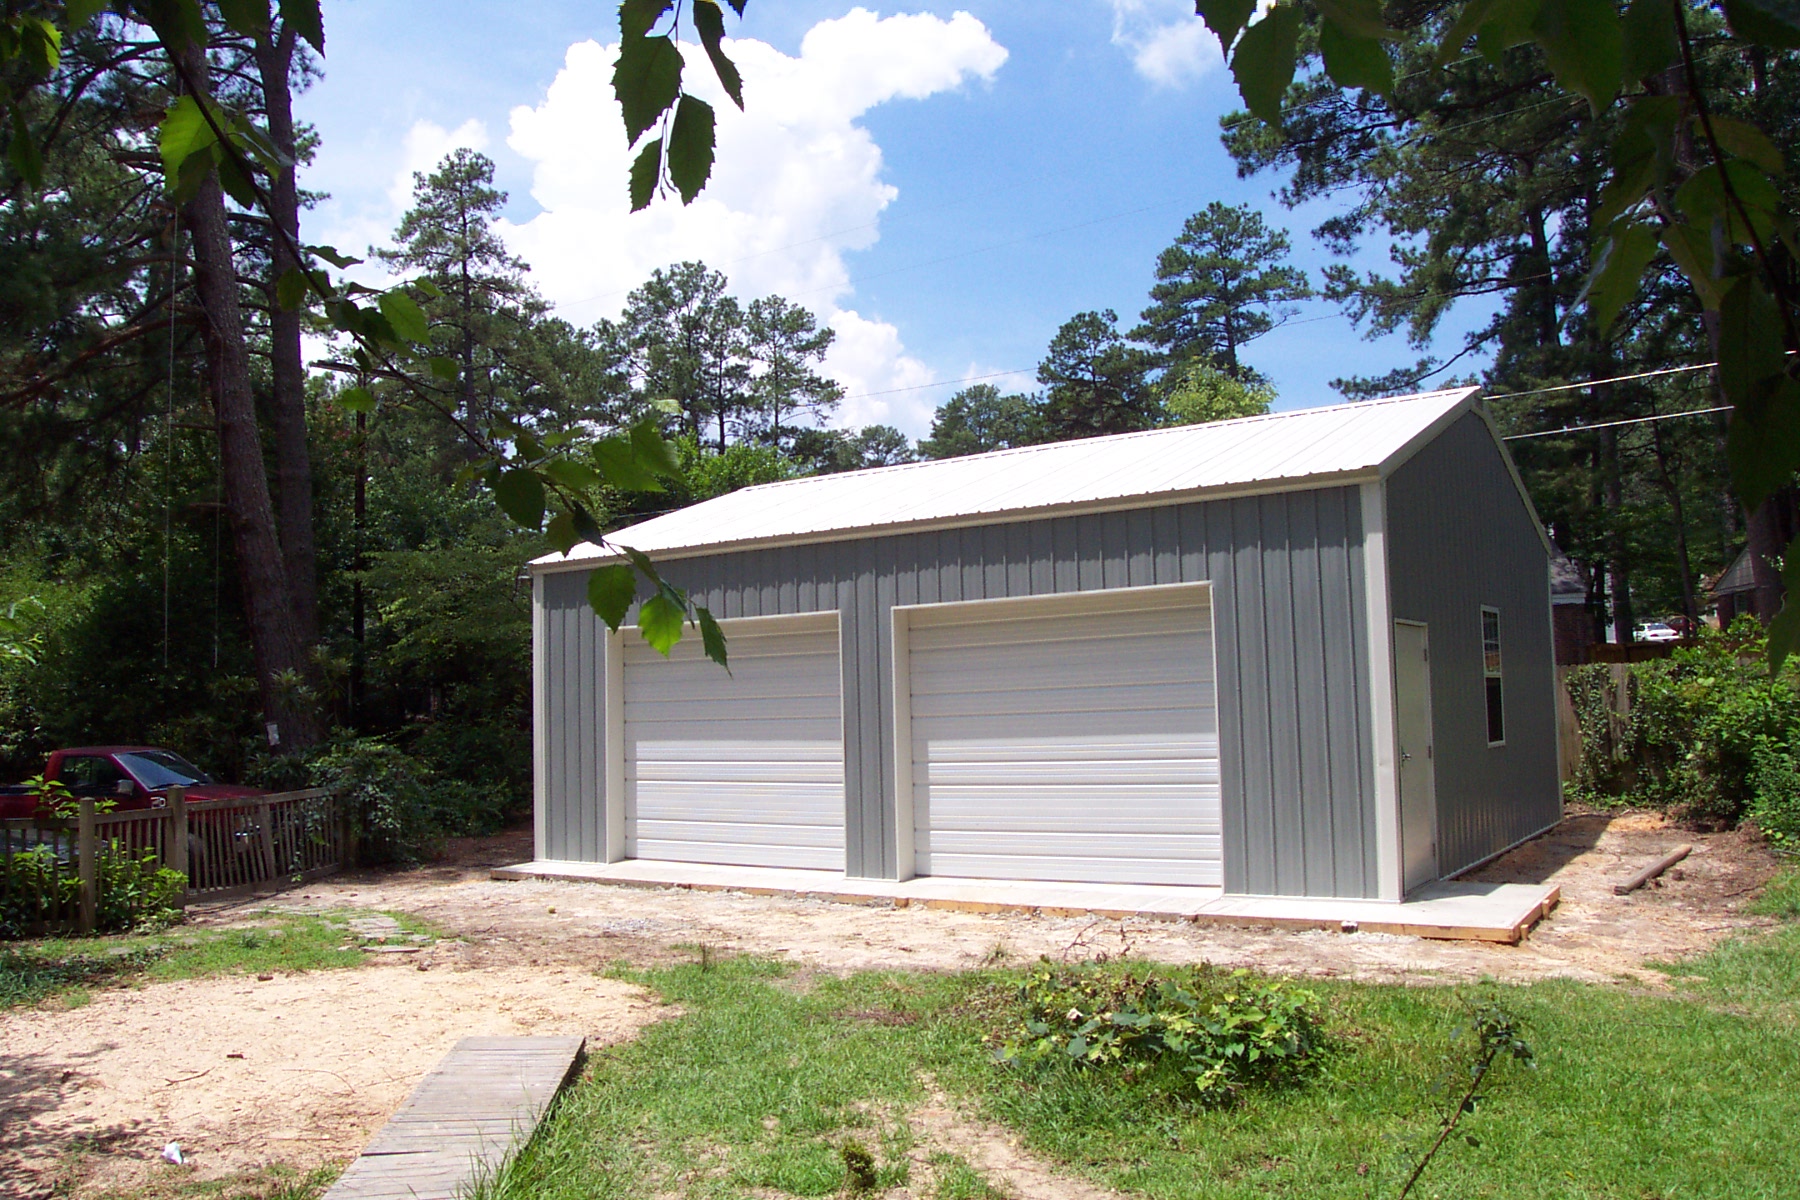
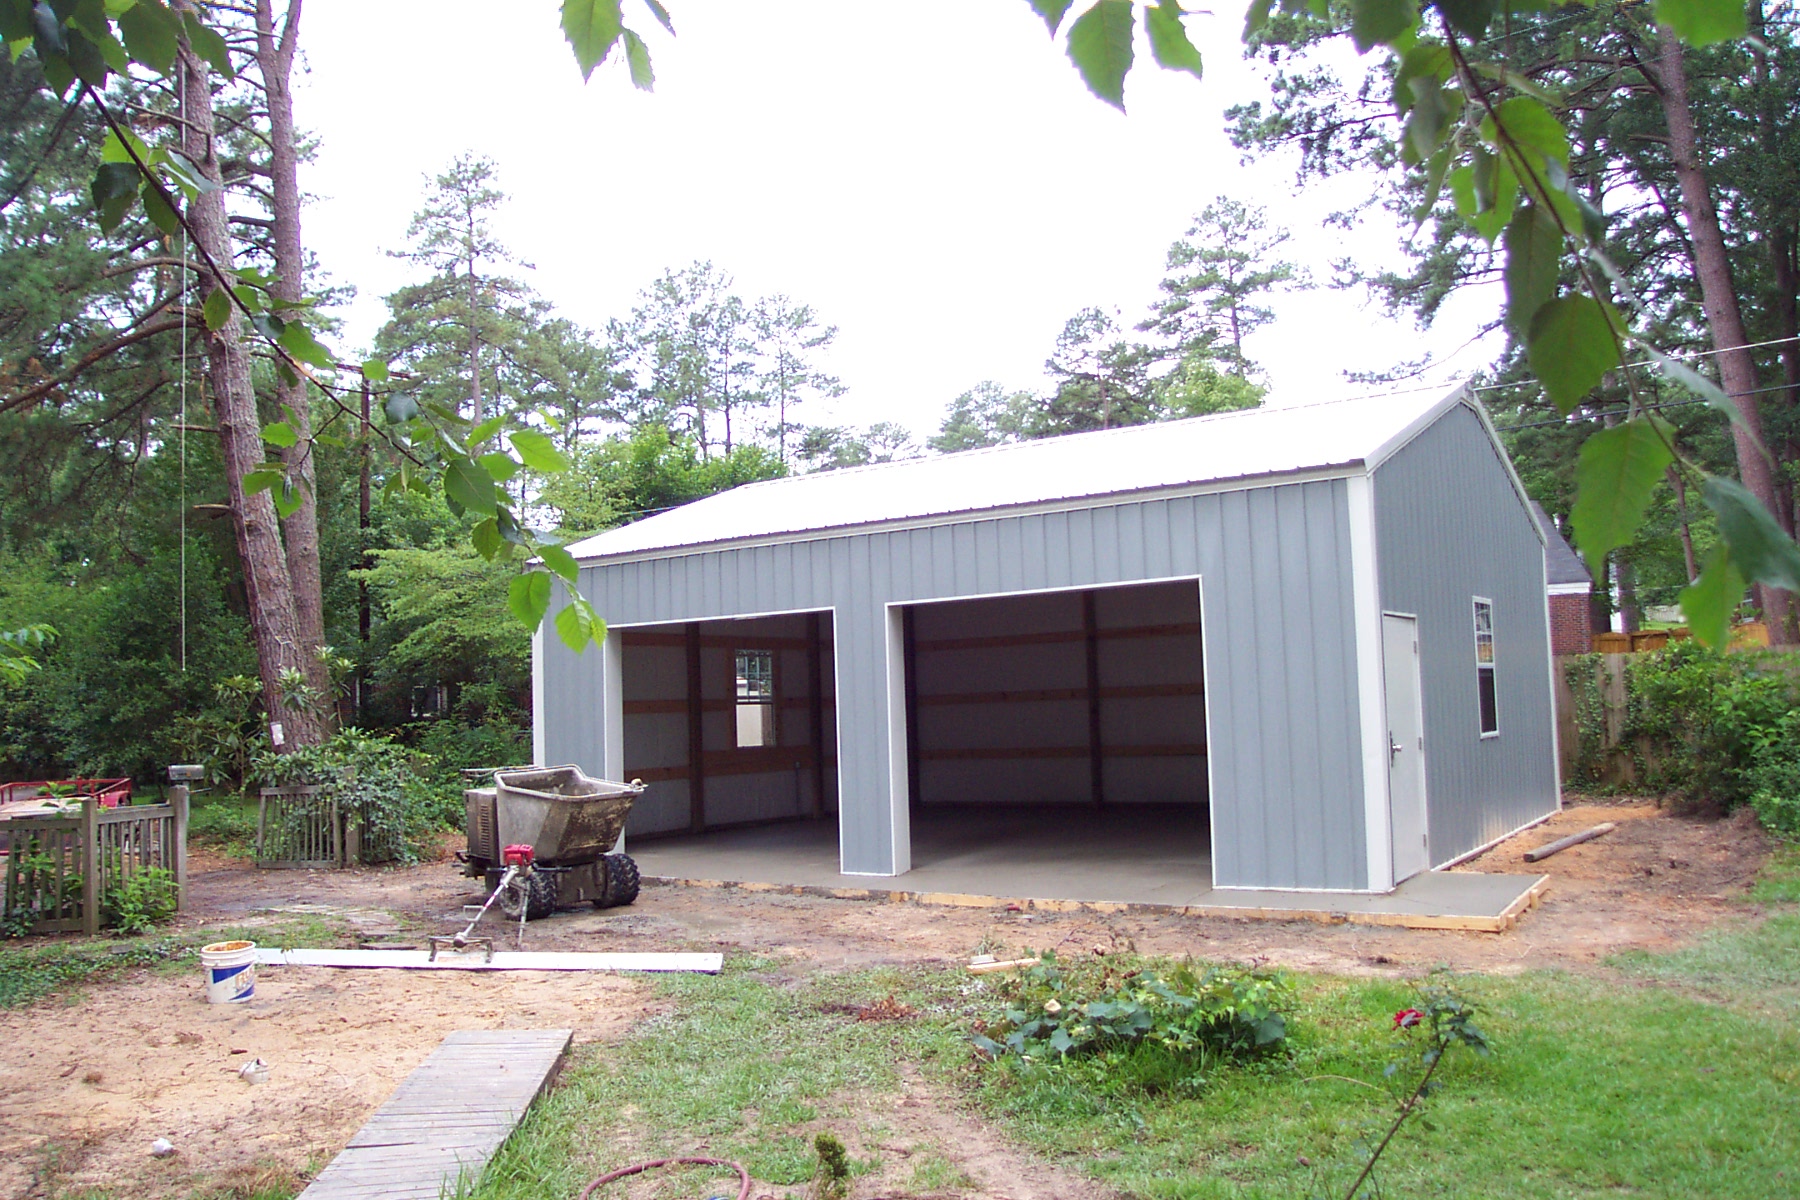
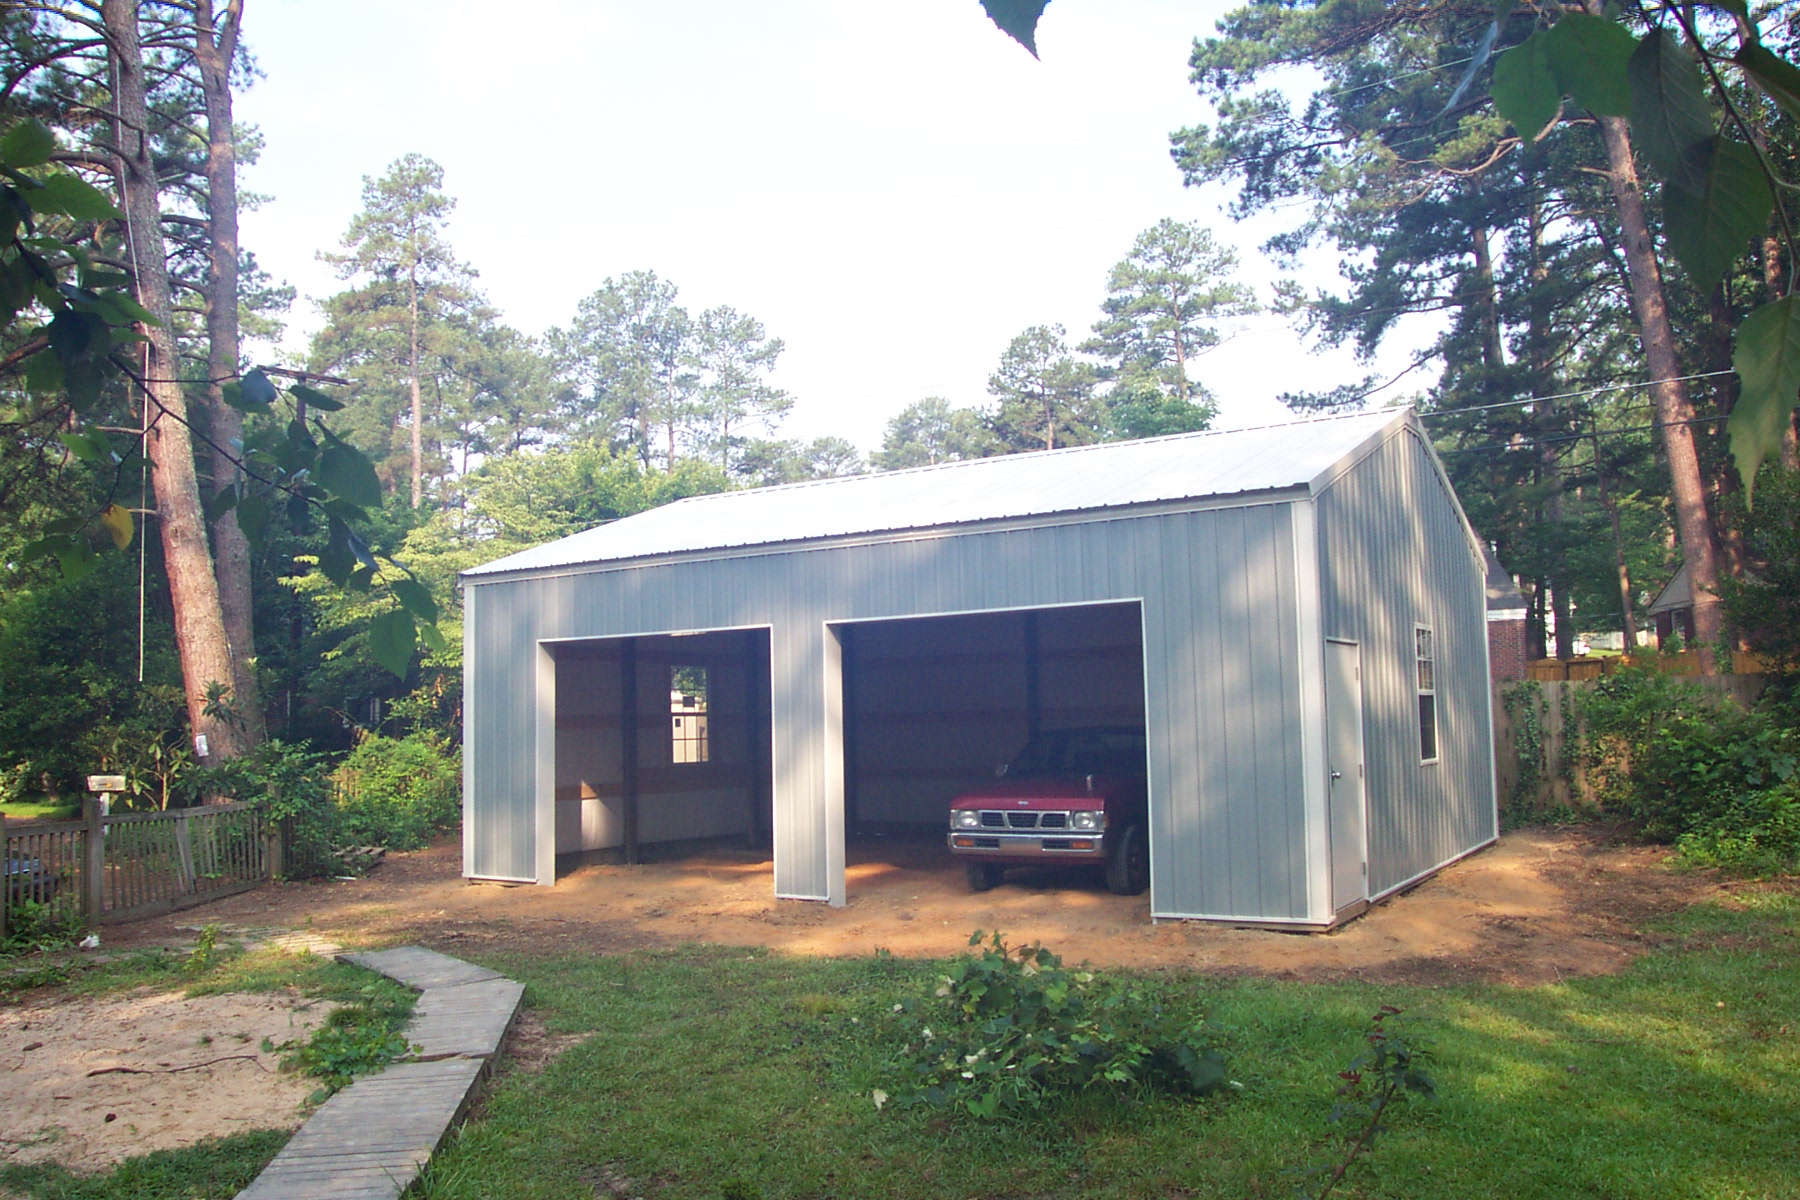
Was out of town on business for the last several days. While I was away, the garage door installers came by in put in the doors. The building construction is completed. Now to let the concrete cure up for several more days and I am ready to move in and outfit it for plane building!
Rain delays held off the concrete crew until today. Thought hurricane Dennis was going to extend the wait, but SC was spared any nasty weather. The concrete crew came in early this moring and poured and finished the slab. It is almost time to get building again!
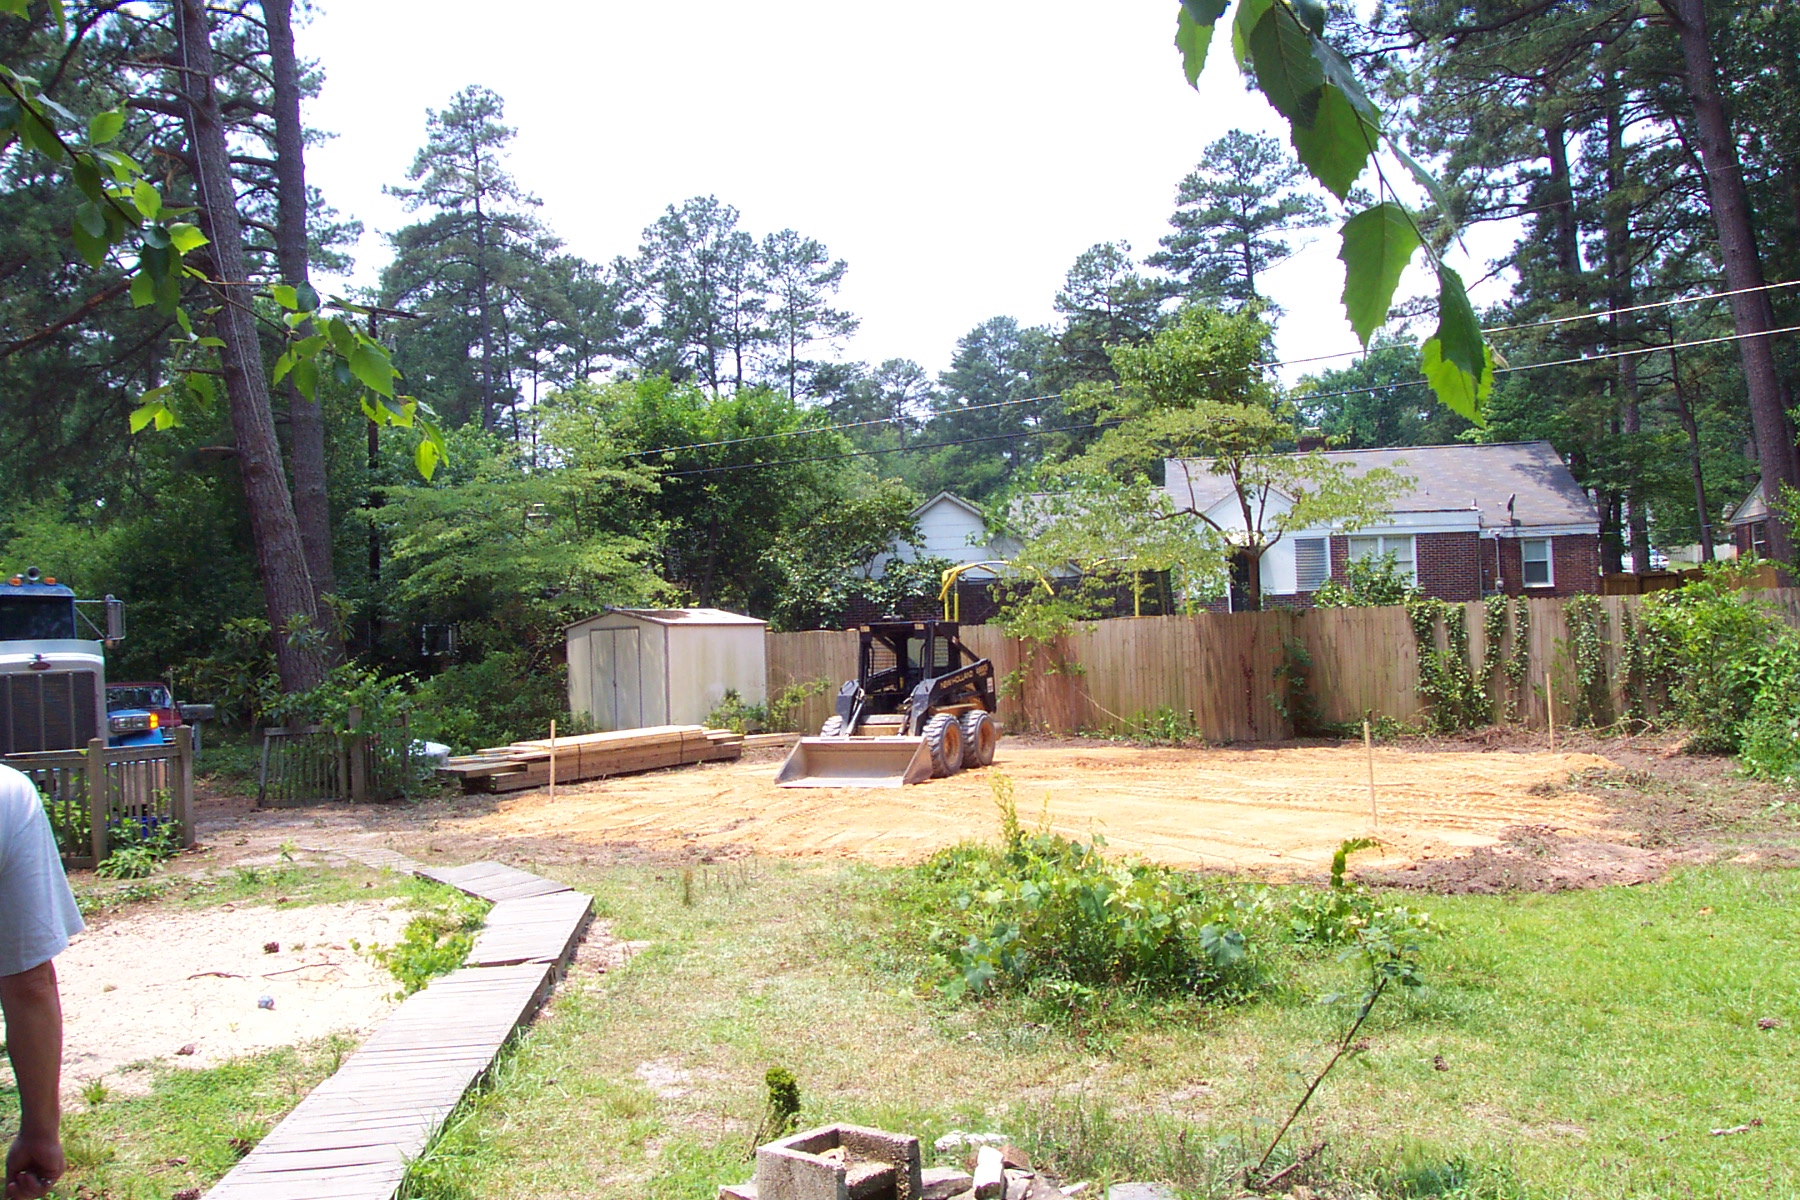
The concrete crew showed up today and leveled and compacted the dirt. They put down plastic underlayment and put up forms for the apron and entry door stoop. They will pour the concrete Thursday morning. Almost done!
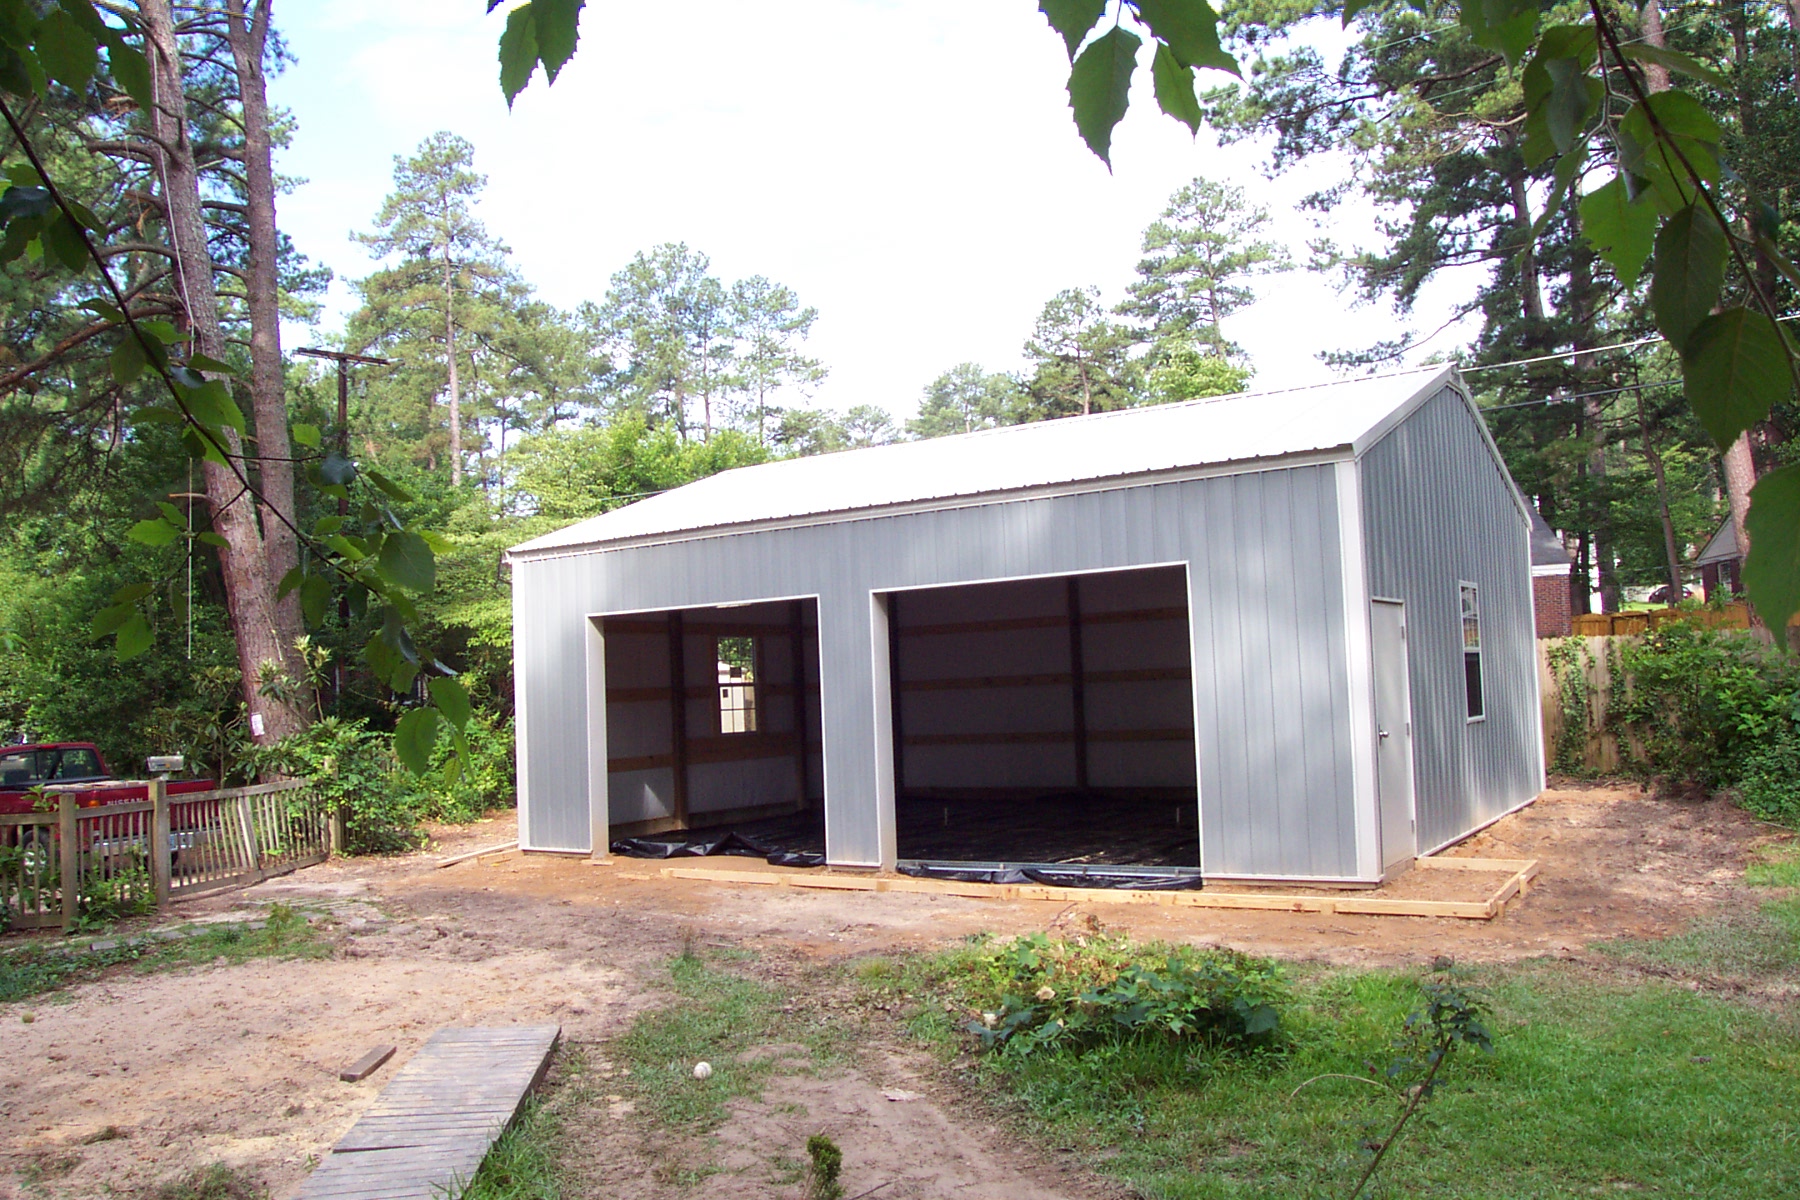
Finished with the building construction. Waiting on concrete.
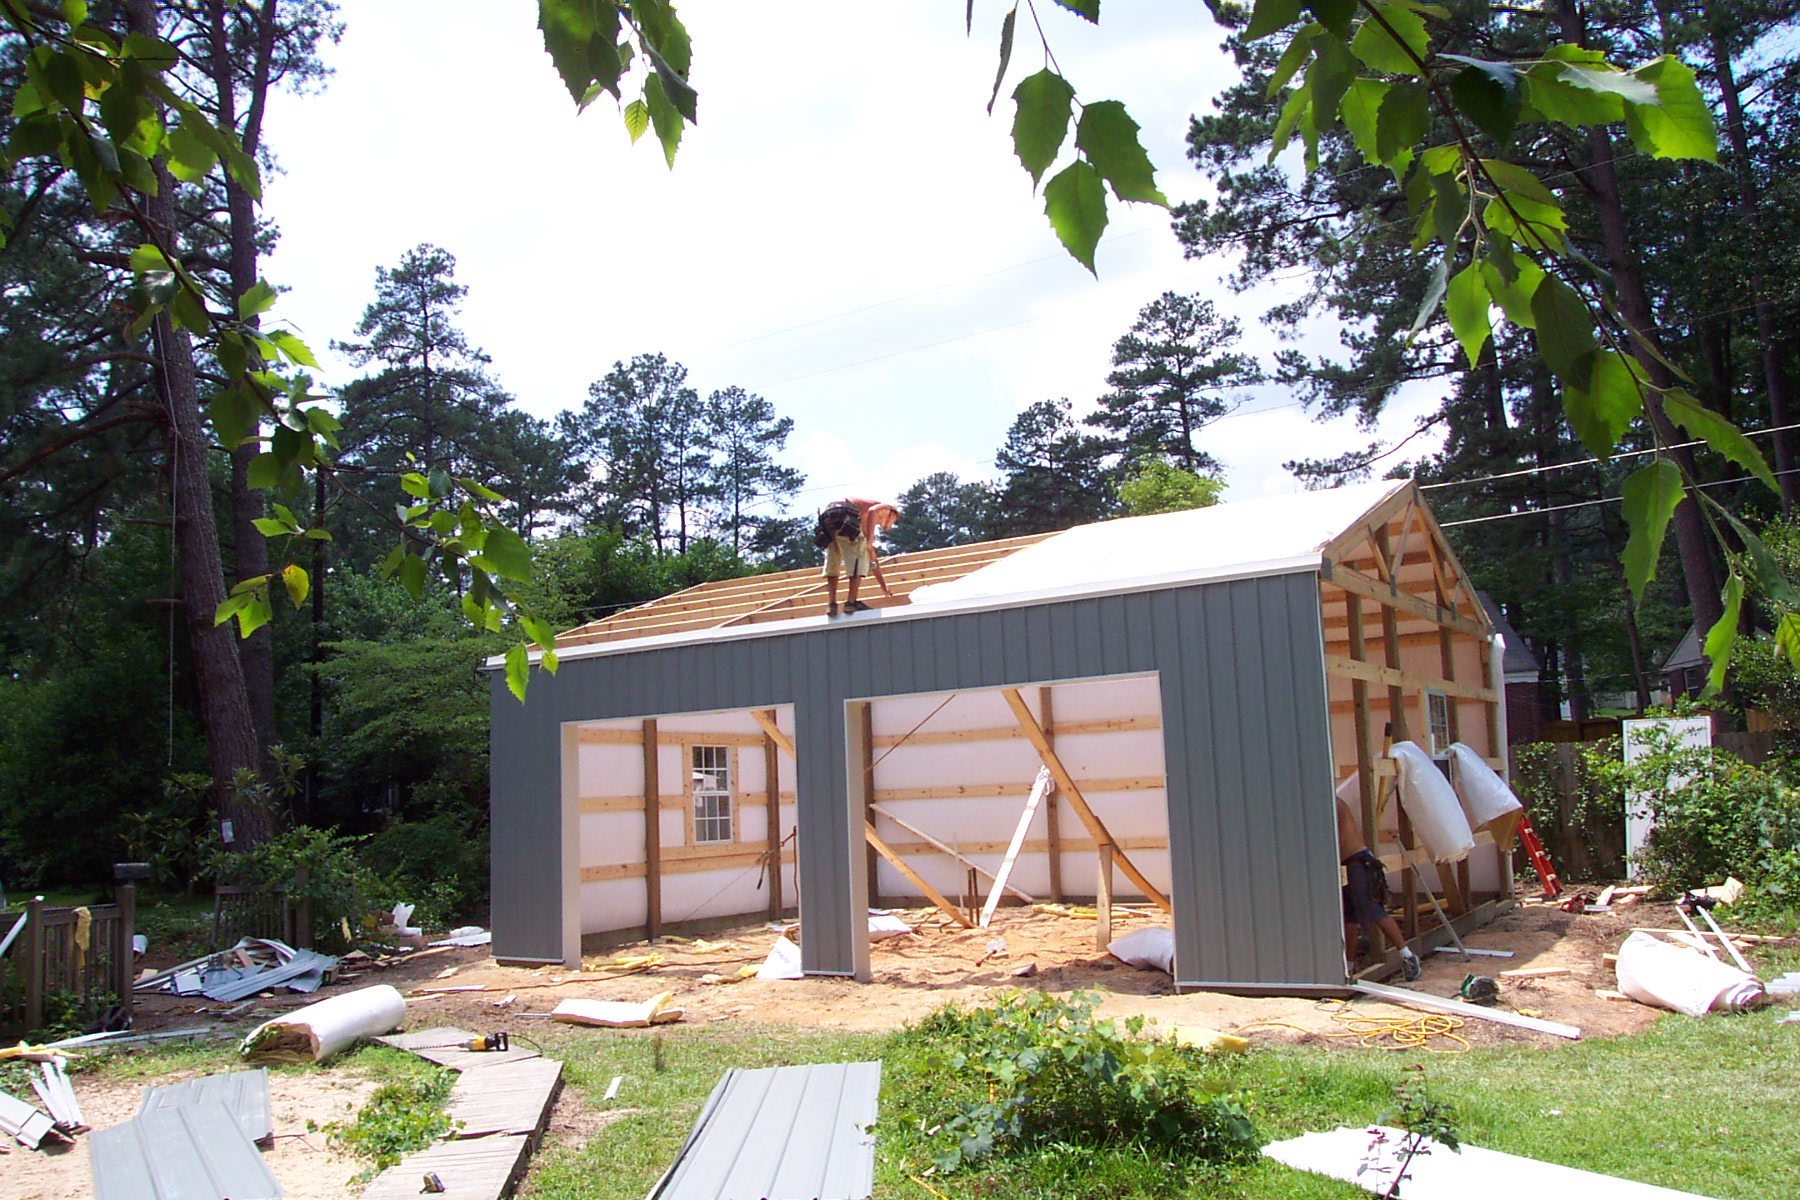
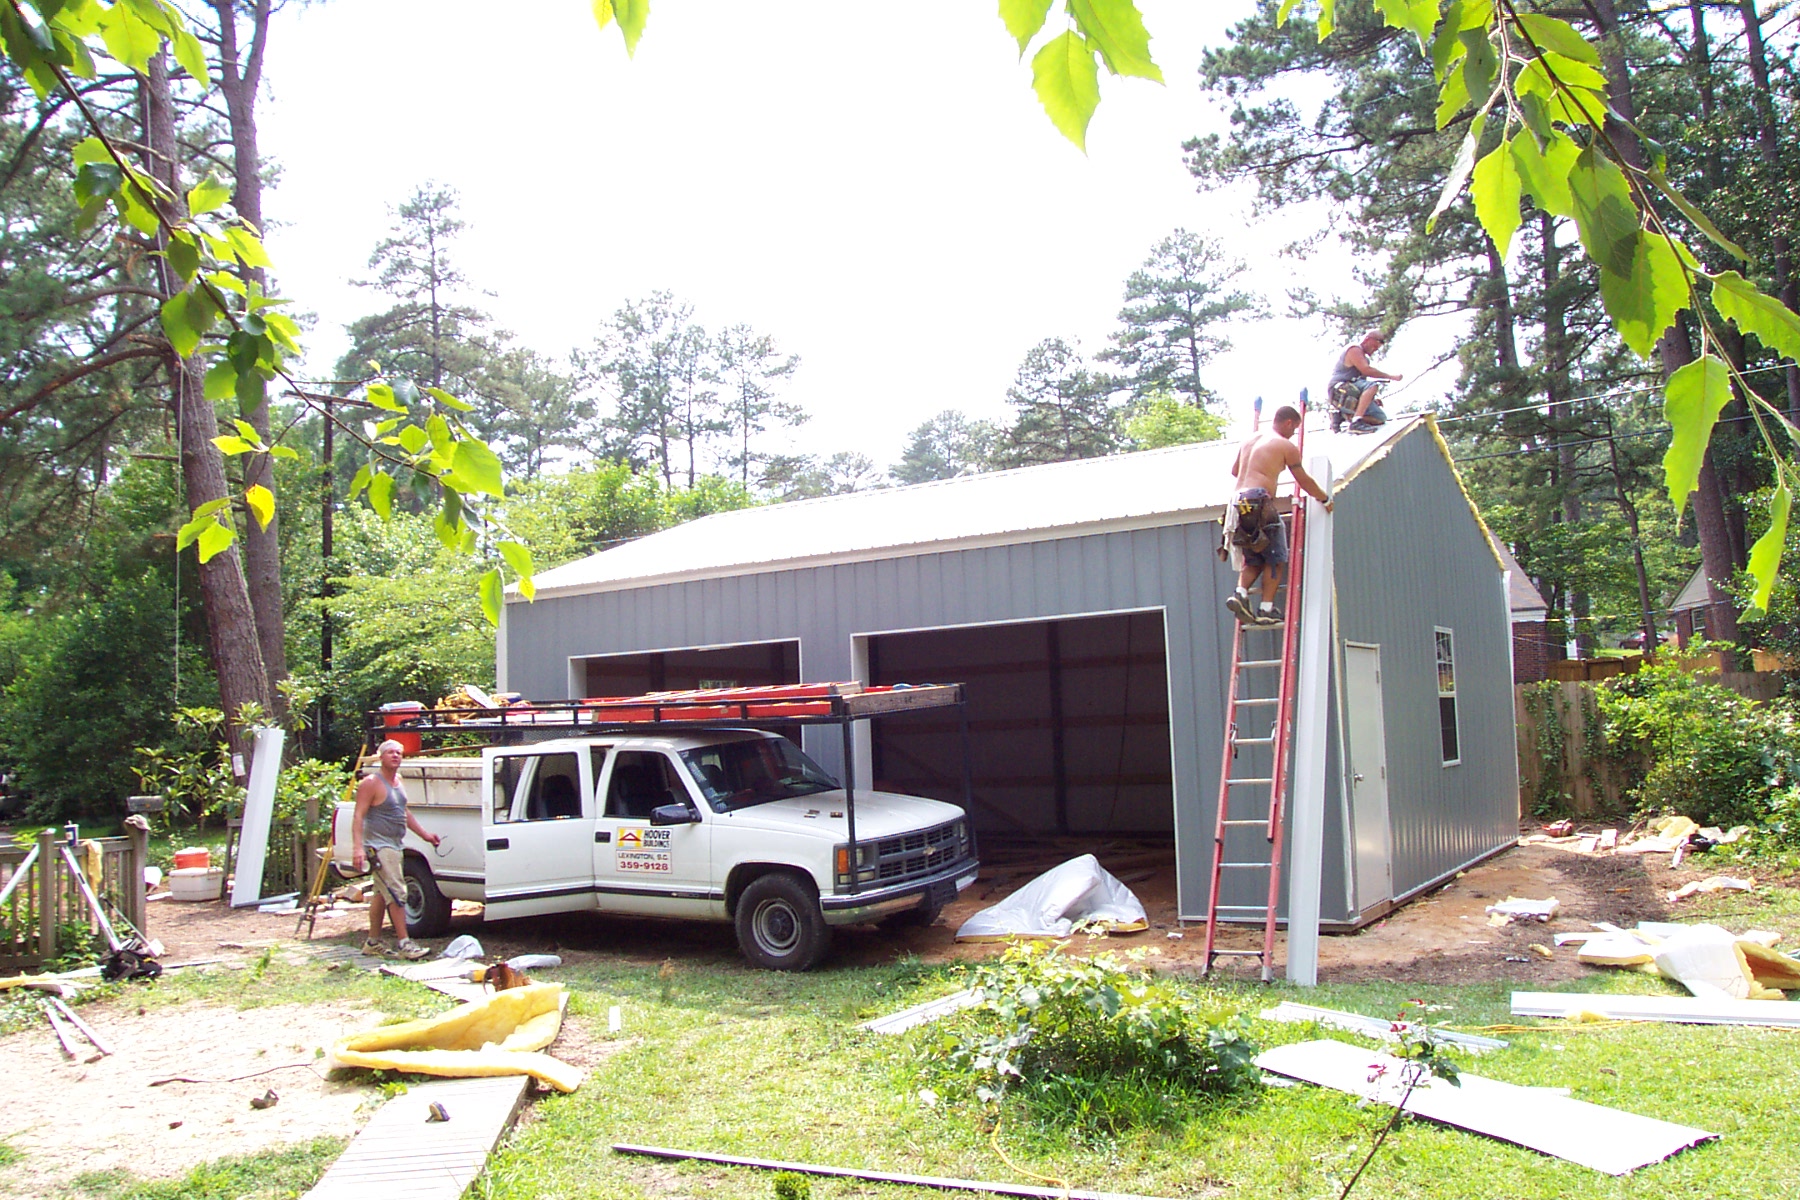
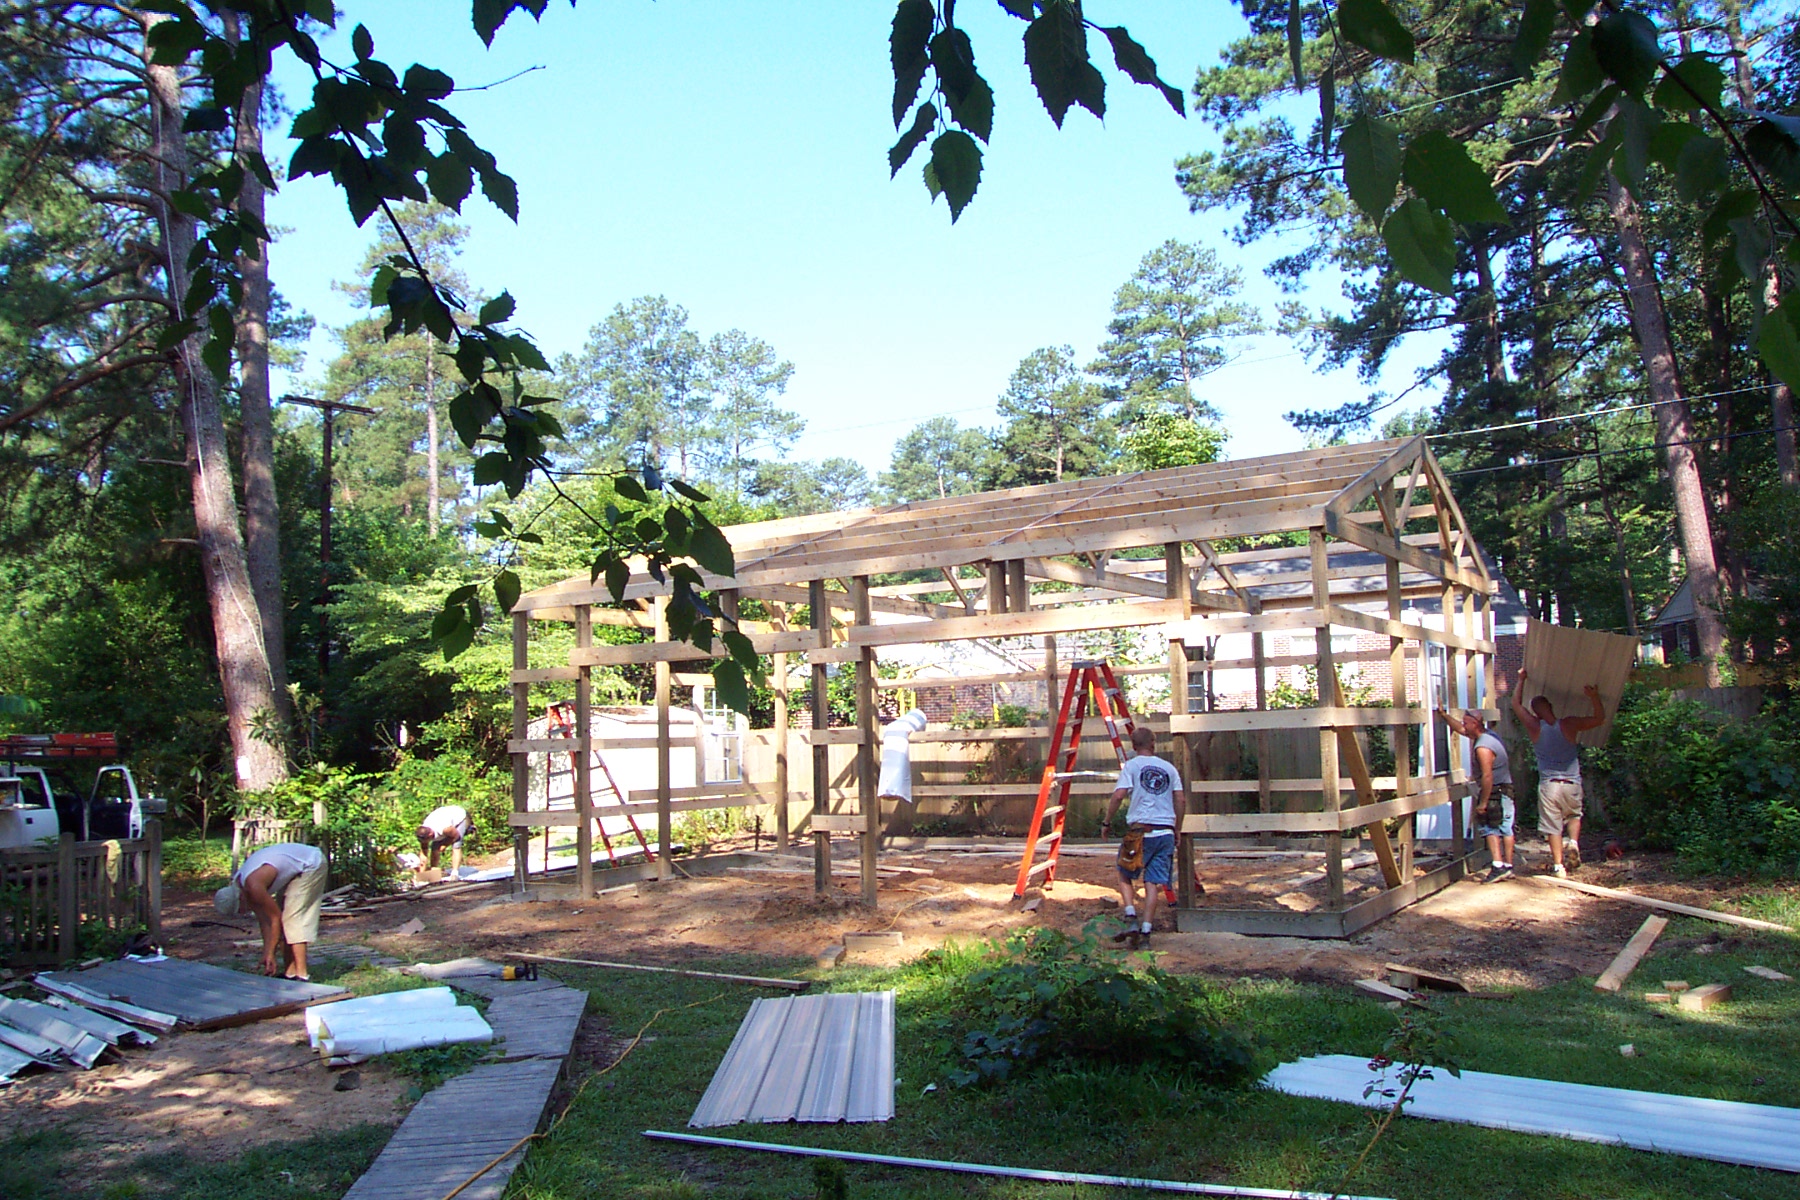
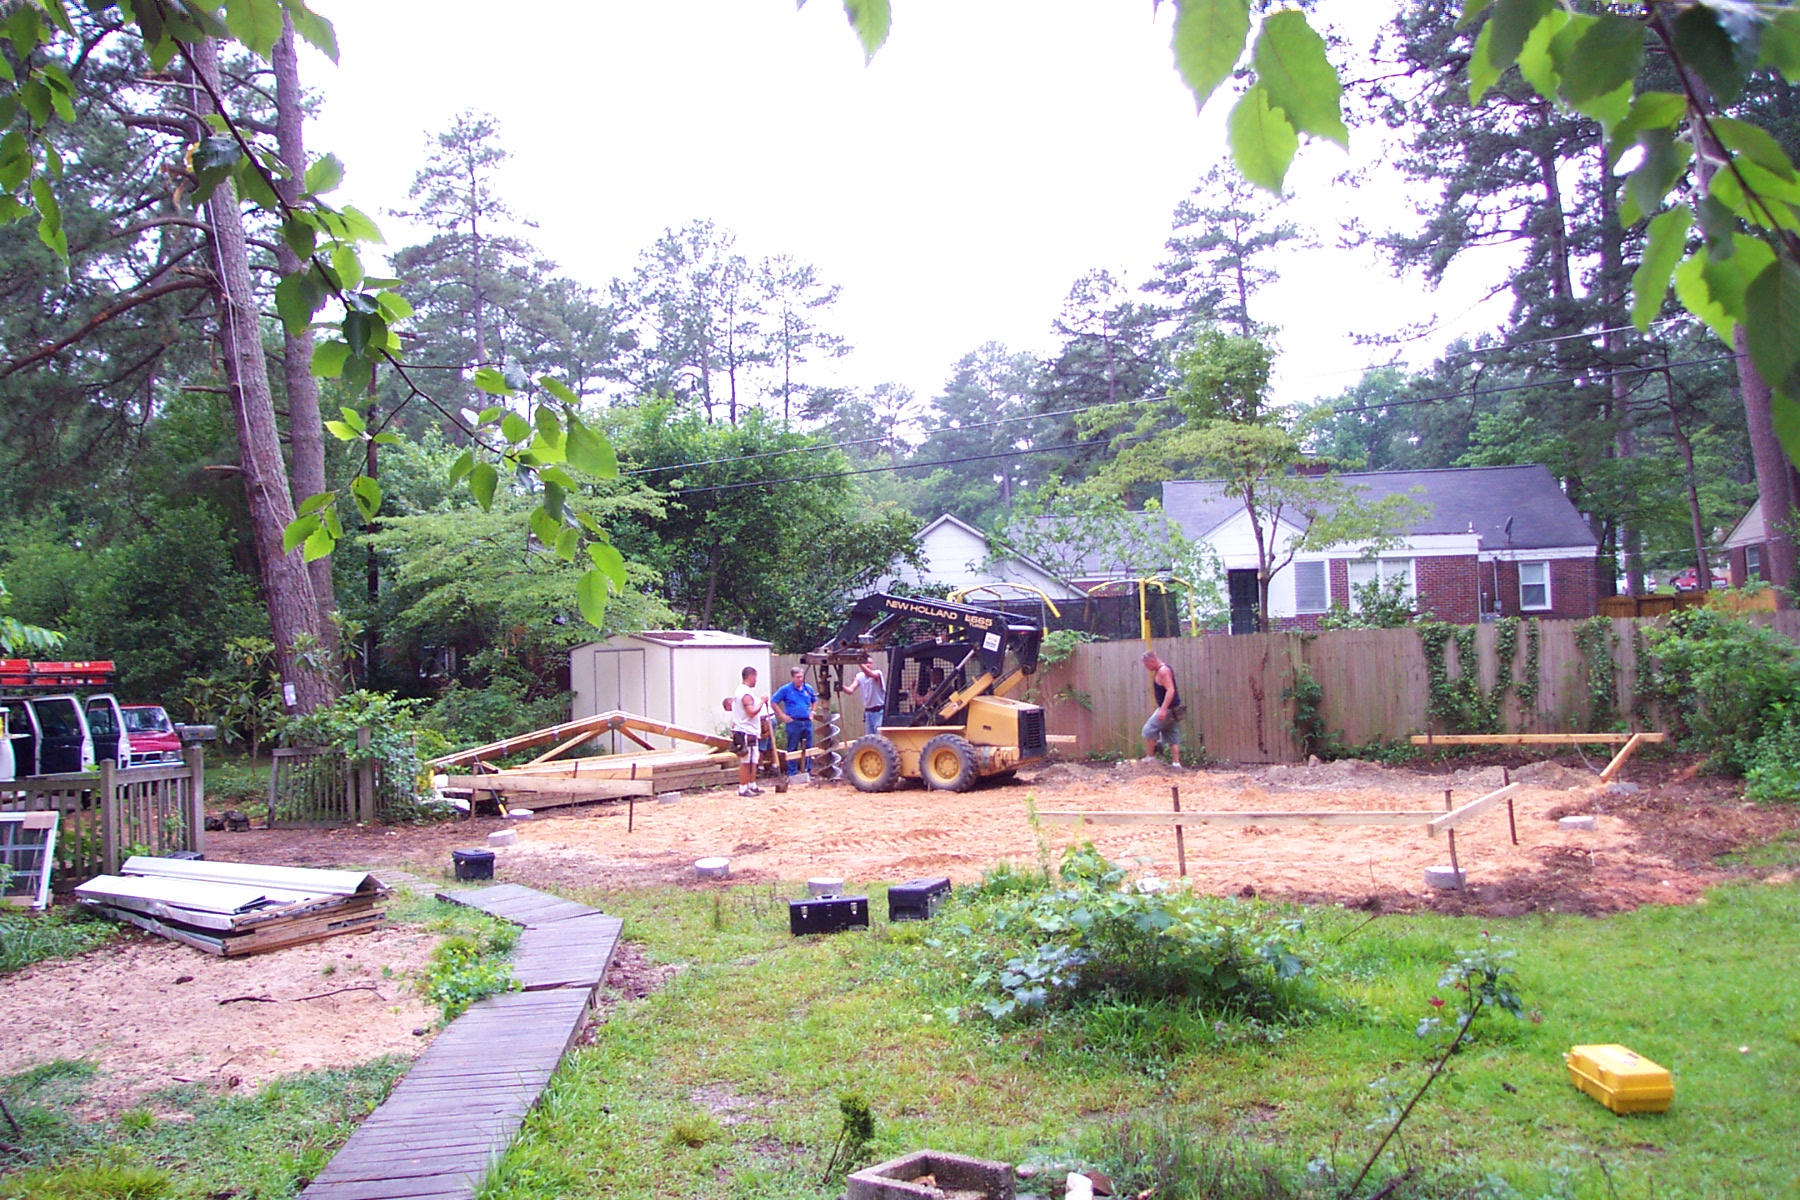
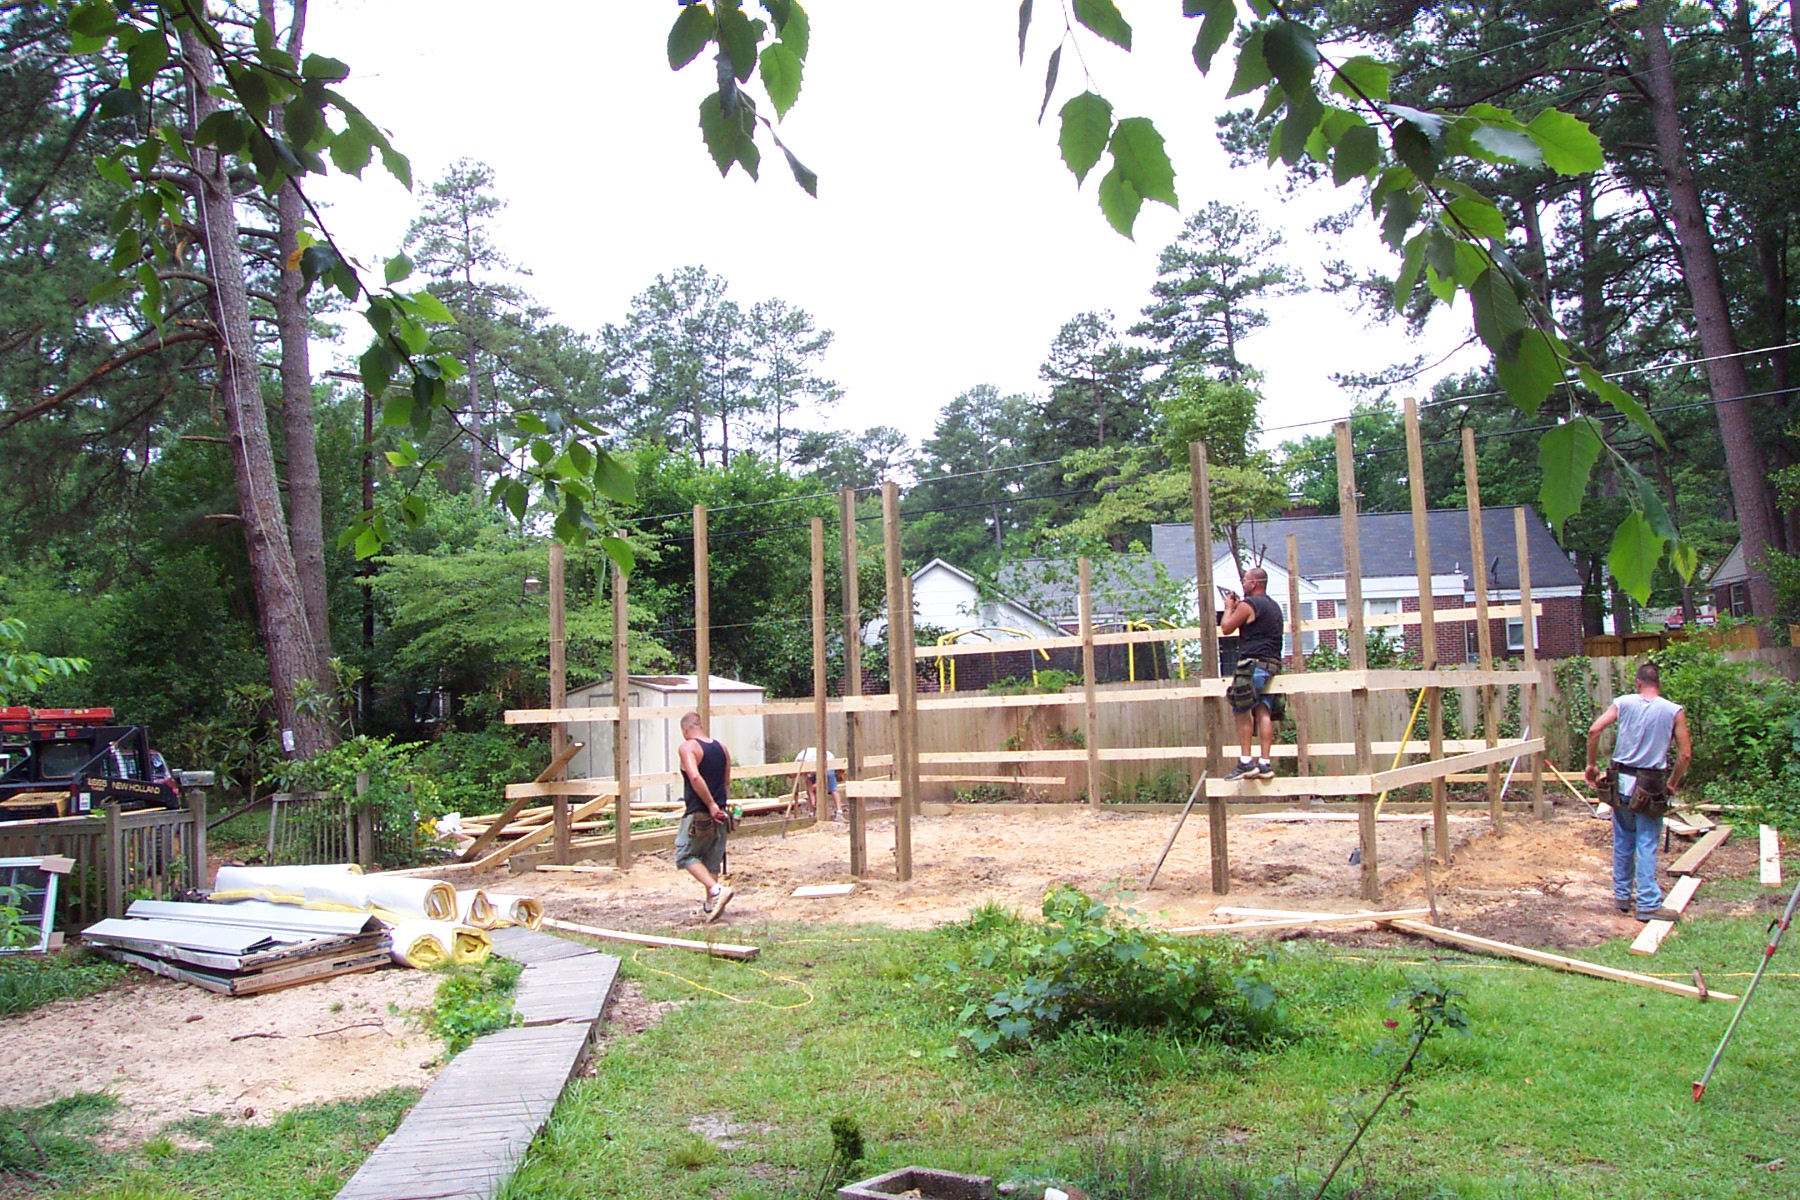
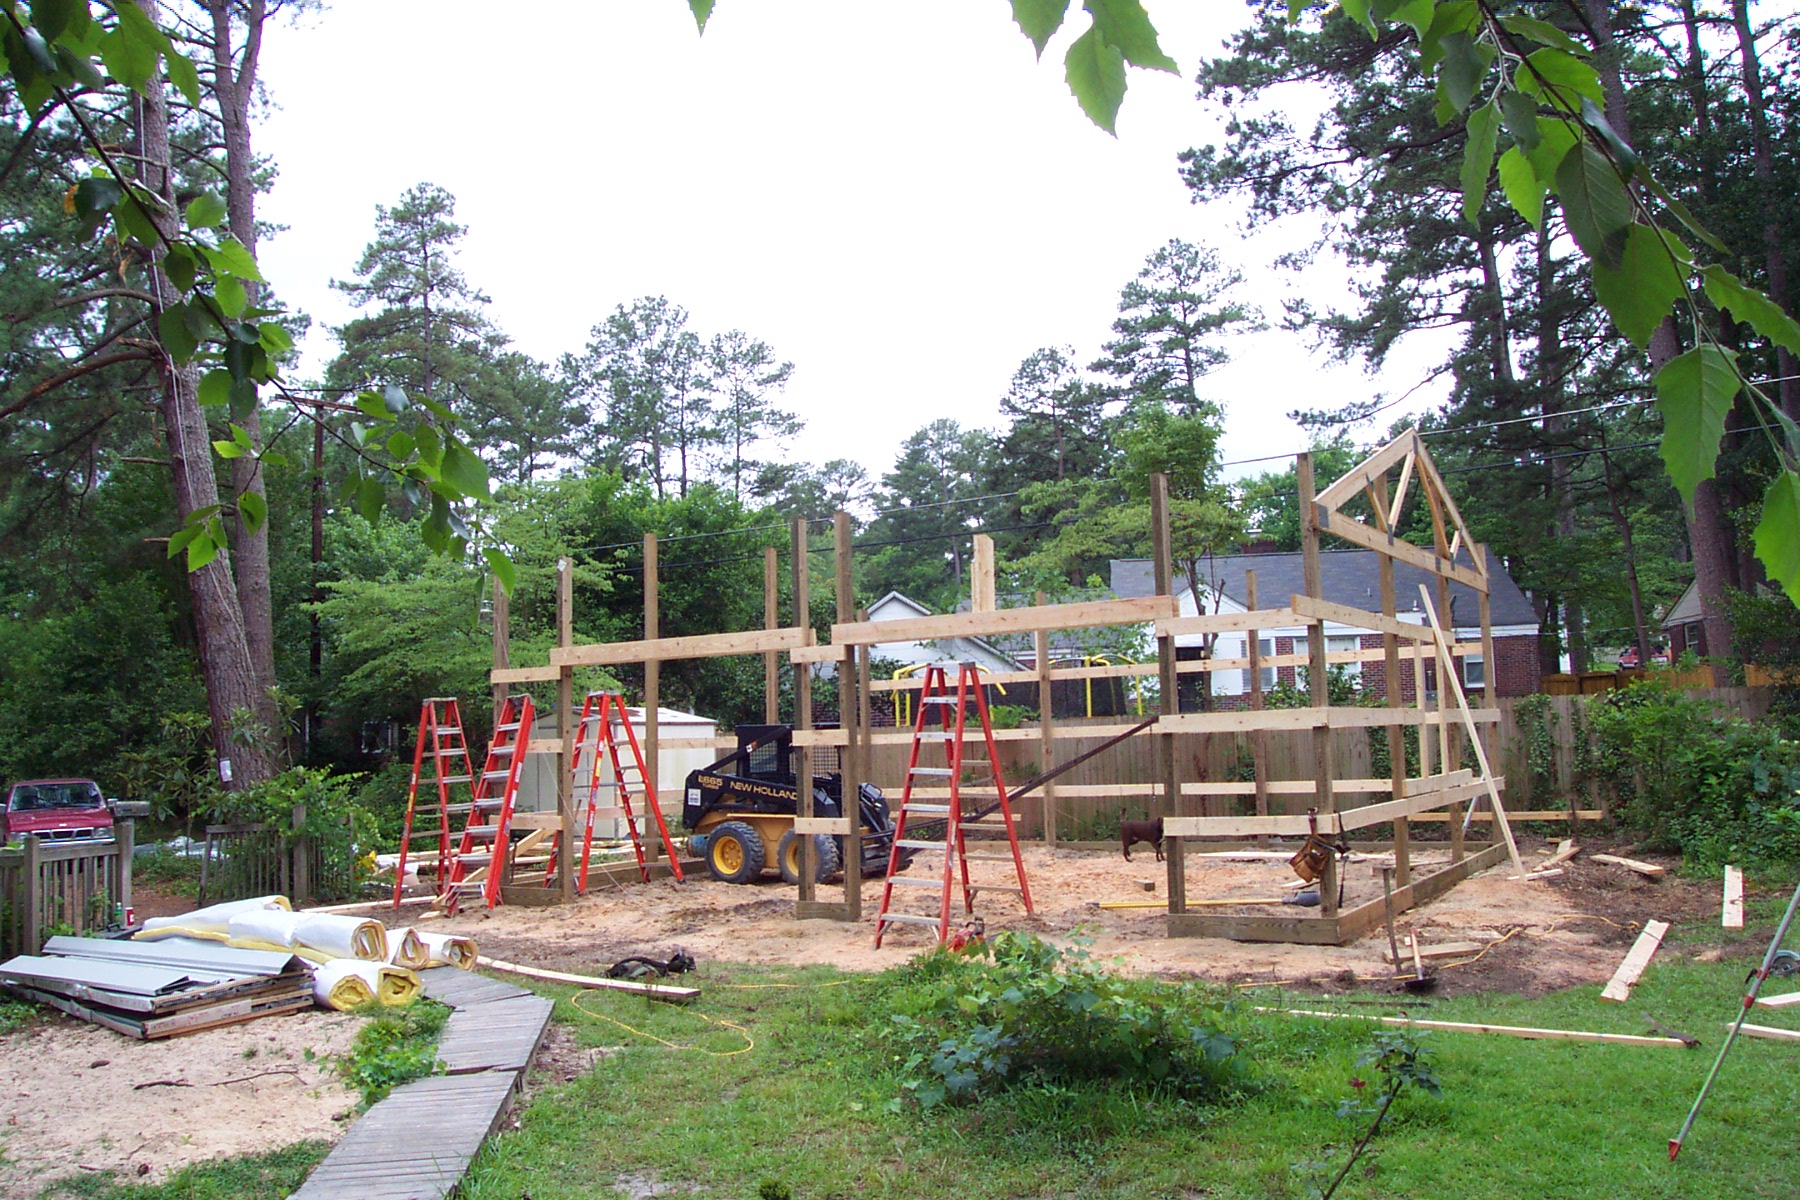
The builders got the complete structure built by late this afternoon. They worked hard all day in hot, humid, and sunny weather. Everything fell into place and the crew accomplished a lot today. Great teamwork! Hope to get the concrete crew in here next week.
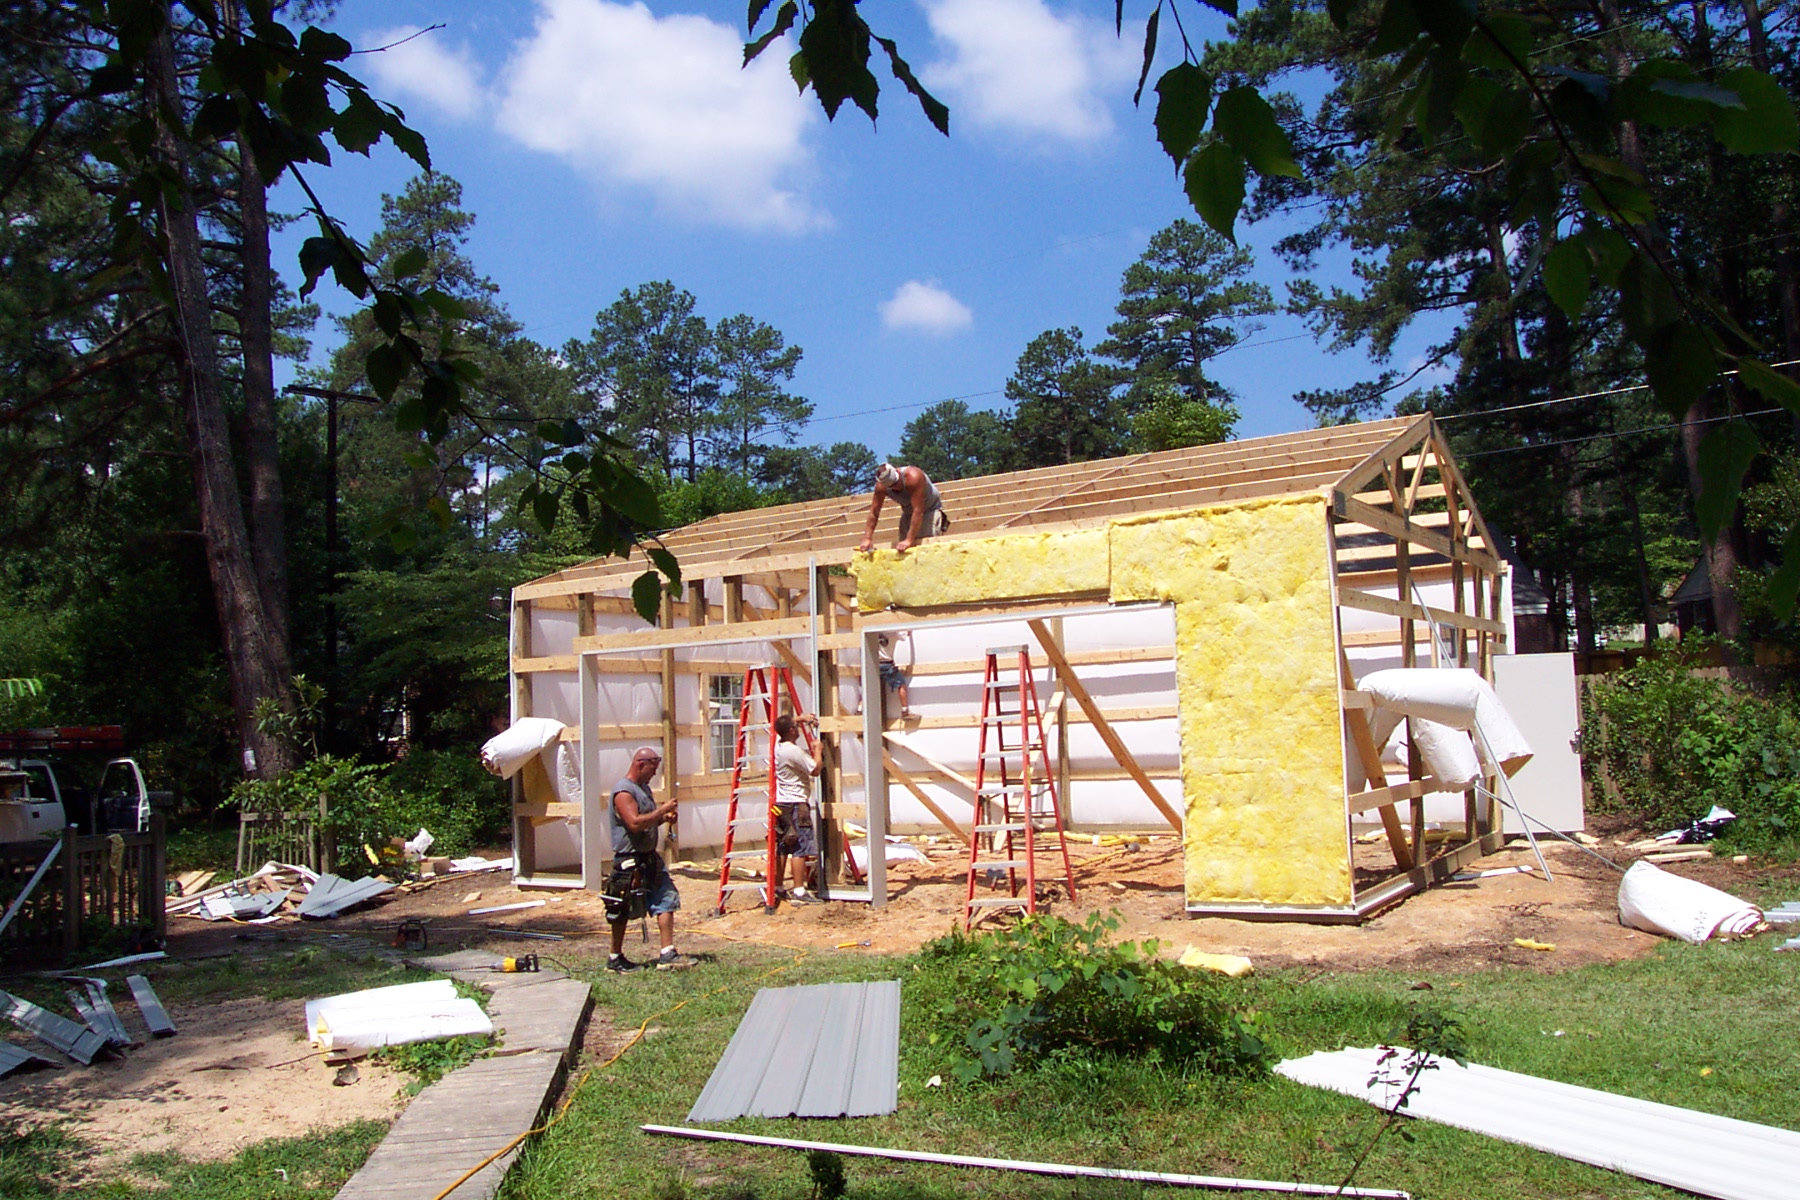
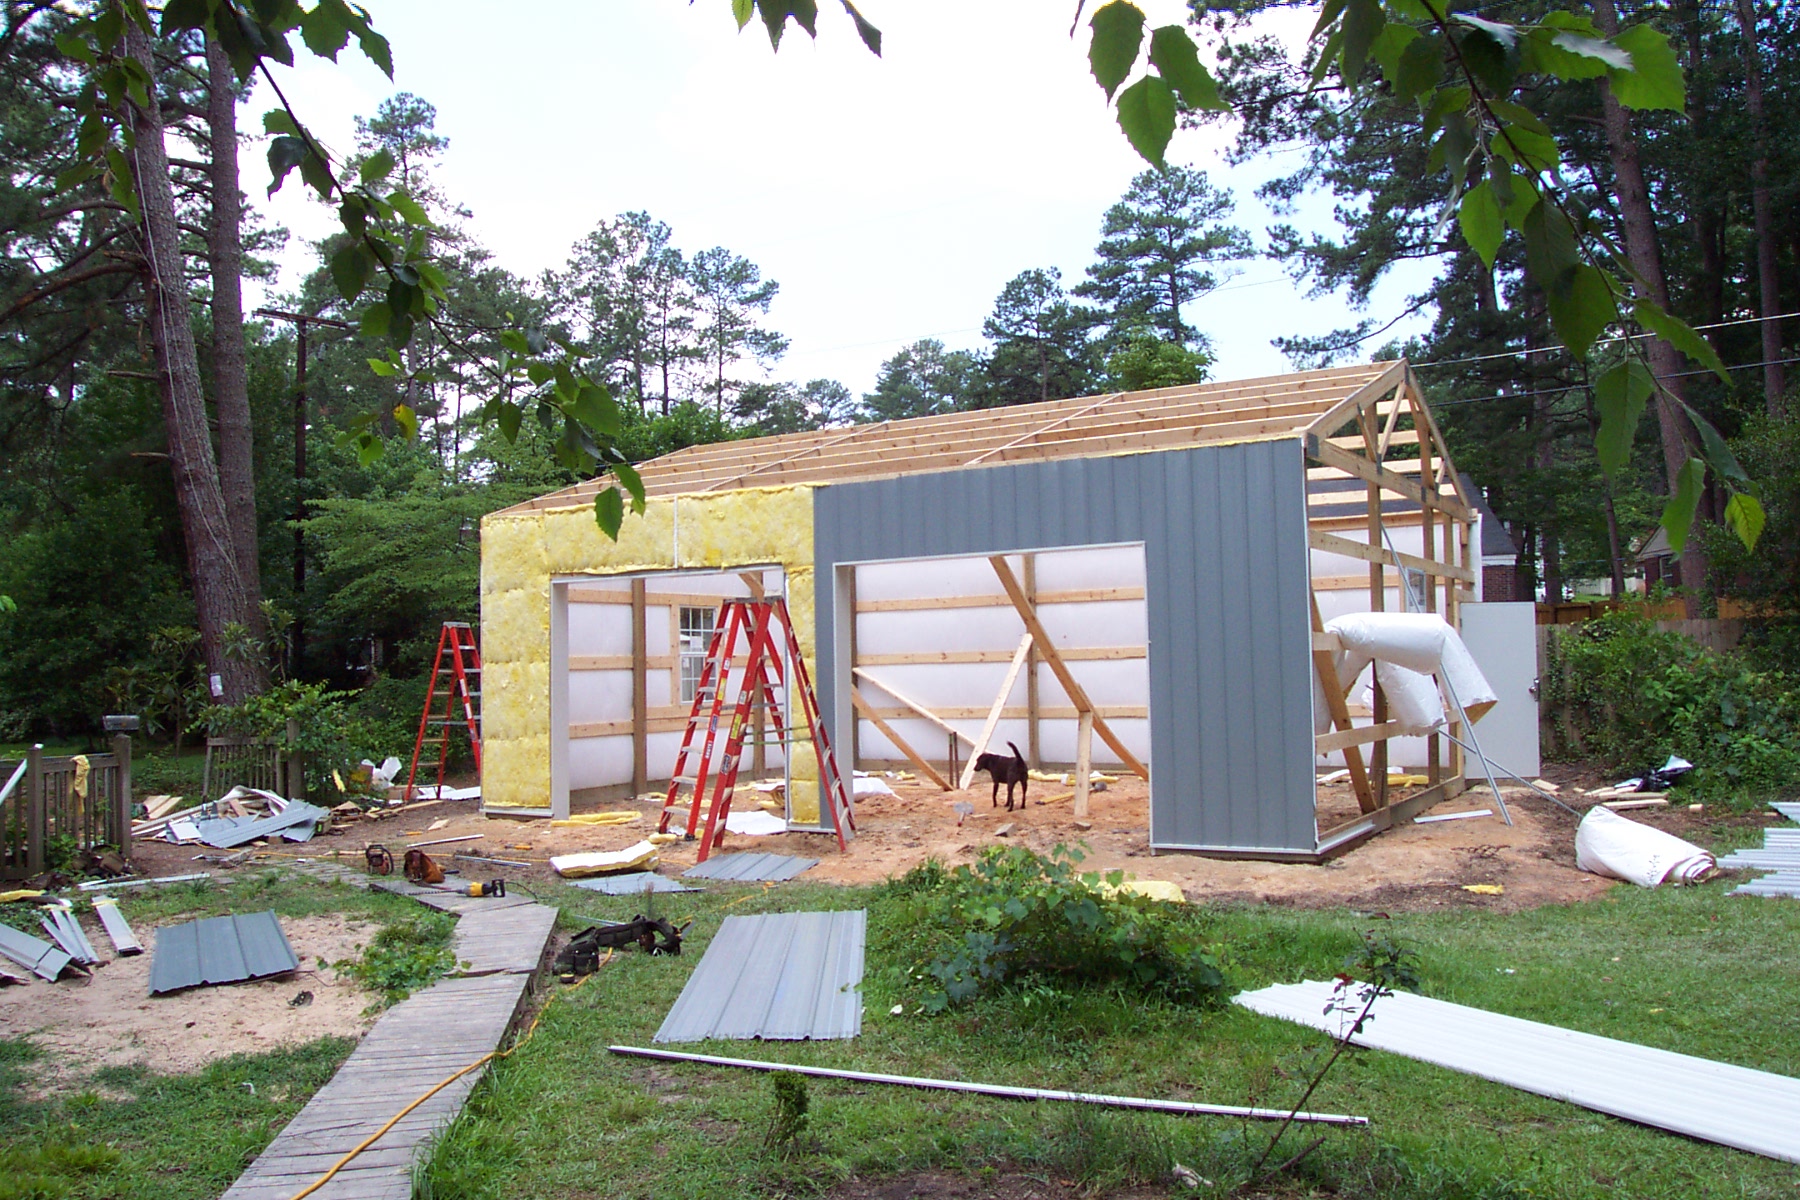
The Hoover Buildings crew showed up bright and early this morning. They finished the framing and installed the insulation and metal siding. The door was put in the wrong place, so it had to be moved. The building crew did a great job!
Bright and early this morning, the Hoover Buildings crew showed up and started erecting the building. First putting up batten boards, then digging post holes. The installed the posts and stringers.
Today Jim Wheatley and Ron Hoover and crew from Hoover Buildings came out and cleared and leveled the building site and marked the corners. Took them only a couple of hours to get the site prepped. They left all the building materials here and said they plan on starting construction on next Tuesday. Finally, this is becoming a reality. I can't wait!
Today marks the end of week ten waiting for my new garage to be built. I got a visit from Ron Hoover of Hoover Buildings yesterday. He did a quick survey of the yard to get an idea of what he was getting in to. We verified the proposed location. He said he hopes to start clearing and grading next week, possibly by Wednesday.
Talked with Jim at Hoover Buildings a couple of days ago. Inquired about the cost difference between the 24x24 we contracted for and 24x30. The cost is not that much more, so I decided to upgrade to the bigger garage. The added 25% more space will be well worth the extra cost. The larger garage costs about $2 per sq ft less.
Celebrating my third Cleco de Mayo building my RV-9A. I am waiting on my new garage to be built. The Hoover Buildings representative said yesterday that they are on track but cannot give an exact start time. It has been four weeks, so hopefully they will start in the next four weeks. I asked Jim to give me a quote on making the garage 24x30 versus the 24x24 we currently have contracted for. The extra room will be nice if the price is not too much more.
Contracted to have a double garage built- need the space badly!
Talked with Jim Wheatley at Hoover Buildings (no relation) on April 6th about building a garage. They build post-style metal buildings. I had gotten a few prices on garages in the past several months. All were way too much. Hoover Buildings seems to be priced as low as I can get without building the garage myself. Called Jim back and then met with him again Friday, April 8th and signed a building contract and put a deposit down. He said they are back logged for about eight weeks. Hopefully it will not be longer than that. What to do about getting more space has been quite a dilemma for the past several months. What prompted me to go ahead and end the anxiety that has been bugging the heck out of me lately is when I saw a finished RV-9A at CUB on Sunday, April 3rd, at the 2nd Annual Palmetto Wing of Vans Airforce Fly-In. The plane was an absolute beauty, built by Larry Bond. Seeing that airplane motivated me to go ahead and make the decision to build a "hanger" in my backyard. What the heck! Larry said he built his in a 16'x24' workshop. I decided on building a 24'x24' double garage. I am really excited about getting a new workshop. I plan on installing a wind sock on top at some point.
Gascolator mount plate, pedestal compass, tie down ring arrived from Vans
FedEx finally got my package from Vans delivered today. Took two weeks from order to delivery and now I know why. The package was damp on the outside. The packing slip in was soaking wet, and the contents of the box were soaking wet and everything smells like it was in a forest fire - smoked damaged. Jeez! So I called Vans and they said they will file a claim with FedEx and send me another order asap. Jessica is who I talked to and she was very nice. She told me to hold onto the damaged package for a couple of weeks in case FedEx wanted to pick it up. I said okay but I will have to leave it outside as it wreaks of harsh smoke and would stink up the house. They handled this very professionally, and helped cool my jets because I was disappointed and really pissed off at FedEx. Plenty of other plane building stuff to do, so I went back to banging dimples in the aft fuse skins.
The servo brackets from TruTrak arrived today. The box was damp and squooshed up in the shape of a football. The documentation inside the box was wet. Luckily the brackets were wrapped in plastic so everything looks okay. Thanks UPS!
The "pink paper" arrived in the mail from Van's today telling me the proposed shipping date of my fuse kit. I still need to come up with the balance due for it and send that in. Might have to rob a bank or something, but I'll find the money some how!
EAA Technical Adviser makes second visit to The Dog House
Our local EAA 242 Technical Advisor, Ken Harrill, dropped by The Dog House to check out my project. He said I was doing a fine job. He answered a whole bunch of questions and gave me some great ideas and advice. We filled out an EAA form as well. A really motivating meeting. Thanks Ken!
Went to the SCBC at Owens Field (CUB) today. Got there a little late for the food, so I missed out on that. However, my luck changed for the good in an instant. A fellow EAA242'r, James Clark, invited me to ride along while he taxied his RV-6 (Papa Juliet) back over to his hanger and I said great, I'd never been in an RV. He looked at me kind of surprised. As we started taxiing, he radioed Unicom that we'd be taxiing to runway 13. Slap an RV grin on my face! It was a great flight. Got to hold the stick a little to get the feel of it. James showed me a thing or two that makes the RV the great flying machine that it is. A note of high interest: at Oshkosh '04, James was flying Papa Juliet in the RV formation (http://yudavision.net/rv/). Papa Juliet is one beautiful airplane. Also, got to hang around James' hanger and check out his lastest project, an RV-6A, and discuss plane building. I left CUB filled with motivation and excitement. Thanks James!
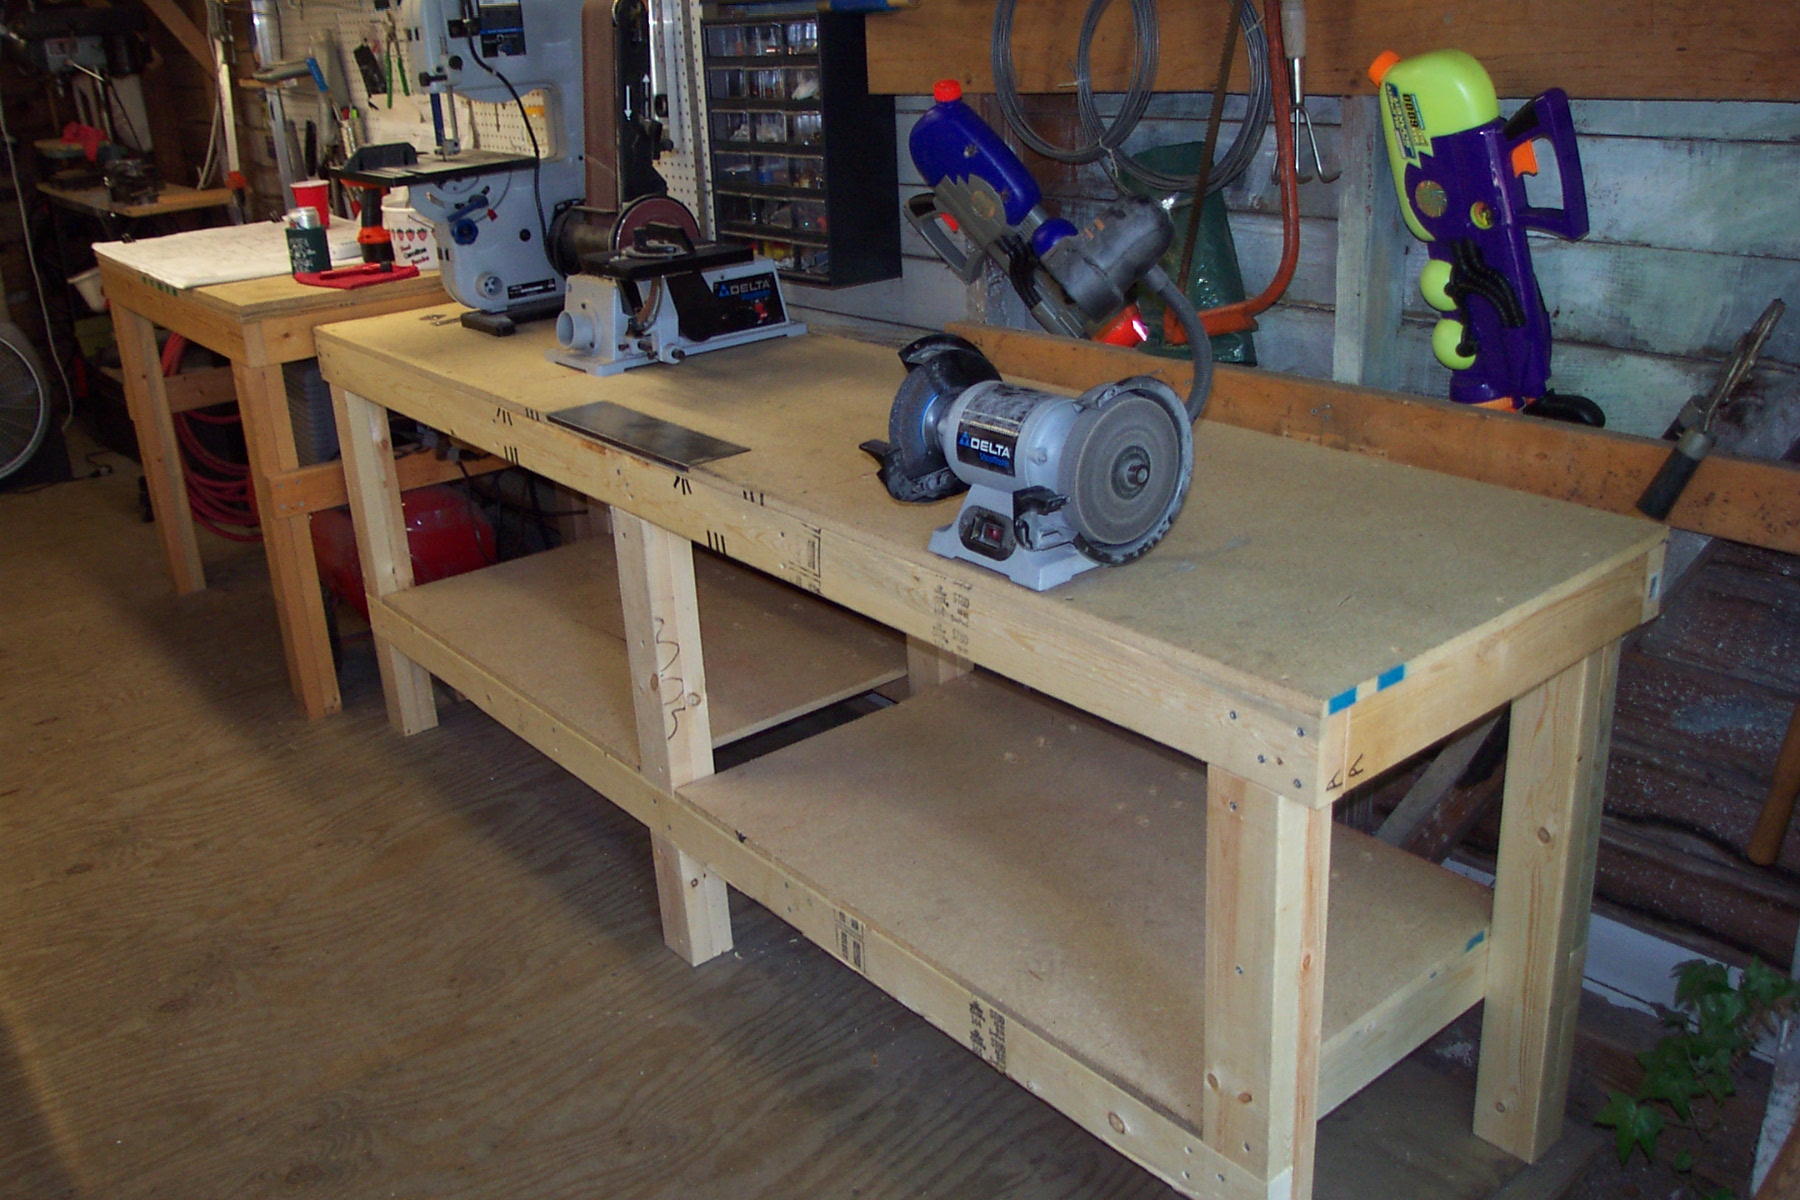
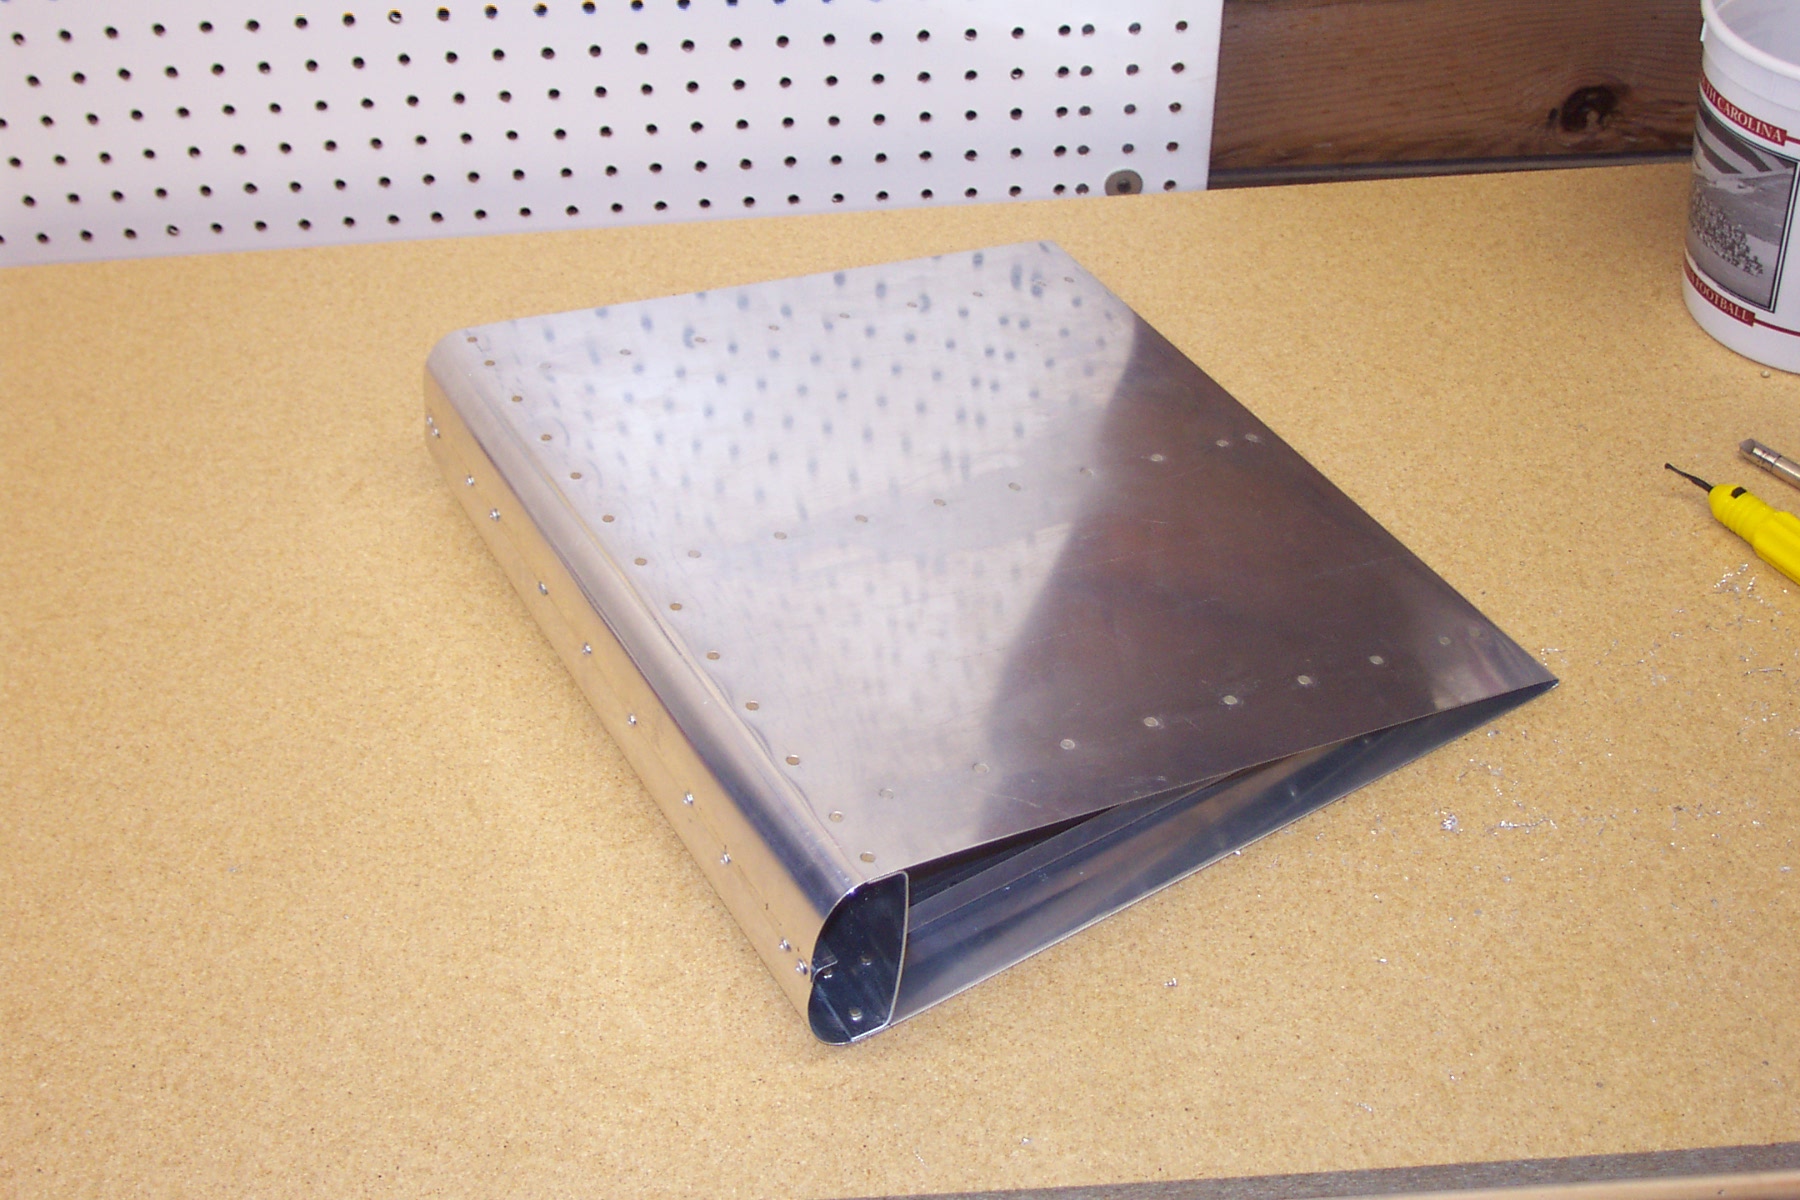
Finished with the flaps, I recycled the flap box table into an 8' work table. It took 7 more 2x4's to make the legs and lower shelf supports similar to the EAA1000-style tables.
I emailed Vans asking for advice on where to best locate an additional AOA line that is required for the Dynon heated pitot tube installation. Since I enlarged the forward wing rib tooling hole for wiring conduit, that would not be suitable for the AOA line. It would have been ideal had I known which pitot I was going to use a long time ago. So my question to Vans was where to safely drill an additional hole and keep it the AOA line from getting in the way while riveting on the bottom skins. Their reply was: put it between the 1st and 2nd lightening holes, at the top of the wing. So this is what I will plan to do. I still do not know where the pitot mount will be located. Hope Gretz Aero's installation plans covers that.
Don Alexander from Virginia came to South Carolina during the month of November, 2003, and was nice enough to drive over to Columbia to check out my project. We both met up earlier in the day at the Celebrate Freedom Airshow held in Camdens Woodward Airfield. Don has a great website at: www.propjock.com
Finally met with my local EAA Tech Rep. Ken Harrell was kind enough to dropped by to check out my emp work. He said overall my work looks good and that gave me a lot of hope. He said to go ahead and order the wing kit! Hurray!
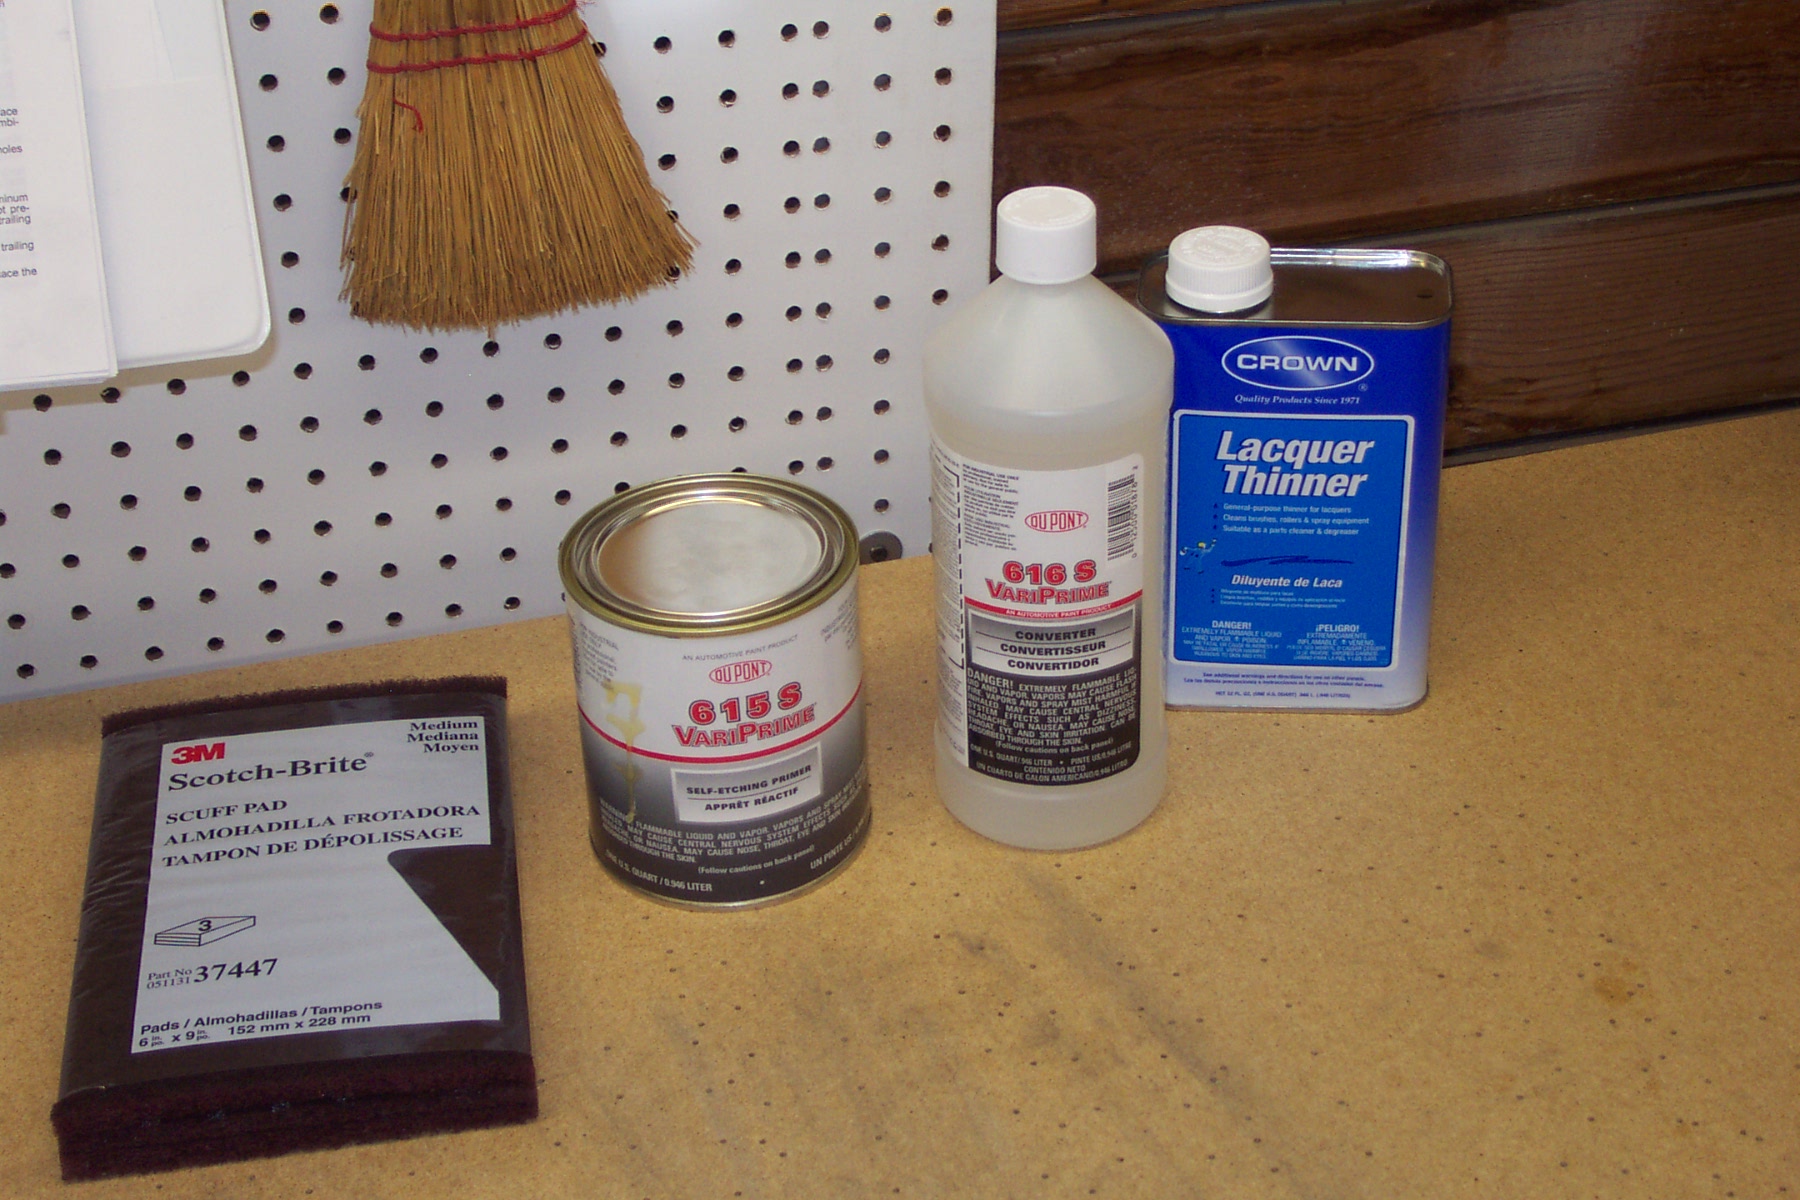
I have decided to go with Du Pont Variprime 615S & 616S. This product is available locally and I have been advised by someone I know who has built many airplanes that this is what they have used very successfully.
I mailed my payment for the empennage today. Getting really excited and still wondering if I have lost my mind. I chose to order the emp kit with the tail light. I am planning to use Van's lighting system #6.
Practiced sheet metal work with GeoBeck's practice kit
February 2, 2003 - Got my Sheet Metal Tools video and practice kit from GeoBeck, Inc. a couple of day ago. I also got the RV-9 Emp video. After watching the sheet metal video about 6 times, I was ready to build the mock-up control surface. The leading edge here is not as round as it should be. The plans for this control surface did not specify a length directly for the stiffeners to be cut, so I just used them as they were. They could be been cut a 1/2" shorter. This would have allowed enough metal to give a good curve to the leading edge without having to stress the piece (and arch the spar) to get the two edges to meet up. This is the flawed part of my work on this piece, but now I know how to avoid this in the future. I am pretty happy with the riveting job I did on the practice project. There are some rivets that might be replaced because they are marginally too flat, but I did only a couple to get used to that process. Now that I know what a good rivet job looks like and how to do it, I feel pretty confident to continue on with the Empennage. The stiffener rivets all came out very nicely. I would recommend getting the back riveting steel plate from Avery's. It is well worth it. After reading alot on the RV-9A Discussion Group at Yahoo, I decided not to worry so much about removing the blue protective plastic from the sheet aluminum early on before drilling and dimpling. As long as I don't bang the metal and put dinks in it, the paint job will hide everything.
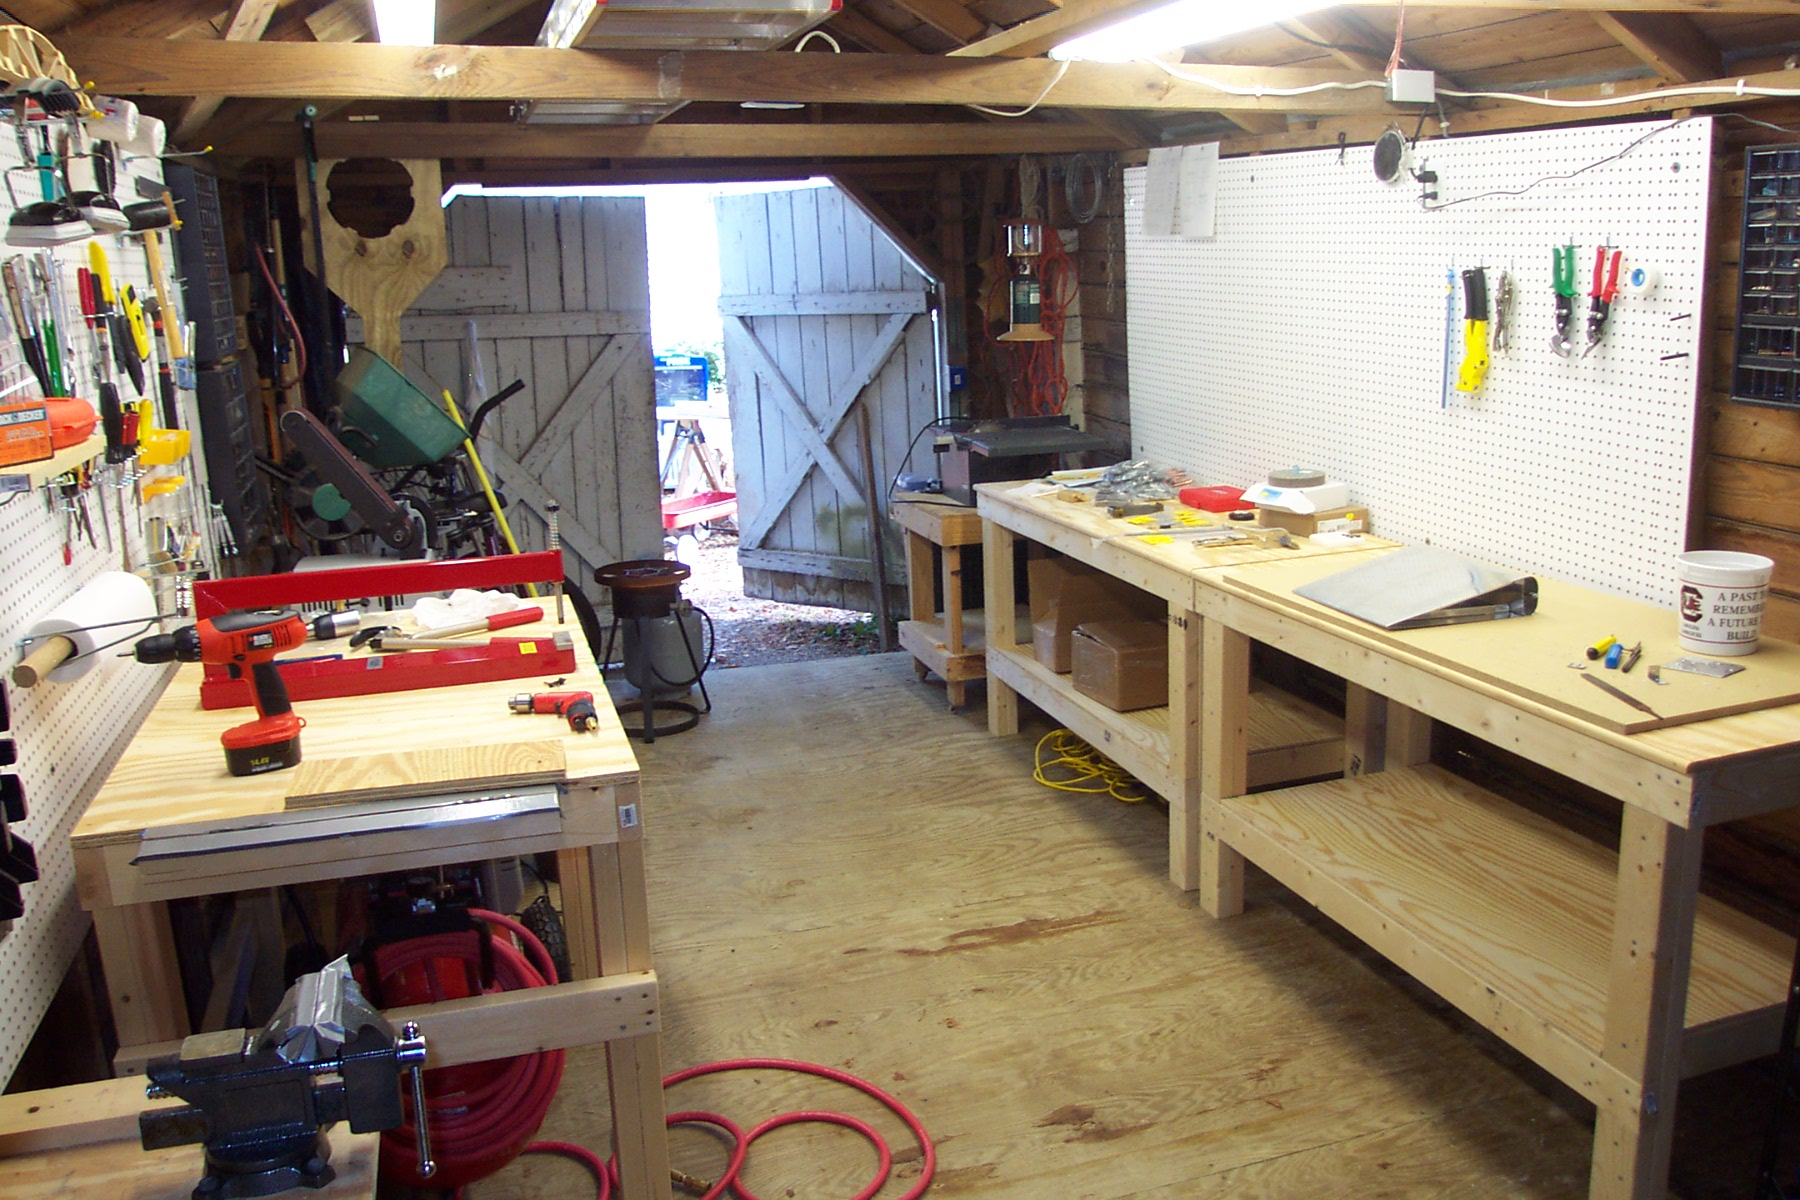
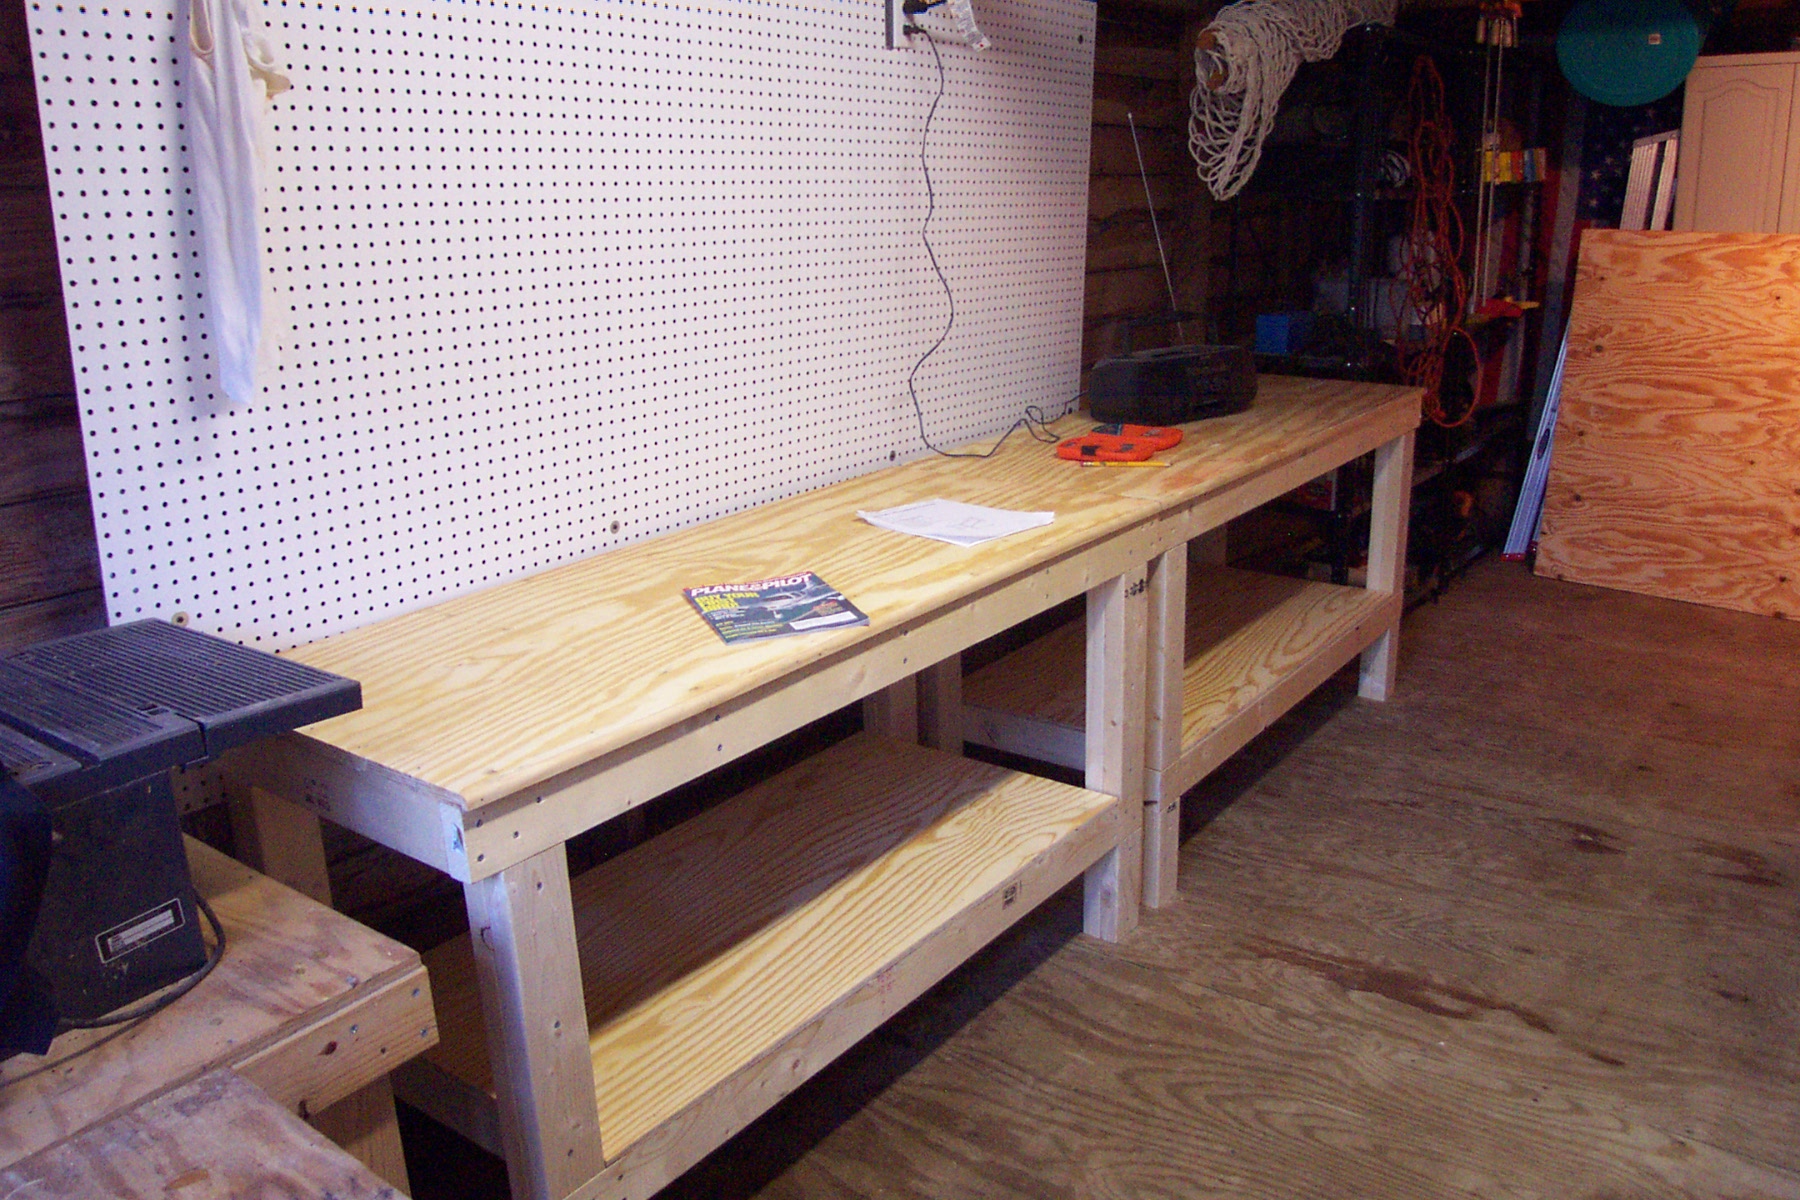
January 16, 2003 - Constructed two EAA1000 tables and another 2.5x4 table that fits nicely over my new air compressor. This works out nicely to save floor space in my very small shop. I added some peg board panels for hanging tools - actually helps brighten up the place.
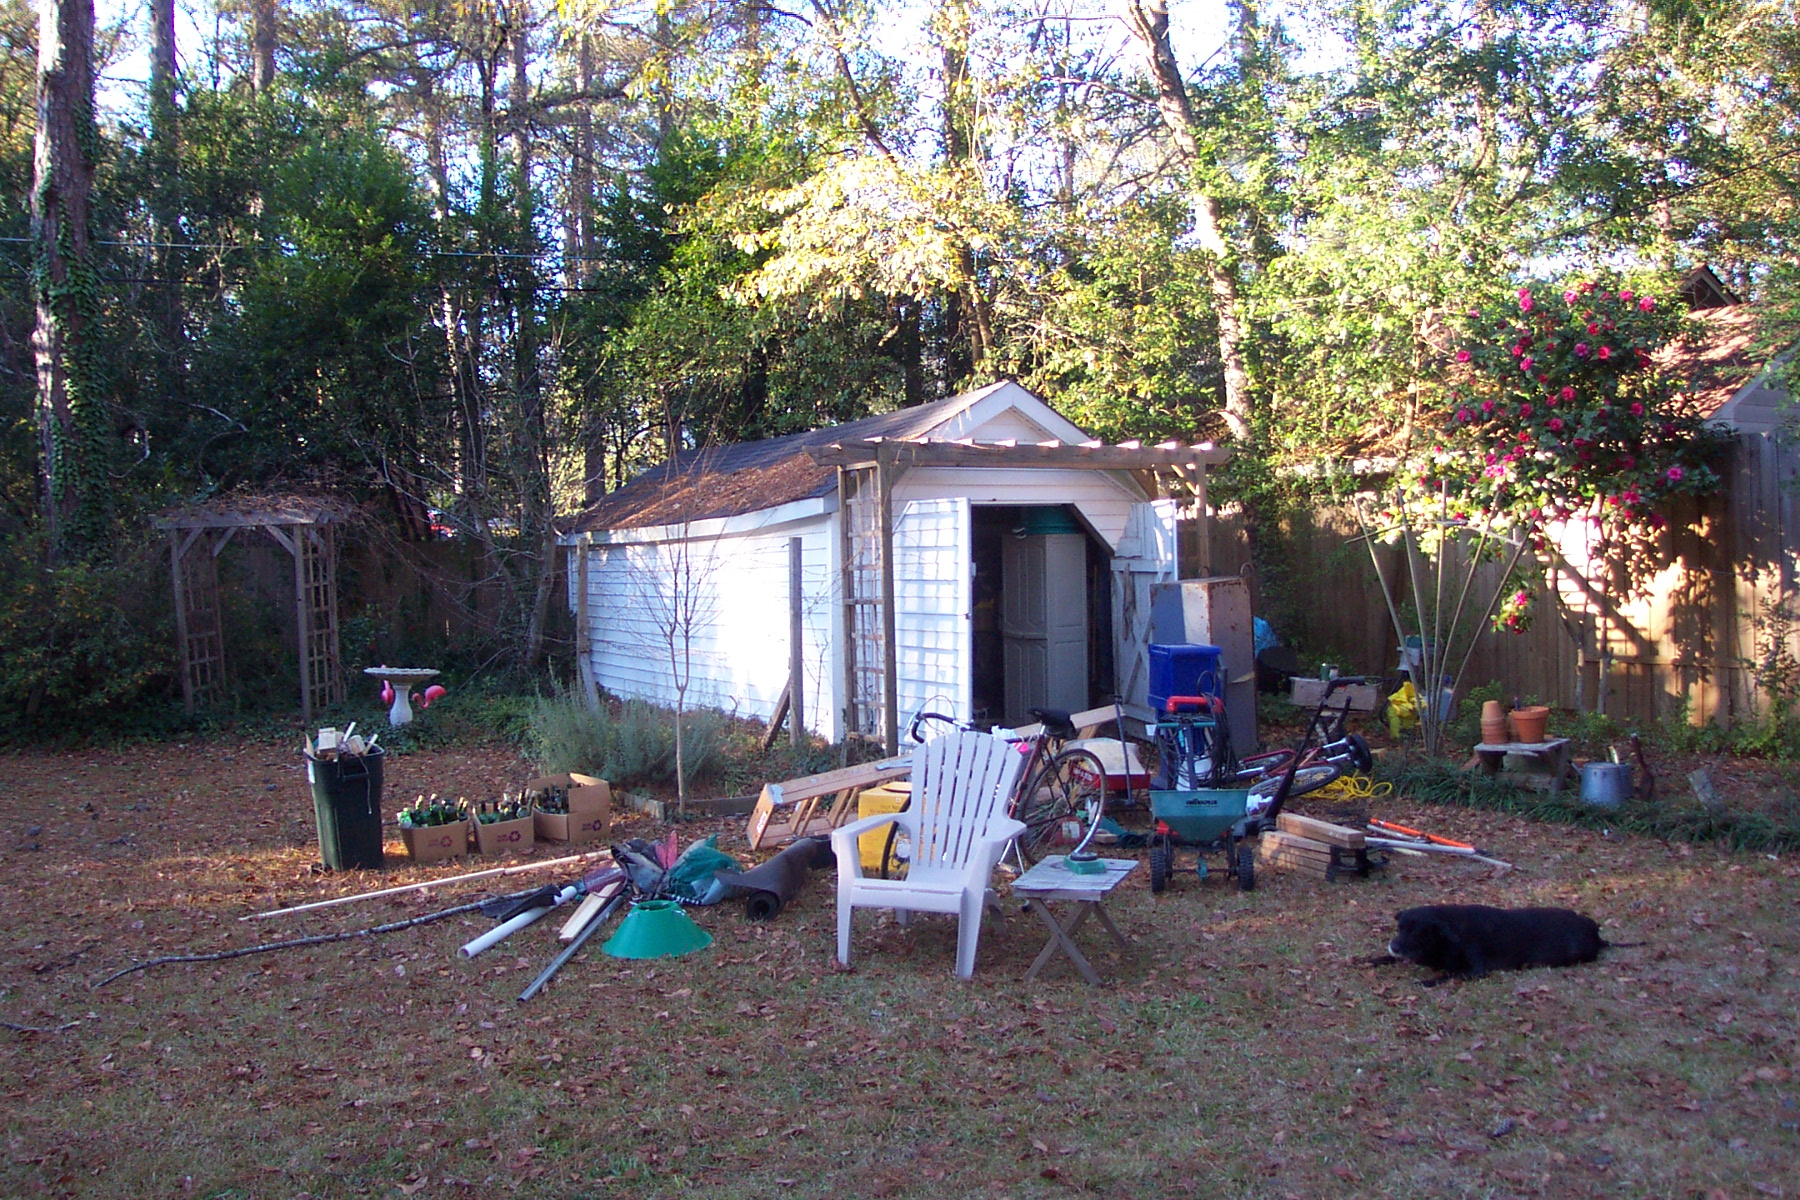
January 4, 2003 - I began to prepare my workshop for building an RV-9A by cleaning out the mess. Here you can see half the junk I took out of my 10 x 22 shed. That is my old dog "Bernie" on the right, lying in the grass. He is not certain what we're getting into here.
