|
|
|
|
|
|
Official building time: 2224.3 hours.
|
|
|
|
|
|
|
|
7 most recent log entries:
|
|
2022-11-07 |
Hours: 0 |
Category:
Electrical
|
|
Manual Ref:
|
ID#:
1198
|
|
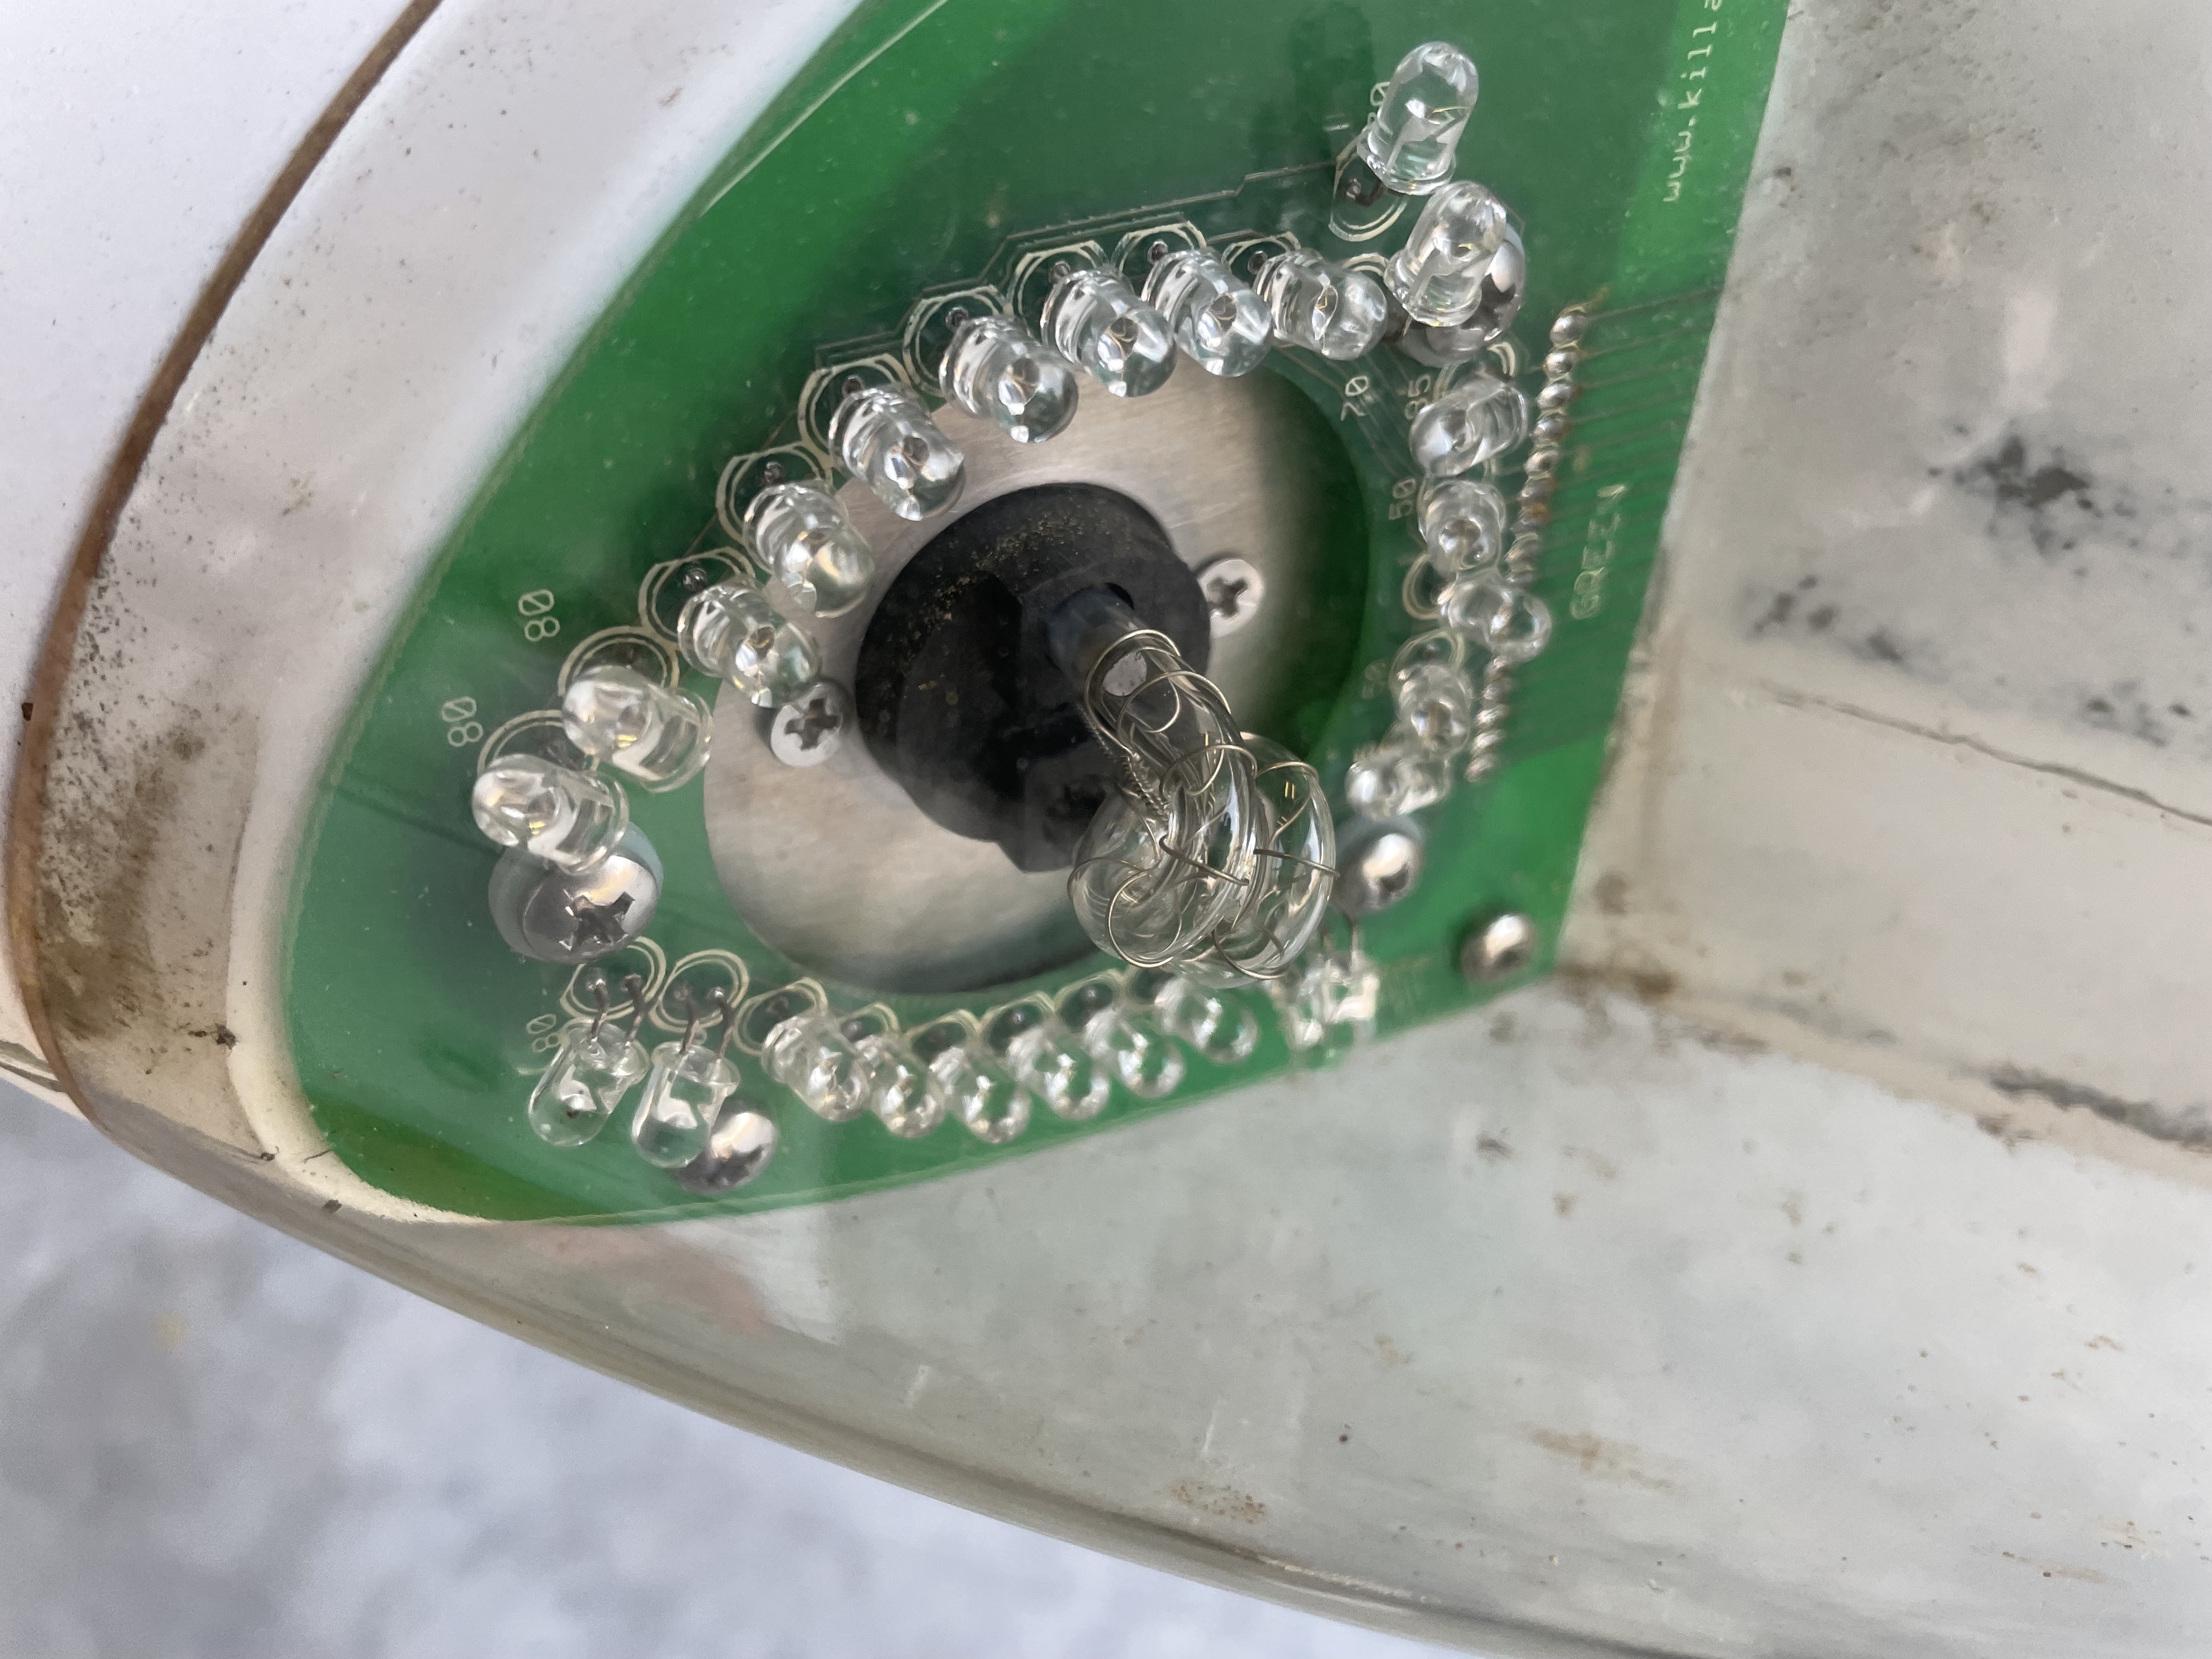
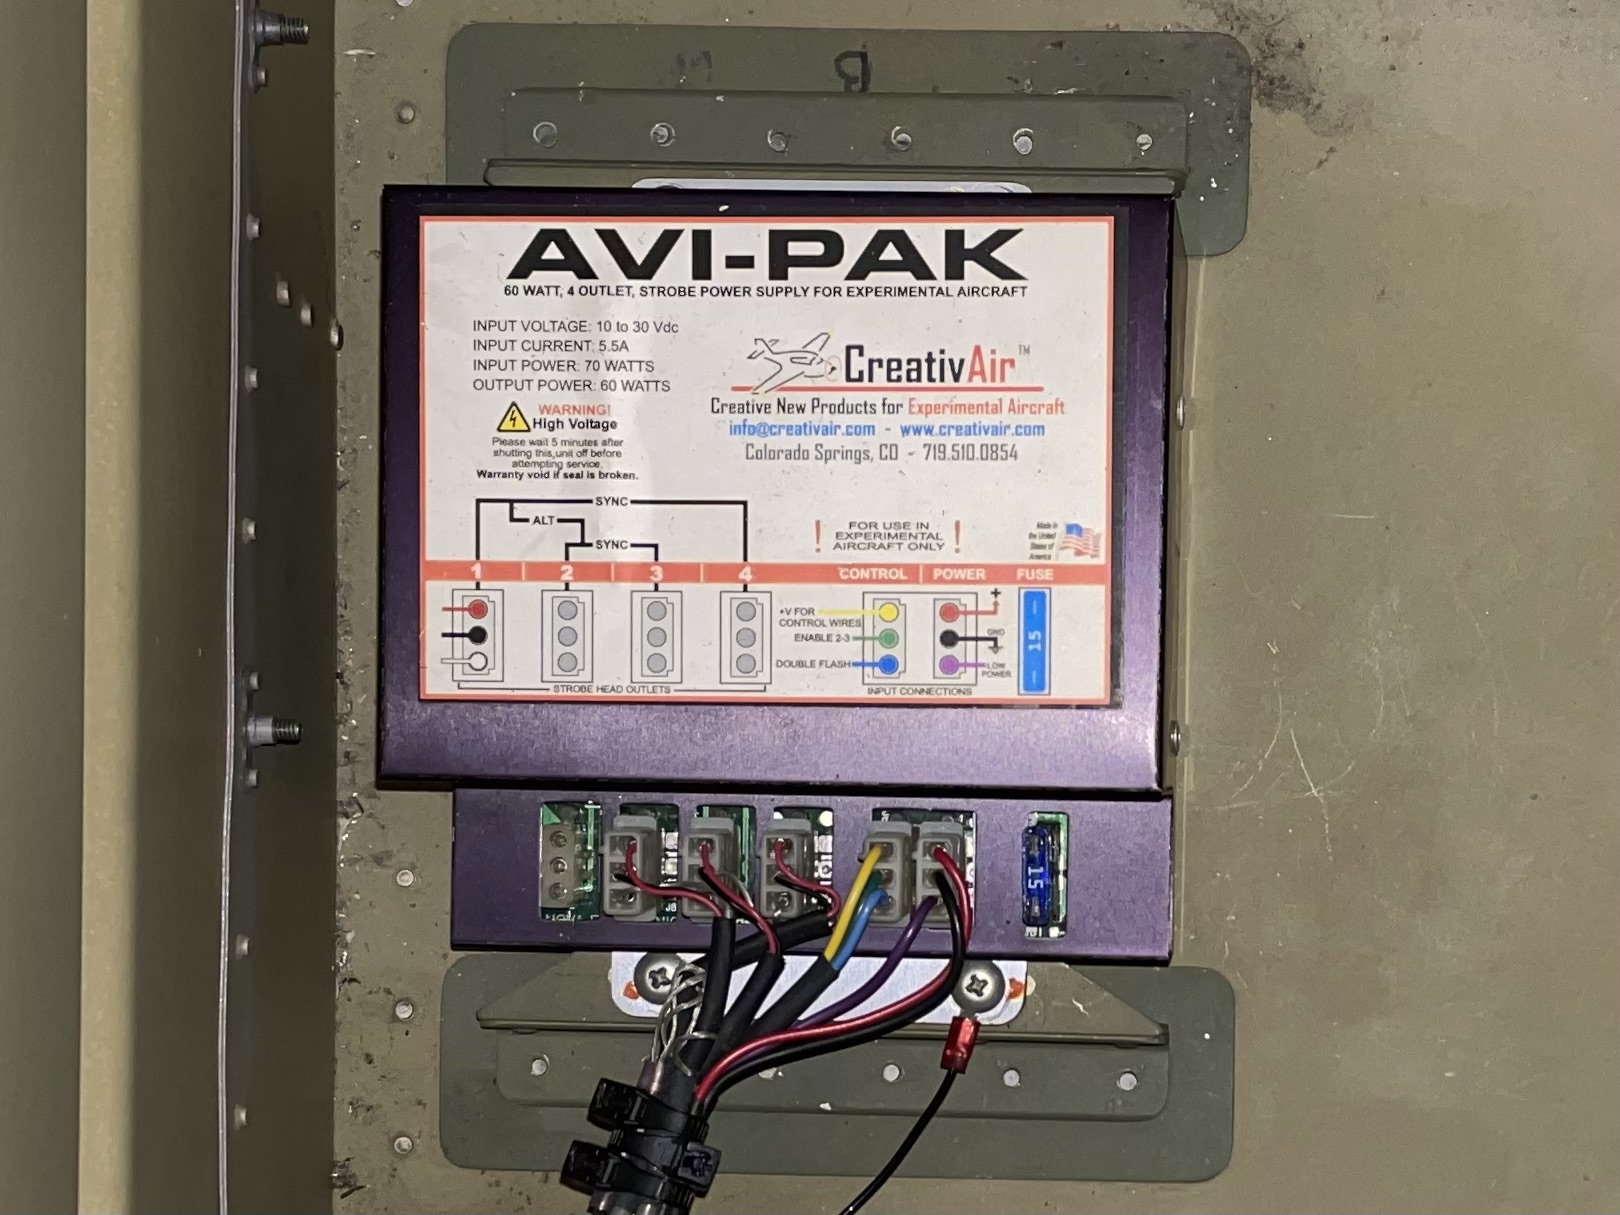
Replaced faulty wing strobe light |
|
Spent a few hours trying to figure out why my right wing strobe light was flashing intermittently. It would only flash once and every several seconds with no apparent pattern. It should have double-flashed in synch with the left wing. I switch wires on the power pack and got the same behavior. Then I switched the left and right bulbs. That revealed the bulb was the culprit. Scoured the internet to find a replacement. I purchased my LED navigation and strobe light kit many years ago from CreativAir and apparently they no longer are in business. After identifying the bulb as a Nova Hide-A-Flash (HAFC ) clear bulb with Amp connecter, I found several sources with prices all over the place. Stumbled on to Strobes-n-more's website located adjacent to an airport in Rhode Island. They had the lowest price I could find. Around $31 with shipping. Installed the new bulb and everything works great!
|
|
|
2014-07-05 |
Hours: 4 |
Category:
Electrical
|
|
Manual Ref:
|
ID#:
1197
|
|
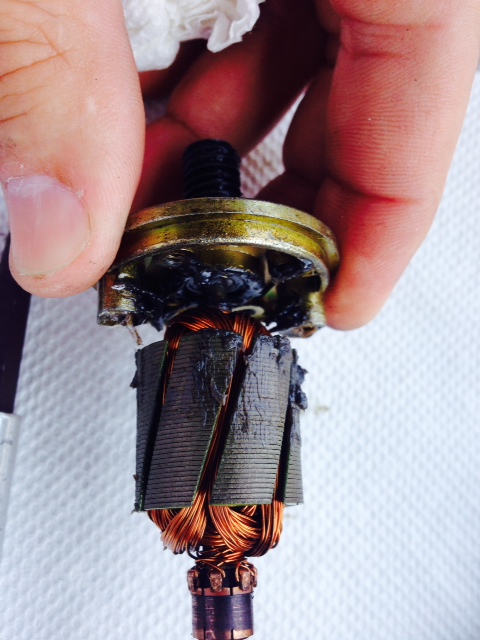
Had to degrease my flap motor |
|
After 89 tach hours, my flap motor succumbed to the well documented grease problem that has plagued many RV'ers. At least, I expect that is the problem. Ironically, I had just signed off on the annual condition inspection. I cannot image that is anything but coincidence. I was on the ground thankfully when I discovered the issue. I was retracting my flaps while and there was no response when I pushed the switch up (or down). The next day, I tried again and the flaps went up but when I tried to put them down, the switch did nothing. I put a little pressure on one of the flaps as I pushed the switch down and the flaps extended. And went back up when I tried to retracted them. The next day, they worked without a problem. I tried them several different times that day and they worked fine. Geez! I decided not to ignore the problem and did some research on VansAirforce.net and found the Vans SB regarding the flaky flap issue. I removed the flap from the airplane and disassembled. I found a lot of grease in the motor. It had worked half way through the housing but had not yet gotten to the brushes. I cleaned it up nicely, reassembled and reinstalled. It seems to work fine. We shall see. The hex tool required is a 7/64th. I used laquer thinner sparingly and some q-tips to clean out the grease. I used strands of wire to hold the brushes back while reinstalling the brush horseshoe back onto the armature. Here is the link to Vans SB about the Flaky Flap Motor. Google Pittman 9234S004-R1 Lo-Cog 12VDC motor to find the motor and data sheet.
|
|
|
2014-04-14 |
Hours: 2 |
Category:
Firewall Forward
|
|
Manual Ref:
|
ID#:
1196
|
|
Added air dam to number one cylinder |
|
I had removed the previously riveted air dams from in front of numbers one and two cylinders as they were causing high temps. Number one is coolest by about 20 degrees so I recently added some foil tape and tested. The final amount added resulted in cylinder one matching two and three, with number four now coolest by about six degrees. I made an air dam out of some .040 and attached it to the baffling using three of the rivets holes that existed in the horizontal flange that supports the ramp. I will have to fly again to see if this air dam has the same effect as the foil of the same profile.
|
|
|
2014-01-18 |
Hours: 5 |
Category:
Finish
|
|
Manual Ref:
|
ID#:
1195
|
|
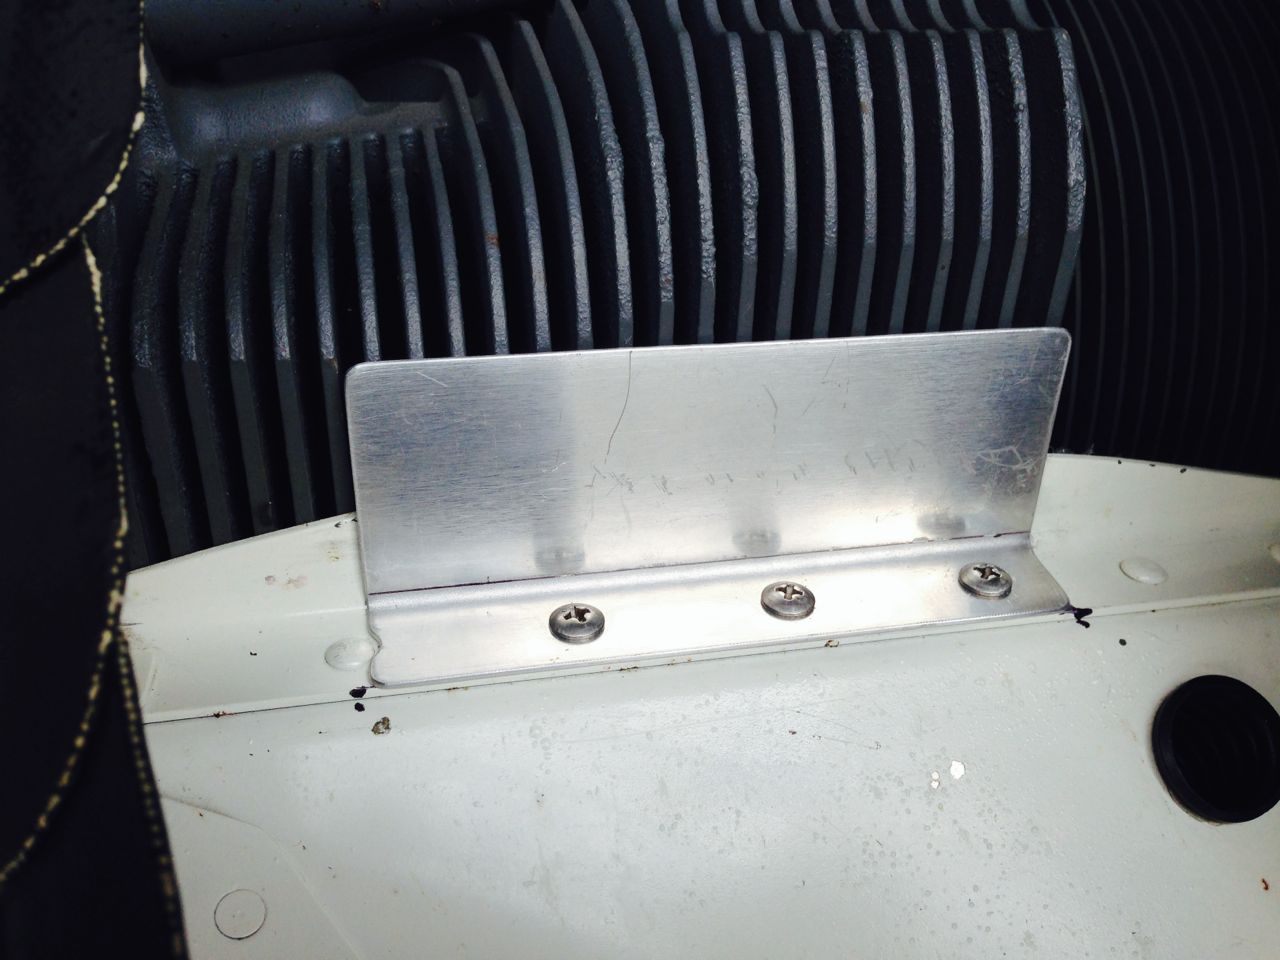
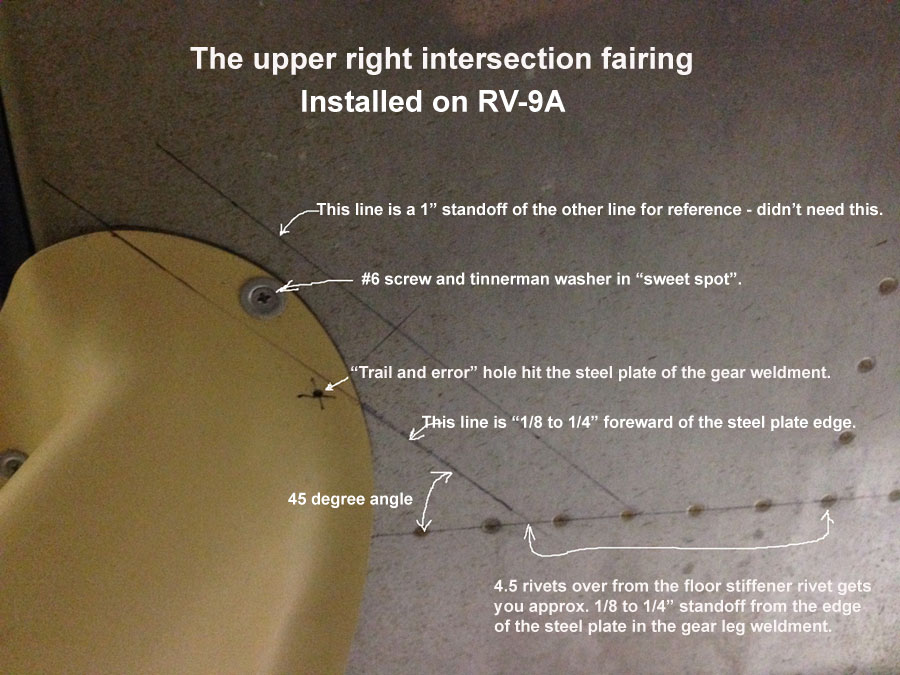
Installed upper and lower main gear intersection fairings |
|
Installed the RVBits upper and lower main gear intersection fairings. The lower ones were easy to locate and drill. The upper one fit nicely but finding places to drill for screws is limited. I used trail and error to find the hole under the foreward bottom skin. Missed by just 1/8" on my first try drilling and hit the steel plate that is on the gear leg weldment. Then figured a way to calculate and draw a line on the bottom skin that was approx. 1/4" forward of the edge of the steel plate on the gear leg weldment. It is a line four and a half rivets outboard of the floor stiffener rivet along the span wise row of rivets in the bottom skin and foreword center section flange. I drew a line 45 degrees off that line and this approximates a line about 1/4" forward and parallel to the fore edge of the steel plate on the gear leg weldment. With the intersection fairing held in place, the "sweet spot" for drilling is apparent. The other two screws were, one in the wing root fairing and one aft of the center section under the outboard seat bay. Had to use a rivnut there. I used #6 screws with tinnerman washers for my intersection fairings.
|
|
|
2014-01-13 |
Hours: 4 |
Category:
Journal
|
|
Manual Ref:
|
ID#:
1194
|
|
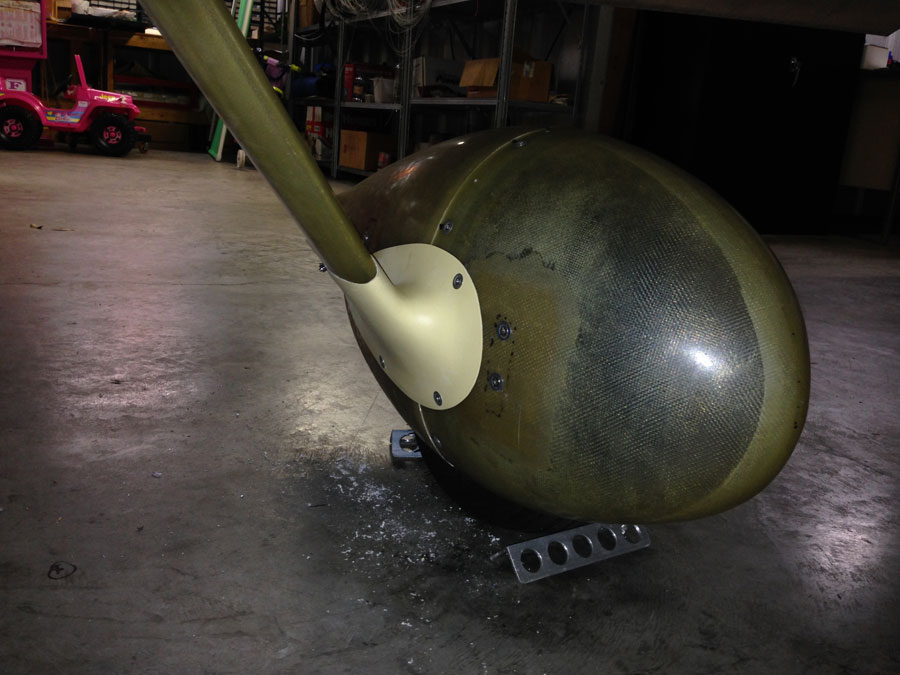
Back to work on the wheel pants |
|
First, thanks a bunch Scott for volunteering your afternoon to help me get started on my main wheel pants. I have put this off long enough. We got the wheel pants lined up and clecoed. That was the hard part. Long afternoon!
|
|
|
2013-08-16 |
Hours: 0 |
Category:
Journal
|
|
Manual Ref:
|
ID#:
1192
|
|
RivetSizer iPhone App is finally a reality! |
|
I finally got my RivetSizer iPhone app up and running. I was approved and went live on the App Store a couple of days ago. It calculates the rivet length as the user inputs metal thicknesses. You can choose which rivet diameter you need too. It is meant for metal airplane builders so RV builders may enjoy it. It is meant to be quick, and I think I have accomplished this. It was a bucket list item to actually learn how to program an iPhone app. Visit the app store and search rivet sizer. Or click this link: RivetSizer on the app store. or visit the blog I set up for it at RivetSizer.com.
|
|
|
2013-04-01 |
Hours: 0 |
Category:
Journal
|
|
Manual Ref:
|
ID#:
1193
|
|
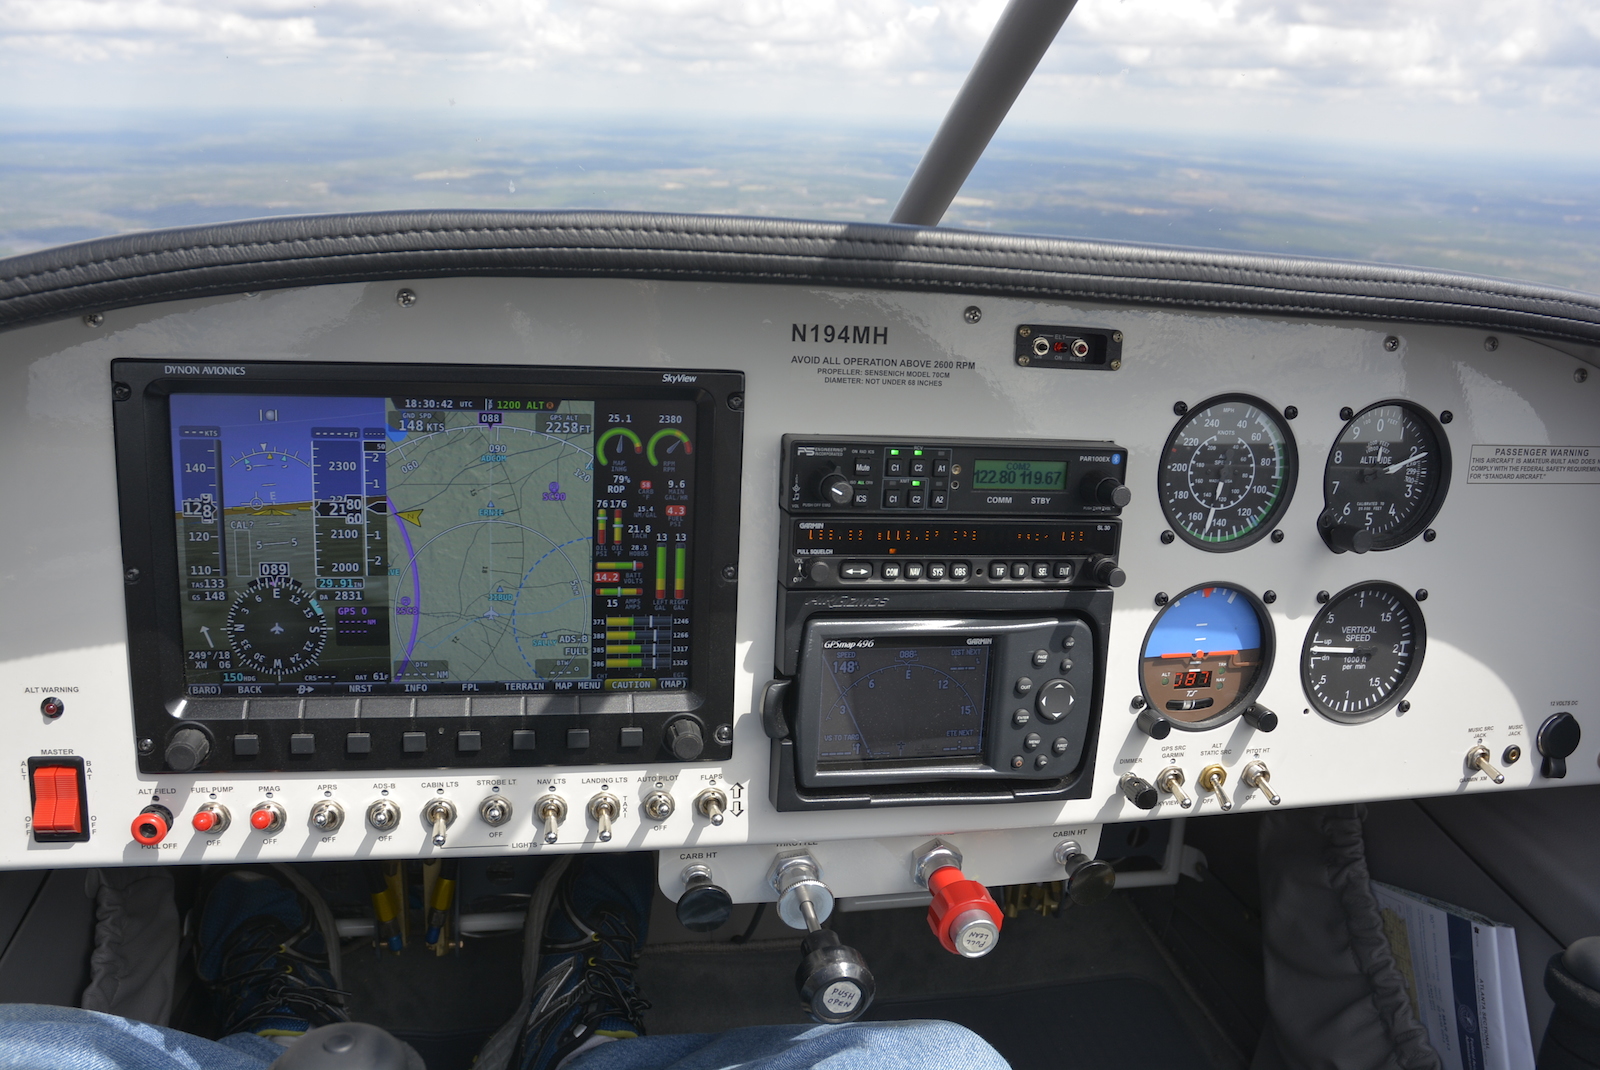
I never uploaded a photo of my finished and flying panel, so here it is!
|
|
|
|
16 Long, Long, Long Years Ago Today: |
|
2010-07-09 |
Hours: 4 |
Category:
Firewall Forward
|
|
Manual Ref:
|
ID#:
1069
|
|
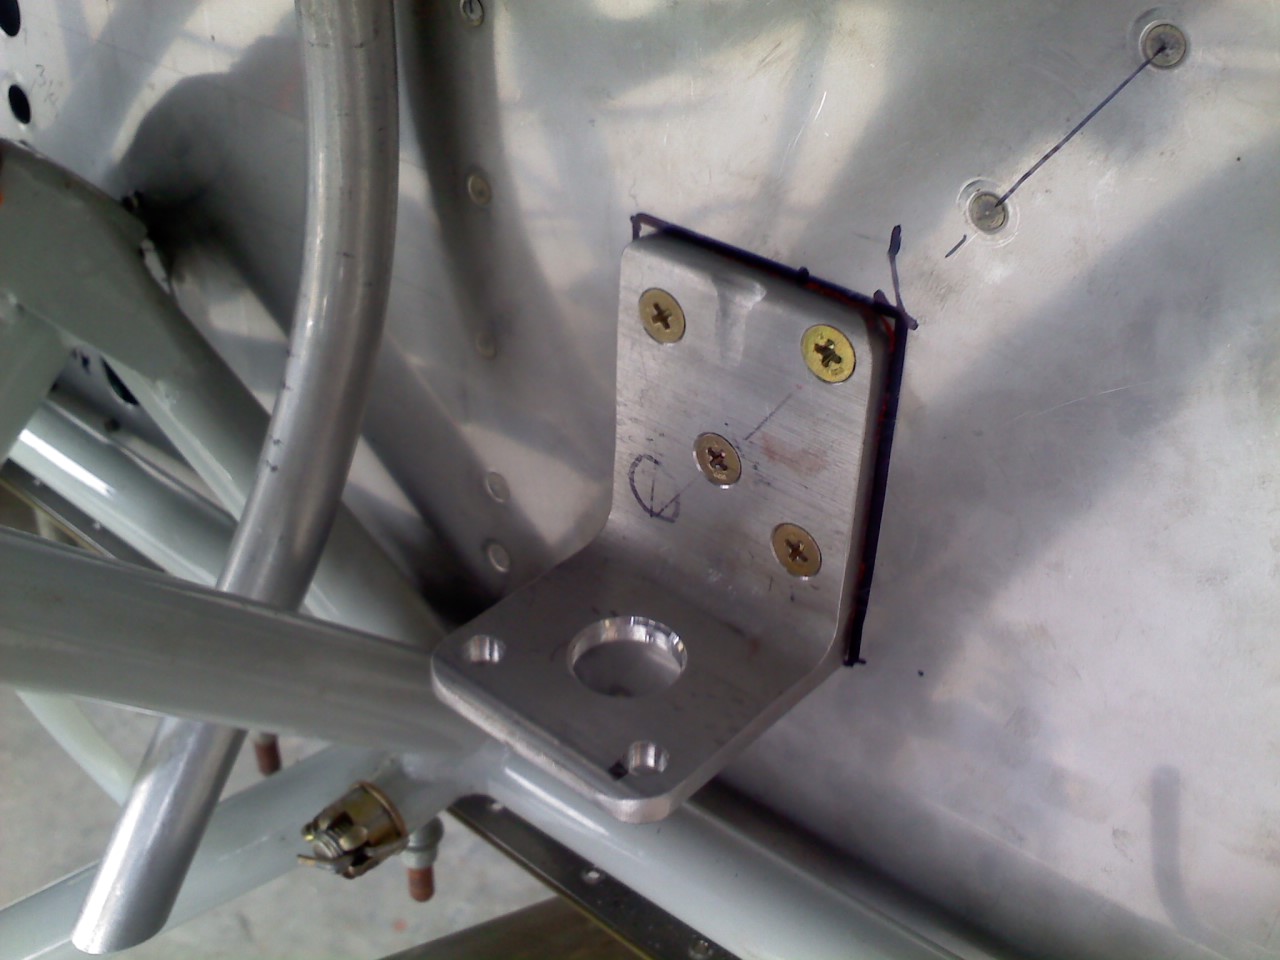
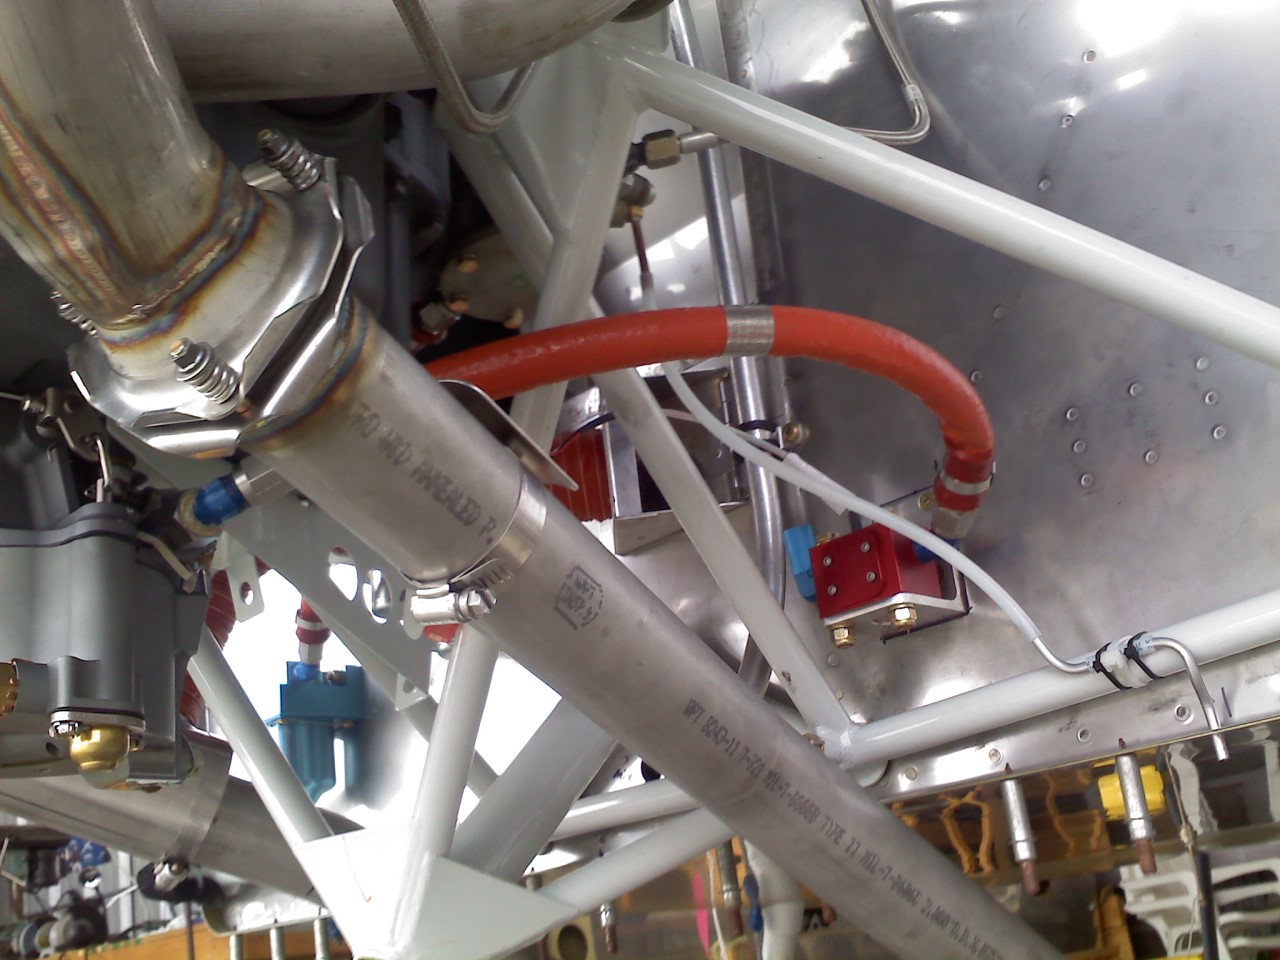
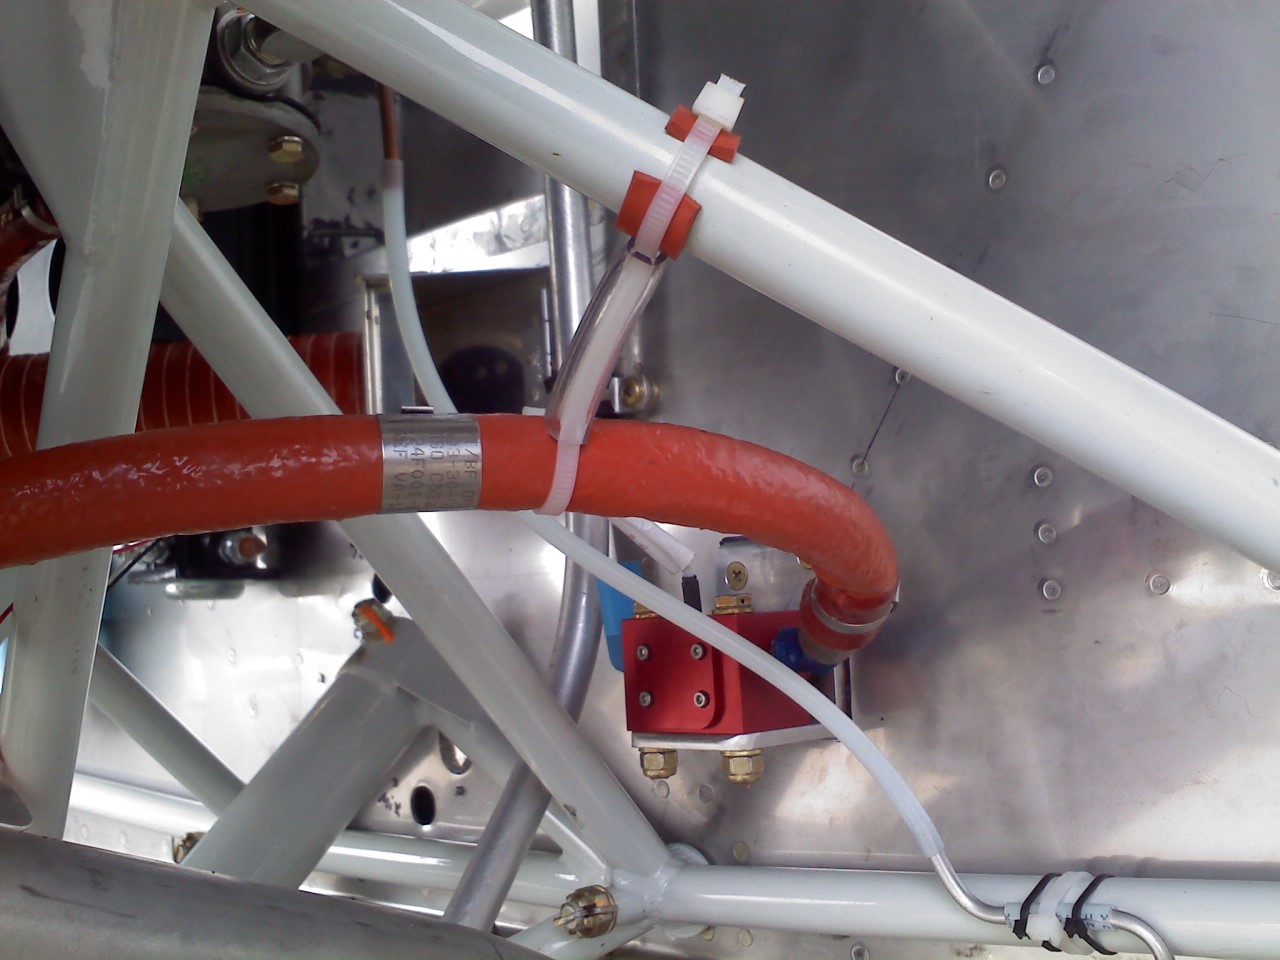
More firewall forward stuff |
|
Got the Red Cube fuel flow transducer mounting bracket finalized and mounted on the firewall. I chose to stay with the thicker 3/16" angle since I already had it fitted. I added two more bolts to the firewall so that the bracket flange would be tight up against the firewall. With only the two bolts through the diagonal firewall stiffener, there was a gap in the corners of the bracket and the firewall that I was concerned might collect gunk or debris over time behind the angle bracket. Also drilled a lightening hole in the horizontal flange that the Red Cube sits on. I have AN363 stop nuts on order to use in place of the nylock nuts that are shown in the pictures.
|
|
|
| 22 Long, Long, Long Years Ago Today: |
|
2004-07-09 |
Hours: 4 |
Category:
Wing
|
|
Manual Ref:
7-14
|
ID#:
233
|
|
Primed most of the flap parts |
|
Spent this afternoon priming as many parts as my remaining primer would allow. Got all the left flap parts primed and the skins and spar of the right flap. Time for the expensive primer purchase again. Ugh!
|
|
|
|
|
|
